Recently bought the new Sony a7C, a7III, a7RIV, or a7SIII camera for your next trip and wondering what the best settings are that you should know before embarking on the journey? We've got your back!
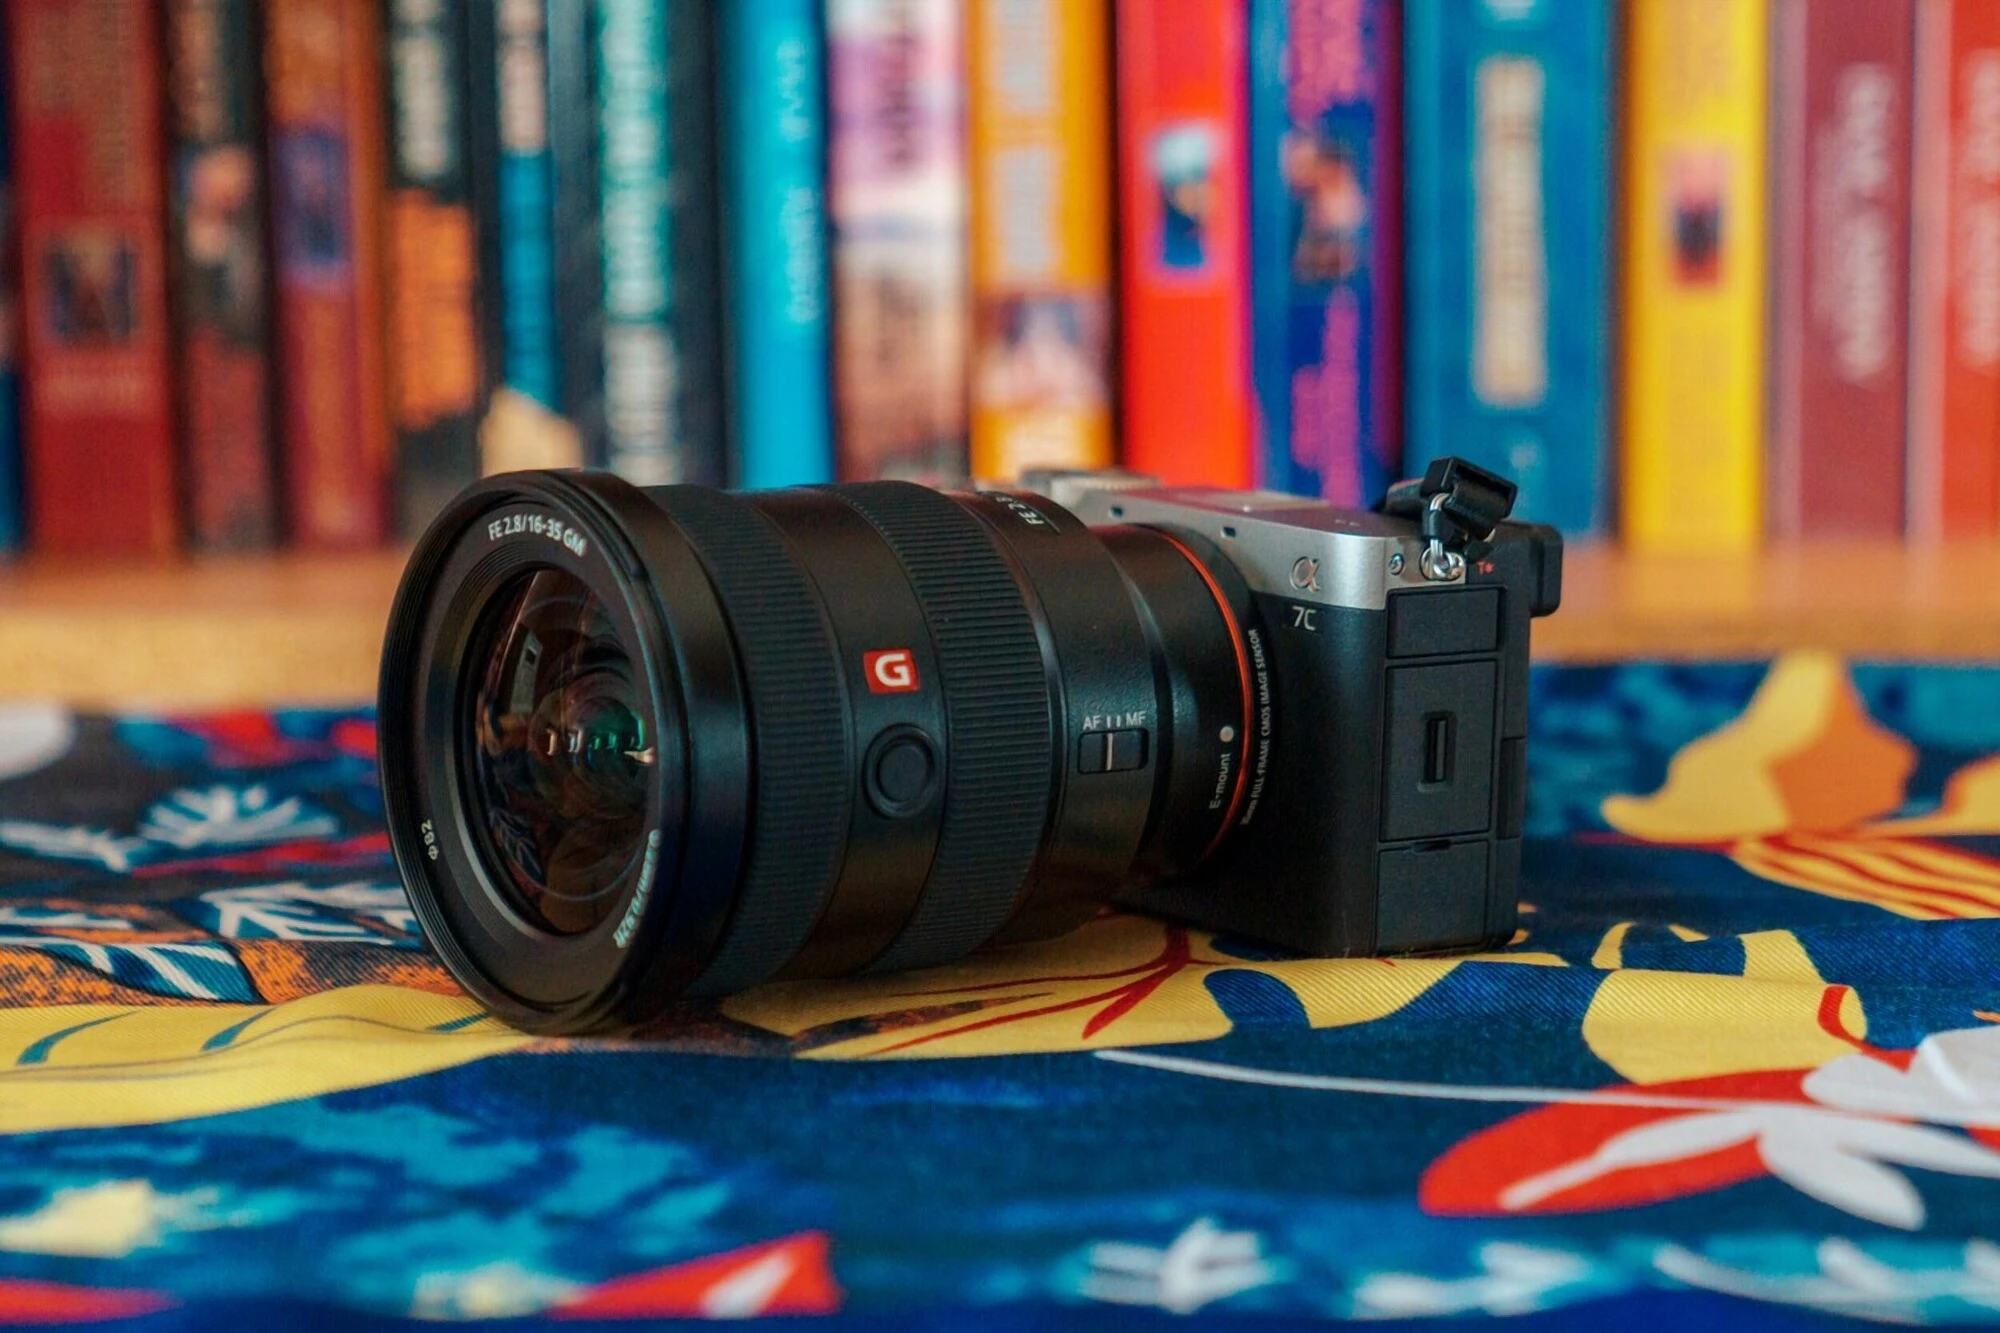
I recently bought myself a little gift this year to help up my travel photography game – a new compact-sized full-frame camera, the Sony a7C. I have been playing around with all the settings and went on a buying spree for accessories to help prepare for my next adventure.
After weeks of experimenting and trying to come up with the most efficient settings that work with a run-and-gun style of shooting, which I like to do when traveling, I have decided to compile all the best tips and tricks I discovered for the Sony a7C cameras. These tips and tricks also apply to other newer Sony cameras such as the Sony a7RIV, a7SIII, and even the old but popular a7III camera.
Without further ado, here are the 15 best tips and tricks for your new Sony full-frame cameras, including all the best settings to use for travel, as well as accessories to make your life a little easier. Let's first take a look at the best settings to use for your new Sony cameras.

15 Best Settings to Know for the Sony a7C, a7III cameras, and More
1. Turn Off Audio Signal
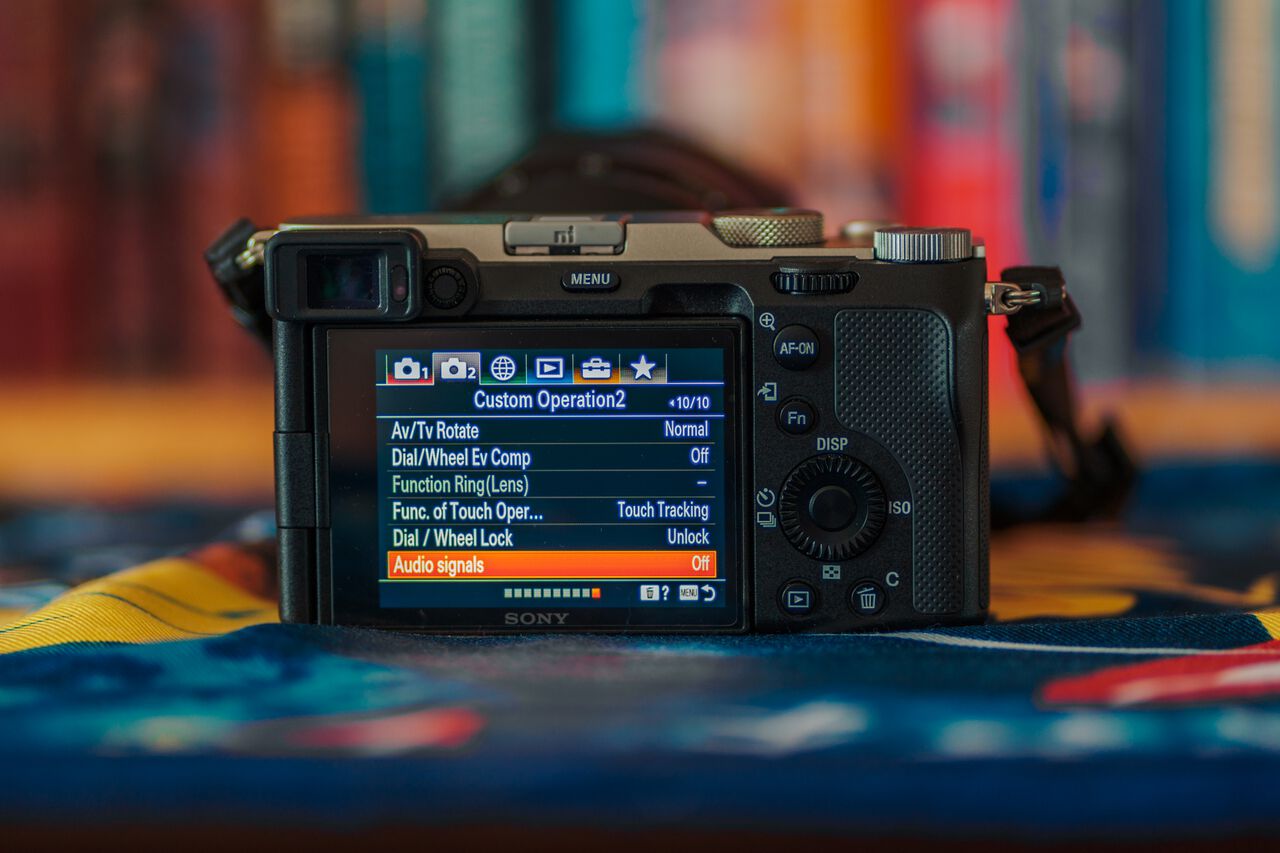
One of the first settings I often toggle off when I get a new camera is the Audio Signal to get rid of that annoying sound effect when you start recording a video.
By turning it off, it will allow you to be a little more discreet when you are recording videos while you travel, without startling your subjects. This is also great for when you are recording videos within the premises of a religious site, such as a temple or a church.
To turn off the audio signal on your camera, simply hit the menu button at the back of your camera, go to the custom operation 2 panel under Camera 2 tab on page 10, and toggle the Audio Signal off. That's it! You can be as stealthy and less disruptive as you like when you travel.

2. Set Auto Min SS to Prevent Blurry Photos
One of the best settings I only recently discovered in a Sony mirrorless camera is the "Set Auto Min SS" setting, which will allow you to set a minimum shutter speed the camera will go down to, preventing you from taking blurry photos in poor lighting conditions.
You see, when your Sony camera is set to automatic mode or the Aperture priority mode, the camera will try to balance the shutter speed and ISO settings according to the environment you are in.
If you are in a dark alley with poor lighting and are looking to take a photo of a moving subject, like a person walking or biking, the shutter speed may go below an acceptable value, and you may find your subject blurry when you snap the photo.
Having a low shutter speed will also require you to hold your camera extremely still since even a little bit of camera shake, such as when you press a shutter button, will cause the photos to be blurry, rendering them unusable.
By defining the Auto Min SS setting on your camera, you prevent the camera's shutter speed from going below a value where subject movement or unintentional camera shake would cause the image to be blurry.
This will help you greatly for travel and street photography, where you are not in a controlled environment and do not have a lot of time to fiddle with your settings when taking photos.

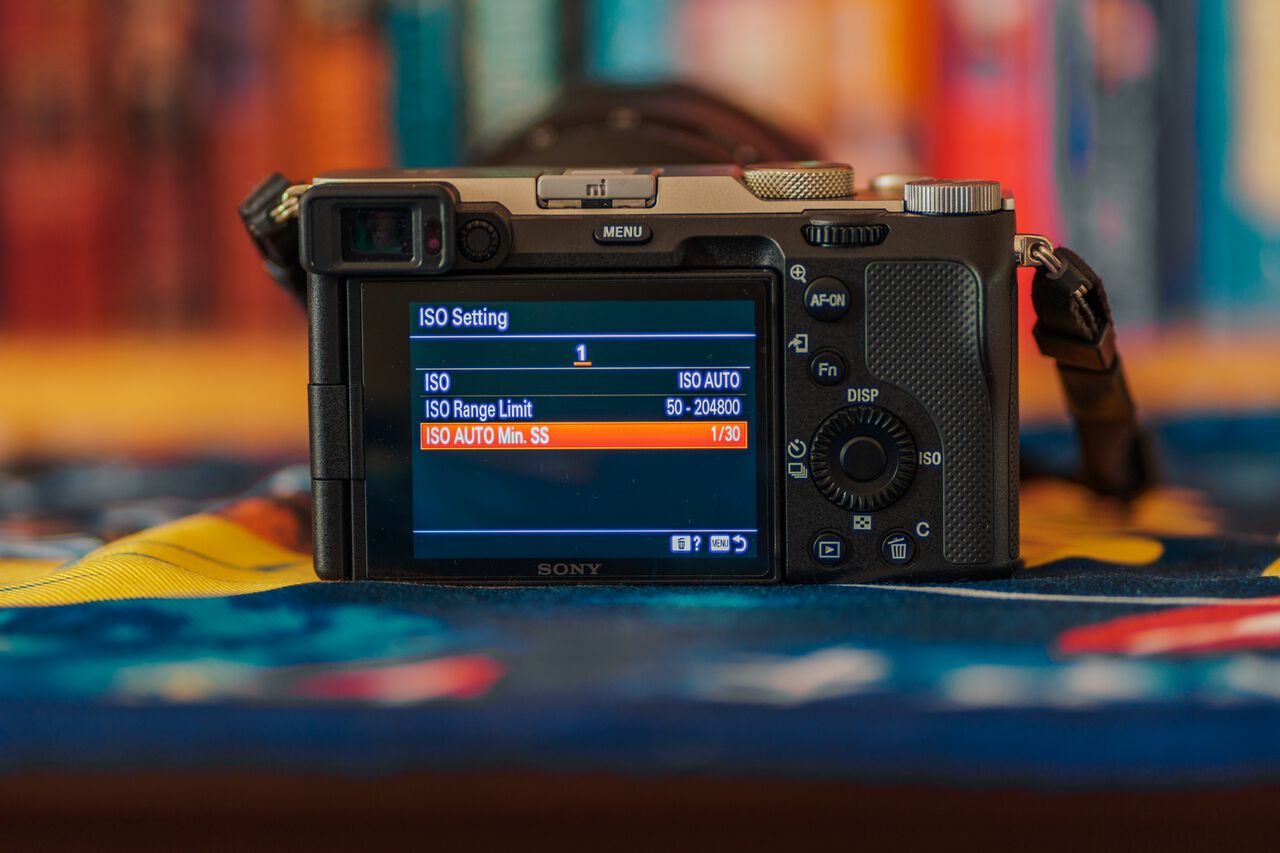
To set the Auto Min SS, you have to press the menu button at the back of the camera, go to the Exposure 1 panel (under Camera 1 tab, page 8/14), access the ISO Settings, and click on the ISO Auto Min SS.

Once you've clicked the ISO Auto Min SS, a panel will show on the left where you can then scroll down to find the minimum ISO value you want to limit your camera to, and that is it.
My recommended minimum shutter speed, which is also what I have set for my camera, is 1/30. This speed should be fast enough to prevent camera shakes, keep slow-moving subjects sharp, and low enough for the ISO not to be too high and introduce unnecessary noise. These are the settings we will be discussing next.
3. Set Max ISO to Reduce Noise in Photos
ISO is a setting used to help you capture photos in poor lighting conditions. It helps bring out the detail in the darkest corners of the world and allows you to see what your eyes cannot see. The higher the ISO, the better your camera sees in the dark.

That said, the photos taken at a high ISO will also contain more noise, which may not be ideal if you want your images to be tack sharp and without any artifacts. Basically, the lower the ISO, the sharper and darker the image is. The higher the ISO, the brighter and noisier the image is.
As mentioned earlier, in Automatic mode, your Sony camera will attempt to balance the shutter speed and ISO setting to assist you in capturing photos in low-light conditions. However, at times, the ISO may become excessively high, resulting in a noisy and unusable image.
Enter Max ISO setting, a setting where you can set the maximum ISO that your Sony camera can go up to before it uses the shutter speed to brighten up your pictures instead.
The maximum ISO setting can be set even when you are in ISO auto mode, which is great for travel photography as all you have to do is set it, and you can just forget about it.
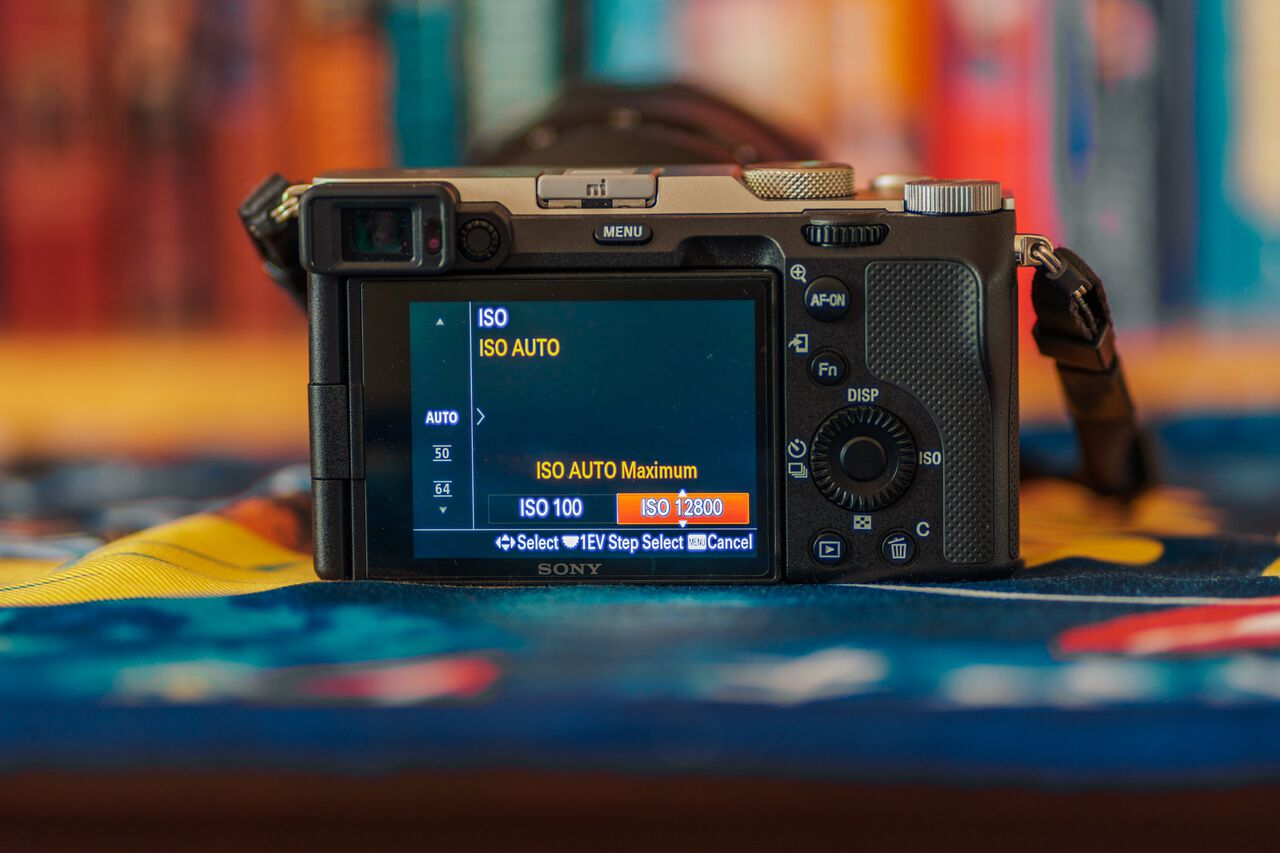
To set the maximum ISO settings for your Sony Camera, you will have to go into the Menu and navigate to the Exposure 1 panel (under Camera 1 tab, page 8/14). Then, access the ISO Settings and click on the ISO.
Once you click the ISO setting, a panel will appear on the left. Make sure that it is currently highlighting the AUTO option, and then press the right button. You should then be able to set the minimum and maximum ISO settings that the camera will be bound to.
Depending on the type of photography you do, the maximum ISO settings will vary. I have mine set to 12800 ISO maximum as I find the noise level to be acceptable.
Some people go even lower to around a maximum of 6400 ISO, which will surely produce sharper images, but you will also reduce your ability to shoot in poor lighting conditions.
One thing to know is that the ISO maximum setting will supersede the previously mentioned Auto Min SS setting. Basically, once the ISO setting reaches the maximum level you have set, the camera will override your Auto Min SS setting and slow down the shutter speed to help you see in the dark. However, the camera will only override it when it is absolutely necessary.
4. Utilize Memory Recalls Videos
Most Sony cameras come with a memory recall function that will allow you to memorize camera settings and assign them to 1 - 3 memory dial modes. You can quickly switch to these modes on your main camera function dial, located at the top of the camera.
These memory recall buttons are extremely useful for travel photography and filmmaking, as they will allow you to quickly set your camera to the desired settings with just a flick of your finger. This will help you capture spontaneous moments that you often find yourself in when traveling.
I often set the first memory recall button to shoot regular videos in the highest possible resolution for 4K 25p video, while I have the second memory recall button set to 1080p 100p for when I need a clip I can use for slow motion.
On a newer camera, such as the Sony a7C, you will also have access to the third memory recall button, which I use to memorize all my favorite photography settings. That way, I can quickly switch between all the photo and video settings with fewer than 2 dial clicks.
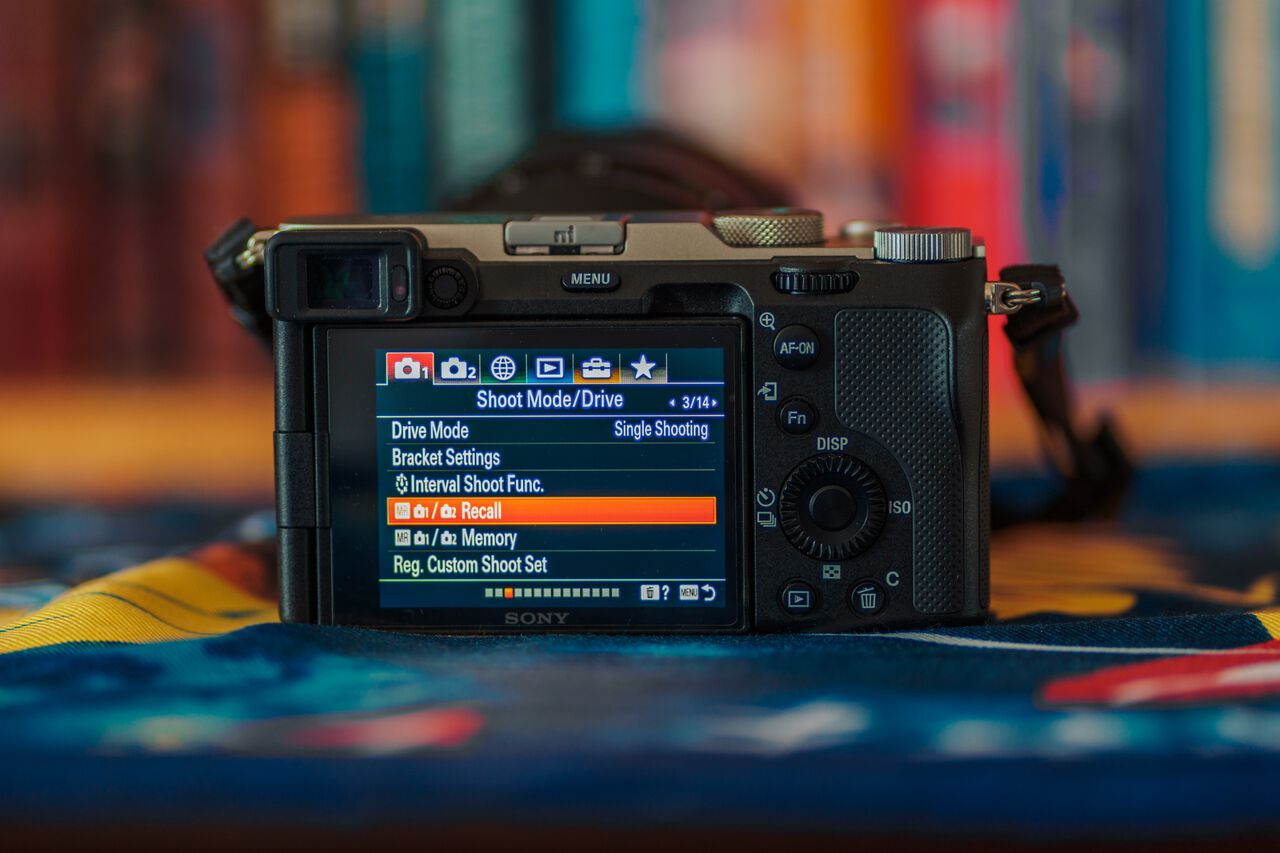
To set a memory recall button, ensure that you are in the camera mode with all the correct settings you want to save. Once that is done, navigate to the menu page on your camera, then proceed to the Shoot Mode/Drive panel under the Camera 1 tab on page 3/14, and click on MR Recall.
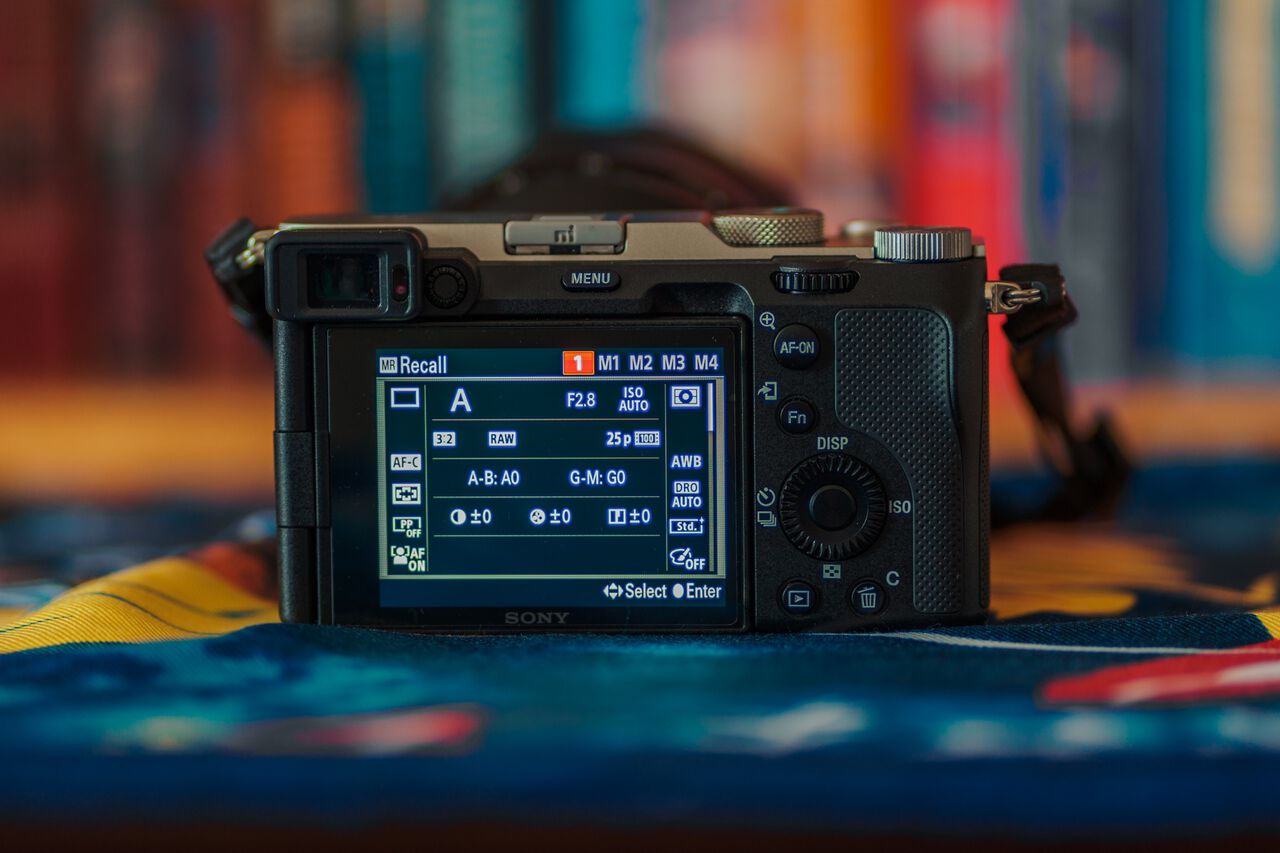
The memory recall page should appear where you can then select whether you want to map these settings onto the 1st, 2nd, or 3rd memory recall button. Once you click it, you should be able to use the memory recall button on your main dial to toggle to all your favorite settings in one go.
5. Don't Use S&Q for Timelapse
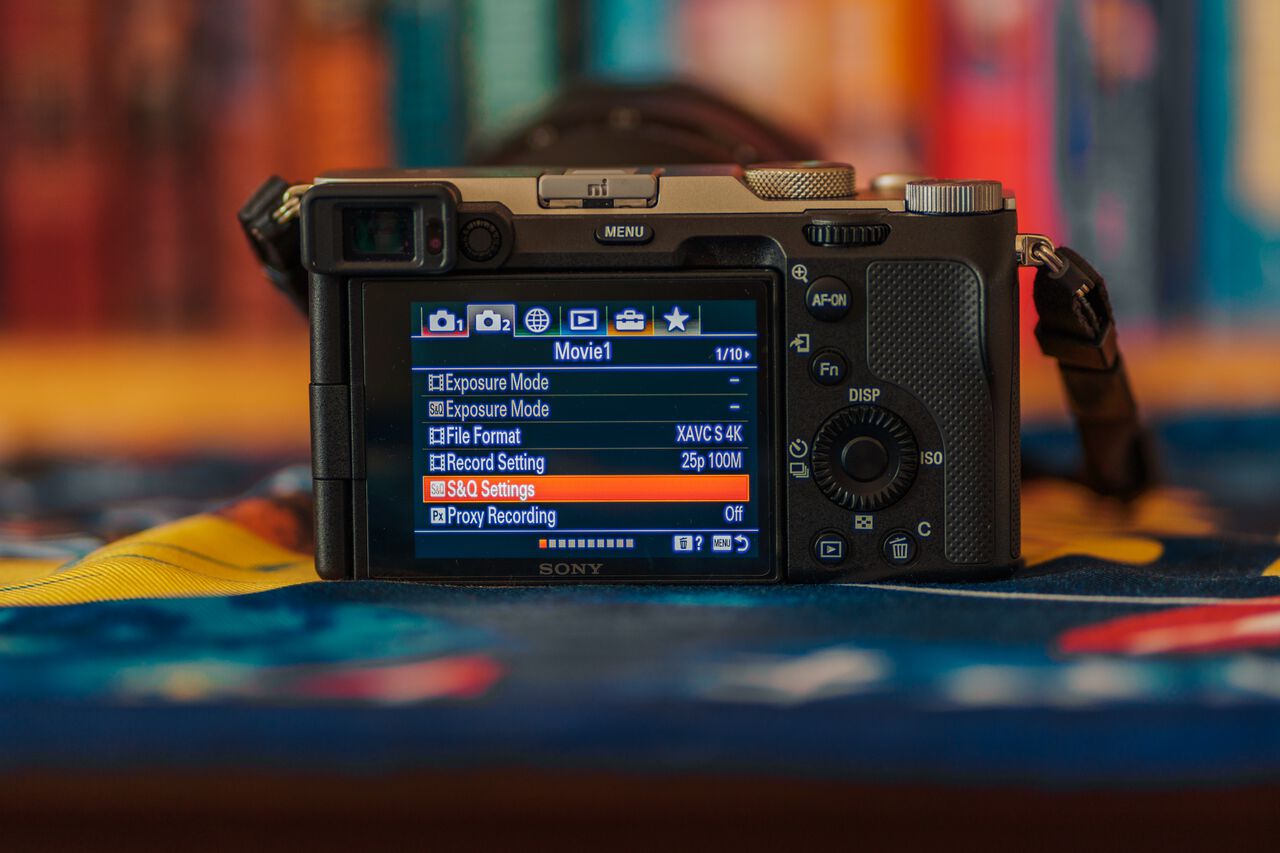
If you are planning to shoot a timelapse video, I do not recommend using the S&Q feature if you want your timelapse to maintain its sharpness. S&Q is a feature that allows Sony cameras to shoot timelapse and slow-motion videos natively straight into the camera without the need for editing software afterward.
With S&Q, you can view the slow-motion and timelapse playback straight from your camera, allowing you to see exactly what you just shot. This may sound great and all, but the downside of doing this in-camera is that the video produced with S&Q is limited to only 60 Mbps.
With such a low bitrate, the video you get will not be as sharp and of high quality as if you were to shoot it with an internal intervalometer (for timelapse) or proper 120p video that you can slow down later on a computer.
And so, if you want to take the highest quality timelapse or slow-motion videos that your camera can offer, stay clear of S&Q and do it the regular way. Edit the videos later on a more powerful machine, like your computer.
If you are wondering what S&Q mode is, you can check out a great video by Mike Smith here: "What is S&Q mode?". He goes into detail about what it is and how you can use it. If you want to learn how to shoot timelapse with an internal intervalometer, you should also check out his timelapse setting video.
6. Utilize My Menu Panel
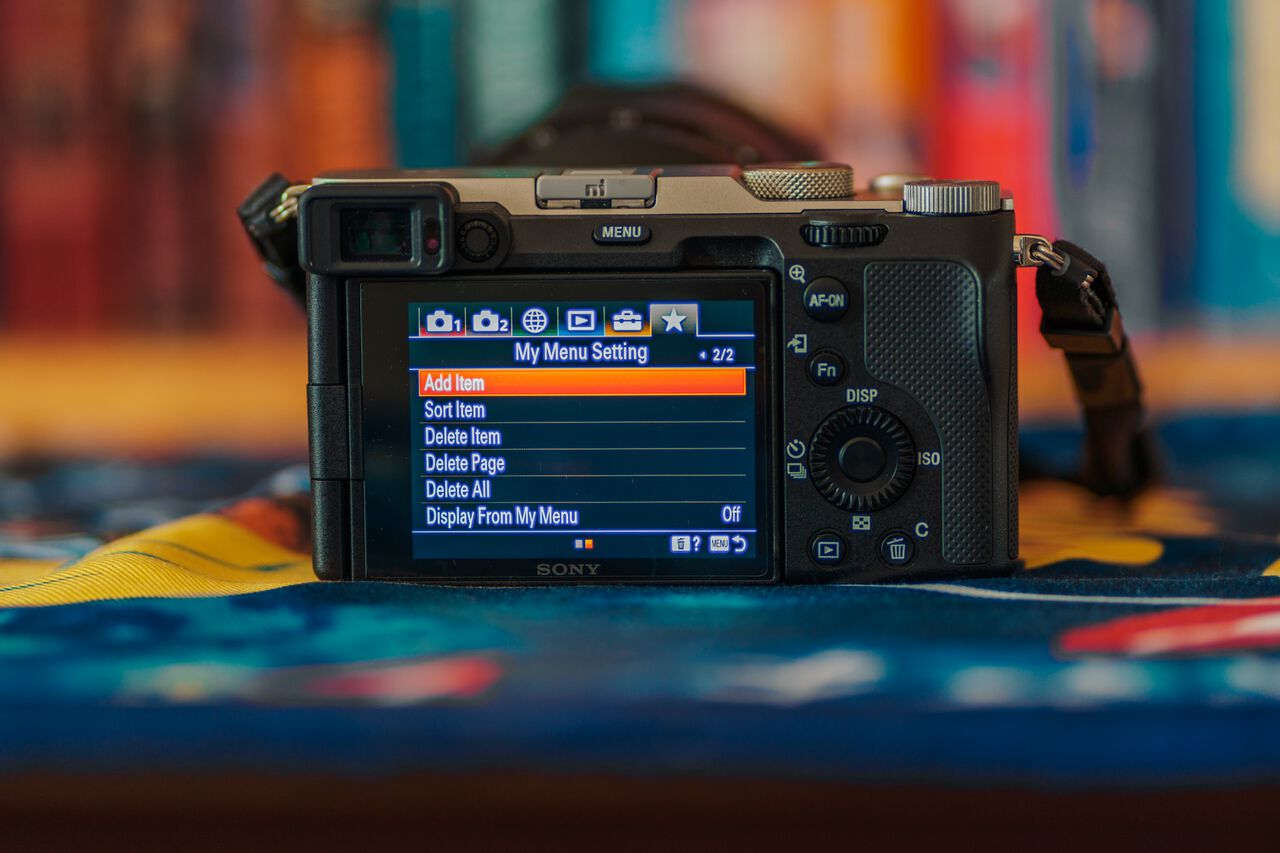
You may not know this, but Sony cameras have an empty tab in their menu system with a star icon labeled on top that is dedicated to all your frequently used settings for easy access.
You can assign all your favorite settings that you often use on this page, so that when you want to look for them, all you have to do is go into the My Menu panel and find them there without having to dive into the gazillion available settings in Sony's infamously confusing menu system every time you want access to it.
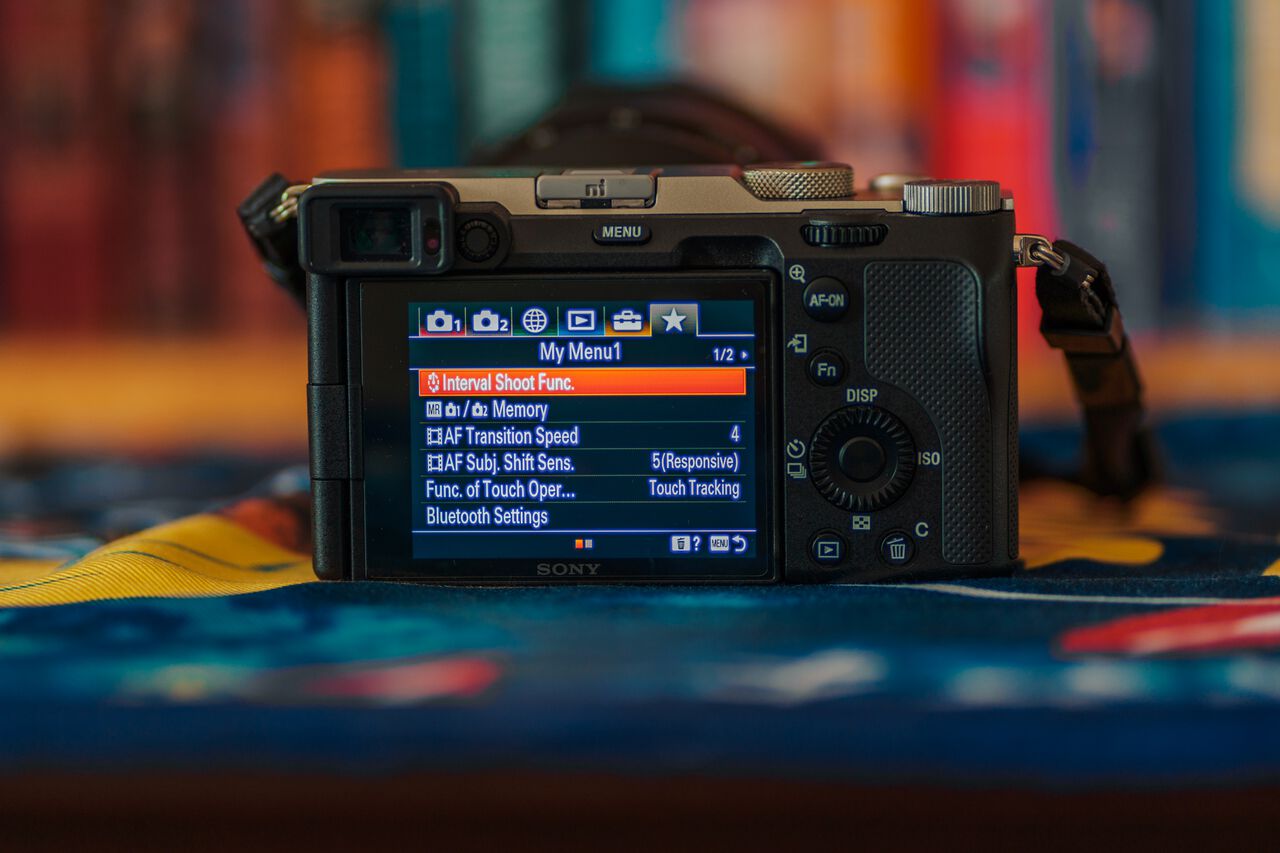
To assign a setting on the My Menu panel, go into the menu system, click left to quickly access the My Menu menu panel, click "add item", and start adding your most-used settings to the My Menu panel.
7. Use Cleaning Mode to Clean the Sensor

If you find that there is a small dark blotch on your photos, there is a good chance that there is a speck of dust on your camera sensor. If you do not have access to a blower or if you are currently in the field, do not make the same mistake as I did by wiping the sensor with a shirt.
You might end up with a scratch sensor, as I did when I tried to get rid of all the dust on my sensor while I was hiking to the Everest Base Camp. That's a $200 lesson I will never get back right there.
Most Sony cameras come with a cleaning mode where the camera will automatically shake off all the specks of dust on the sensor when you toggle the cleaning mode option on in the menu.
It doesn't work 100% of the time, but it is better than exposing your camera to the element and wiping it with clothes that aren't designed to clean camera sensors.
To activate the cleaning mode, all you have to do is go into the menu system, go to the Setup 2 panel under the briefcase icon tab on page 2/6, and click on "Cleaning Mode". You will feel your camera vibrate for a second, and your camera sensor should be speck-free.
8. Enable Real-Time Tracking/Eye-AF Tracking
One of the best features that makes Sony cameras among the best cameras you can get for travel is the real-time tracking and eye autofocus feature that allows your camera to keep focus on a subject or a human face and eyes, and track their movement as the subject or the camera moves.
For older cameras like the Sony a7III, you will have access only to the Eye-AF tracking feature, which allows you to track a person's eyes when you half-press and hold the shutter button. In contrast, for newer cameras like the Sony a7C and a7SIII, you can track anything you want, not just a person's face and eyes, and the tracking is a little stickier.
Unfortunately, the Eye-AF Tracking feature on cameras like the Sony a7III is not turned on by default, and you will have to go into your menu settings to assign it to a custom button that you can use to activate eye autofocus tracking.
To set eye autofocus tracking on your Sony a7III, go to the menu page. On the AF1 panel under the Camera 1 tab on page 5/14, ensure that your Focus Mode is set to Continuous AF.
Once that is done, go to the Custom Operation Panel under the Camera 2 tab, click on Custom Key, and set one of the custom buttons (I recommend the AF-ON or AEL button) to "Eye AF". Whenever you hold that button, the focus will stay on your subject's eyes.
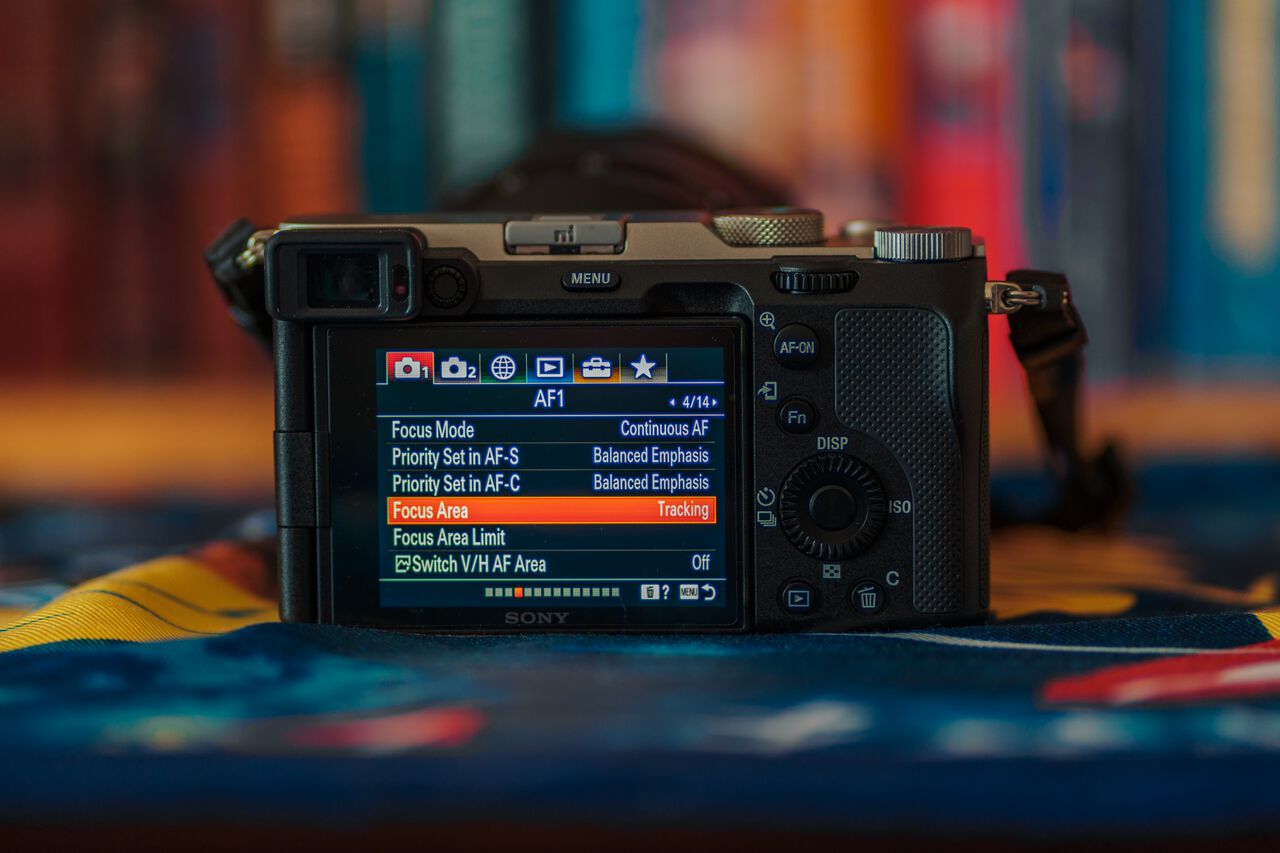
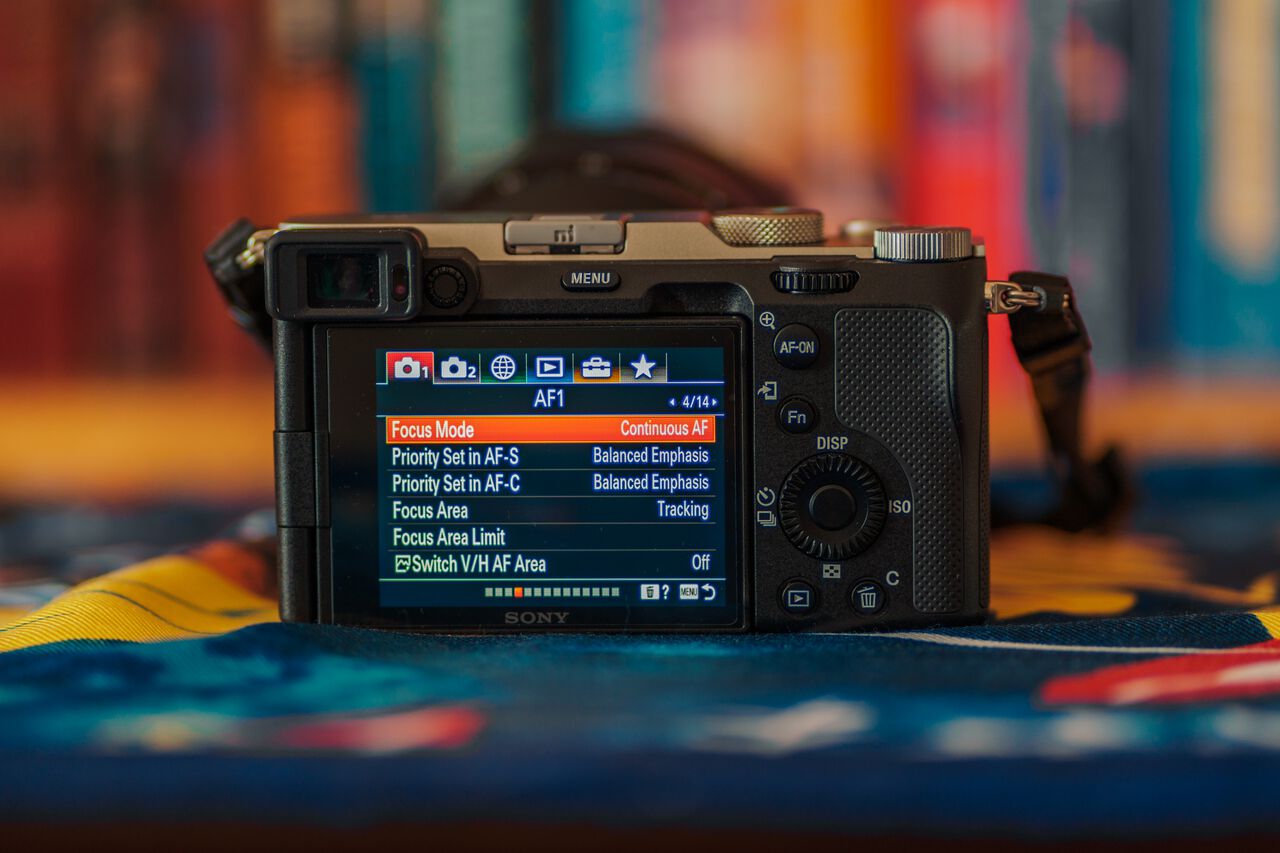
The same goes for newer cameras like the Sony a7C, which have a more advanced real-time tracking system that is not turned on by default. In order to activate the feature, you will have to go into your menu system, on the AF1 panel under the Camera 1 tab on page 4/14, make sure that the Continuous Focus Mode is selected, and the Focus Area is set to Tracking (it can be wide, zone, or center, etc.).
Once that is done, your camera will automatically select a subject (not just a face and an eye like the Eye-AF features) whenever you half-press the shutter button, and it will continue to track the subject and keep it in focus no matter where the subject or your camera moves to.
9. Enable Touch Tracking (For Sony a7C, a7RIV, a7SIII)

For newer cameras like the Sony a7C, you can also take the real-time tracking feature to the next level with the Touch Tracking feature. This will allow you to touch any subject you want to track on your screen, and the camera will keep the focus on that subject as you move your camera around.
Like the real-time tracking above, the Touch Tracking feature works the same way, with the tracking continuously keeping the subject in focus. However, unlike the real-time tracking mode, the Touch Tracking feature is also available in the video mode, allowing you to keep your subject in focus as you and your subject move around. This is a killer feature for travel videographers.
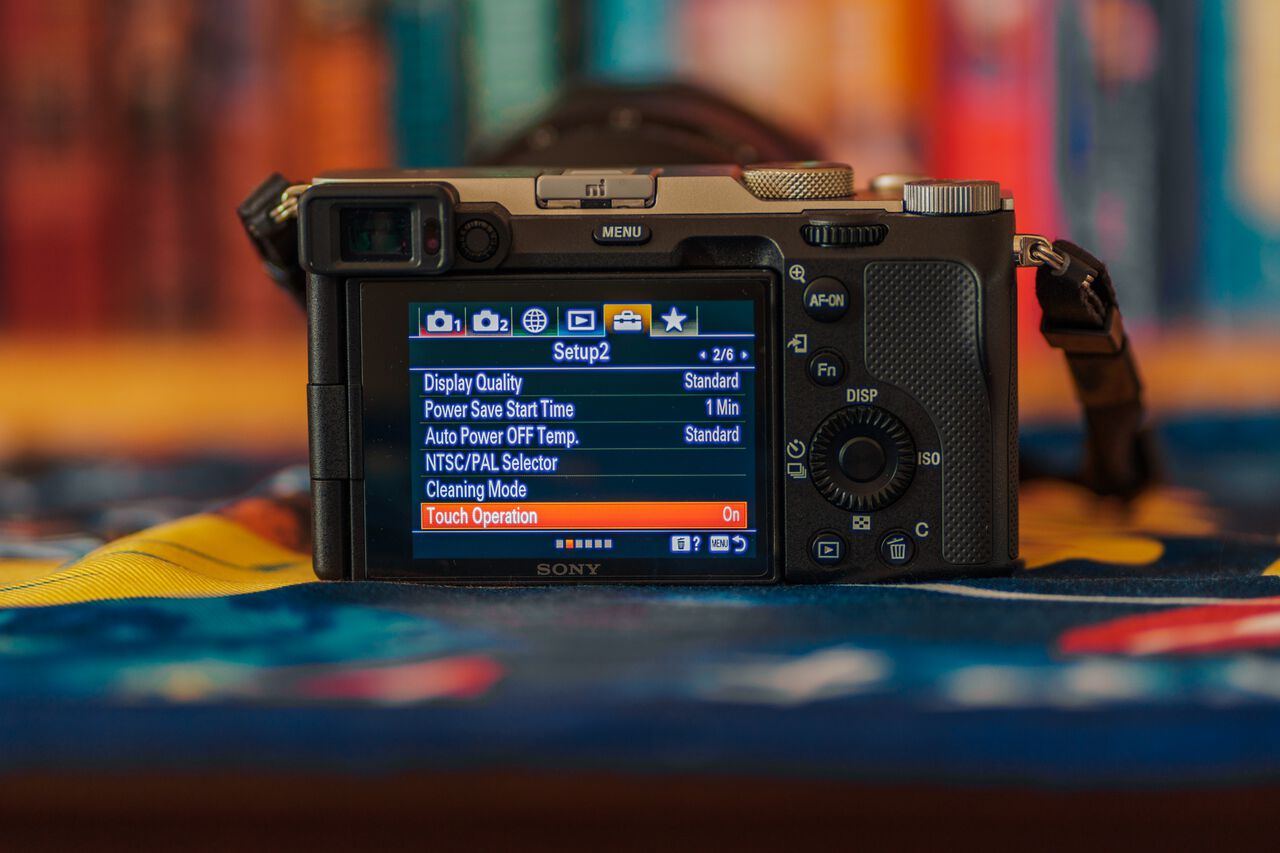
To activate the Touch Tracking feature on your new Sony cameras like the Sony a7C, you will have to go into your menu system, select the briefcase tab, go to the Setup 2 panel, and make sure that touch operation is set to "on". Now, go to the Custom Operation 2 panel under the Camera 2 tab on page 10/10 and set the Function of Touch Operation setting to "Touch Tracking".
Now, regardless of whether you are in photo or video mode, whenever you touch a subject on your camera screen, the camera will relentlessly keep track of your subject as you and your subject move around. This is priceless for travel street photographers and filmmakers.
10. Use Other Buttons as Custom Buttons (For Sony a7C)

Many of the complaints on the Internet about the Sony a7C are about the lack of custom buttons, which I found rather nitpicky. With the Sony a7C cameras, you can use other unused buttons as custom buttons, as well as the video record button in photo mode, the trash can button, and the down button, which comes unassigned by default.
If you spend some time with the Sony a7C, you will find that you can easily replace the missing 2 custom buttons that the Sony a7III cameras have with other buttons, and you will be able to maintain a similar workflow you had but in a smaller camera body, which, for travel, is a huge win.
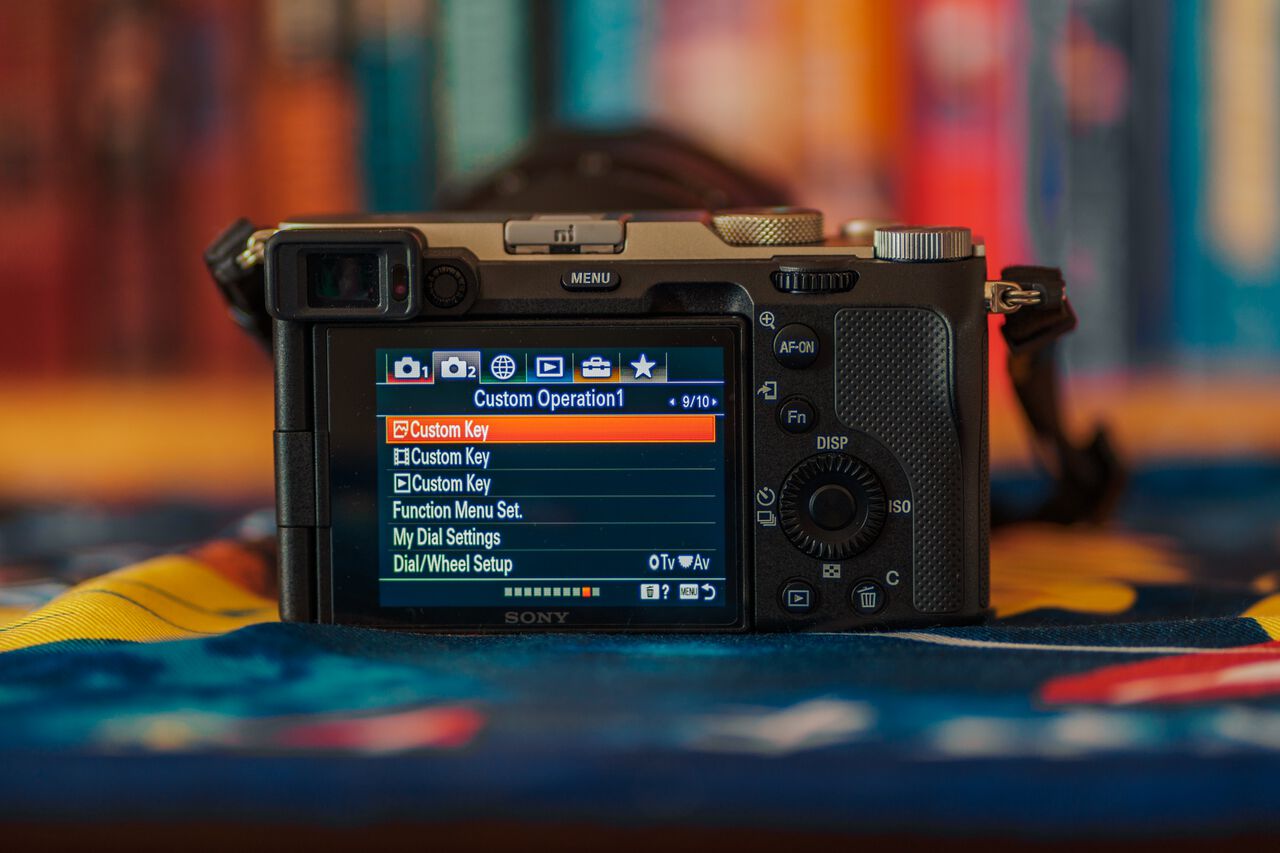
To set other buttons on your Sony Cameras as custom buttons, all you have to do is go into the Custom Operation panel in the menu system under the Camera 2 tab on page 9/10, and you can assign every single button on the back and top of your camera to whichever features you like.
Best Accessories for the Sony a7C, a7III cameras, and More
Get a Bluetooth Remote Control
For those of us who travel solo and like to take epic photos of ourselves with a tripod, and a 10-second timer is not enough to get that money shot, we turn to the next best feature: the internal intervalometer (timelapse).
The timelapse feature, in theory, is a great feature for taking photos of ourselves from afar. Unfortunately, for some unknown reasons, Sony will not allow its timelapse feature to use autofocus while shooting, limiting our ability to move around the scene as we see fit.
And then we turn to the next best feature: the Sony Imaging Edge app on our smartphones. However, we soon realize that the app is buggy as well, with constant disconnections, slowness, and extreme unreliability. (For real, it's been years, and they have yet to fix their buggy mobile app.) You start to lose hope that you will ever get those awesome photos from afar.
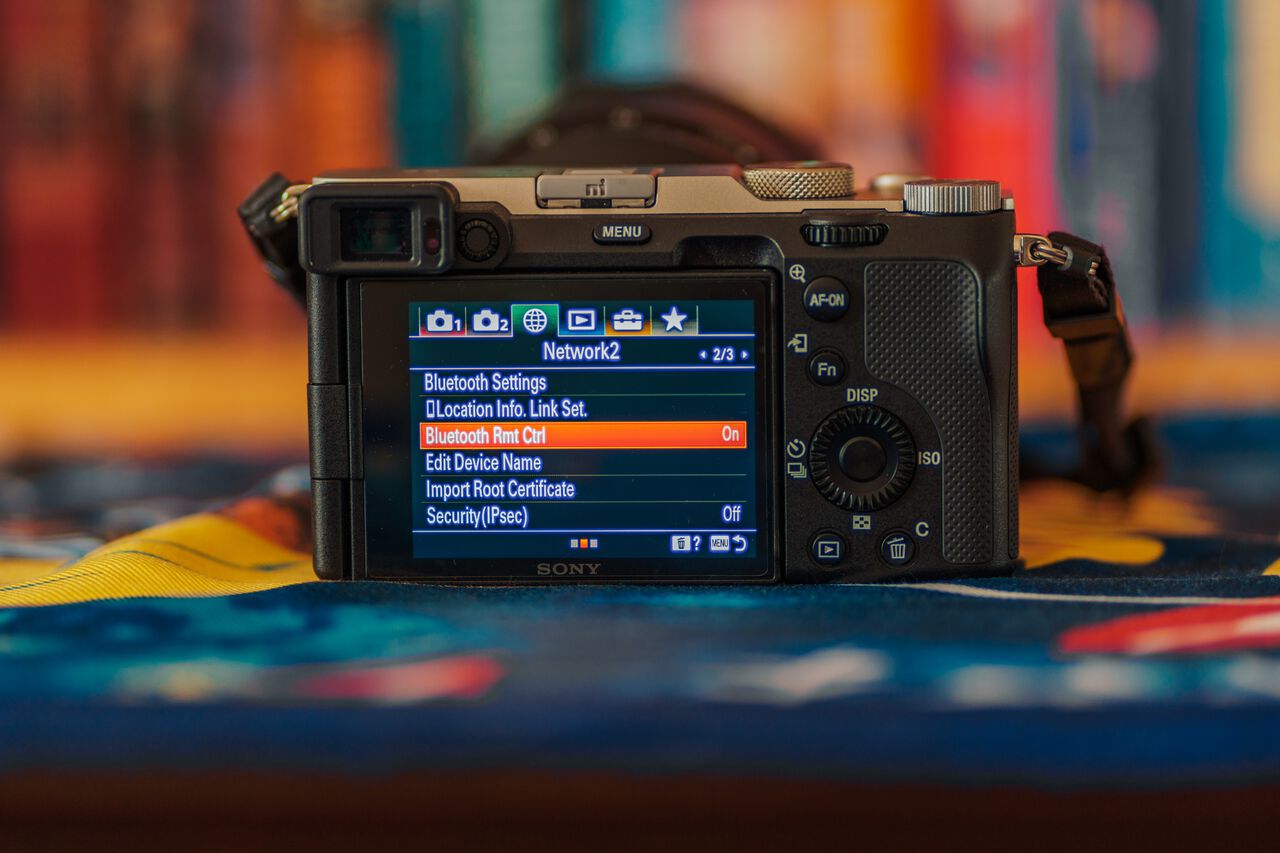
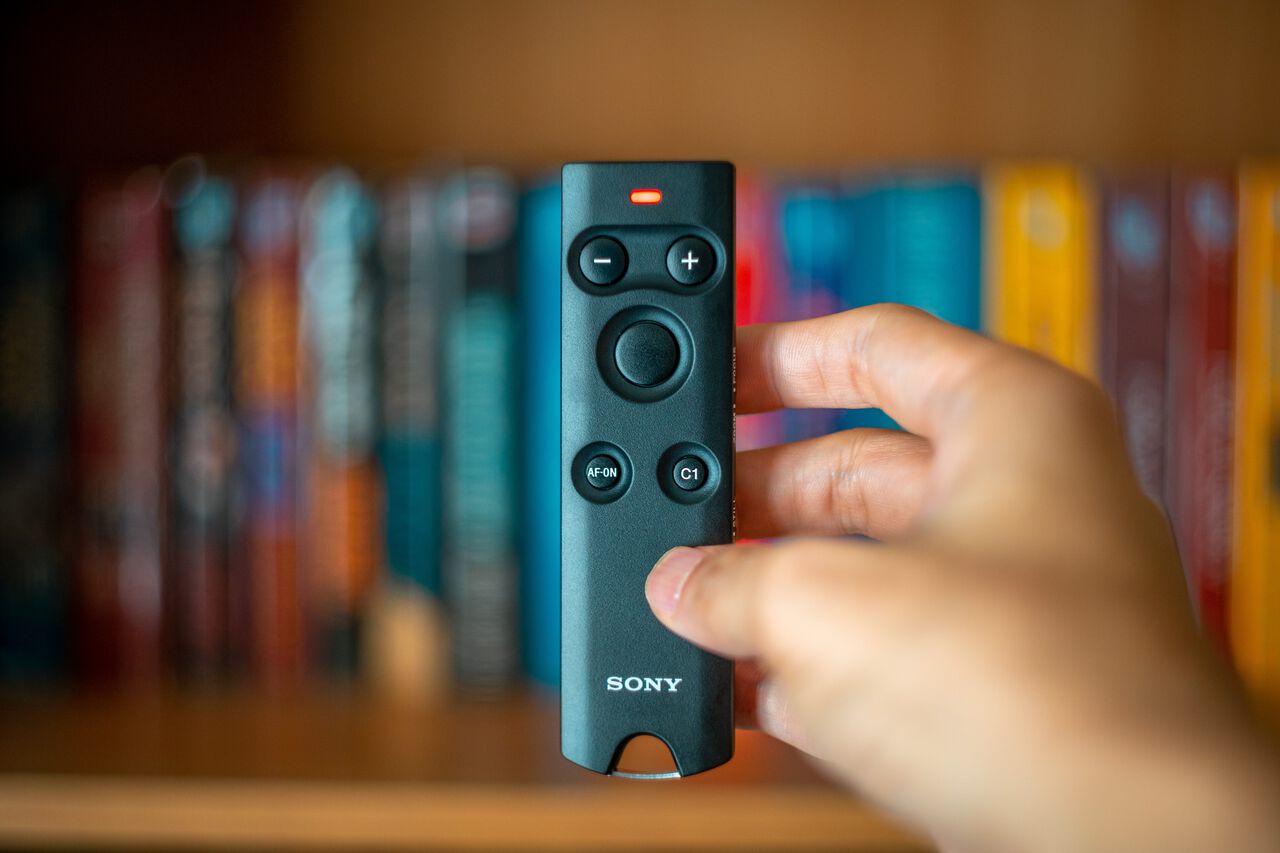
Enters the Bluetooth remote control from Sony, which comes in this small remote with several buttons, including a custom function button for you to shoot video and photos from as far as 10 meters via a more reliable Bluetooth connection.
I bought one for my Sony a7C to take photos of myself when I travel, and I am very happy with it. The remote connects automatically as you turn on the camera, so you do not have to fiddle with the mobile app to reconnect your camera, which often fails.
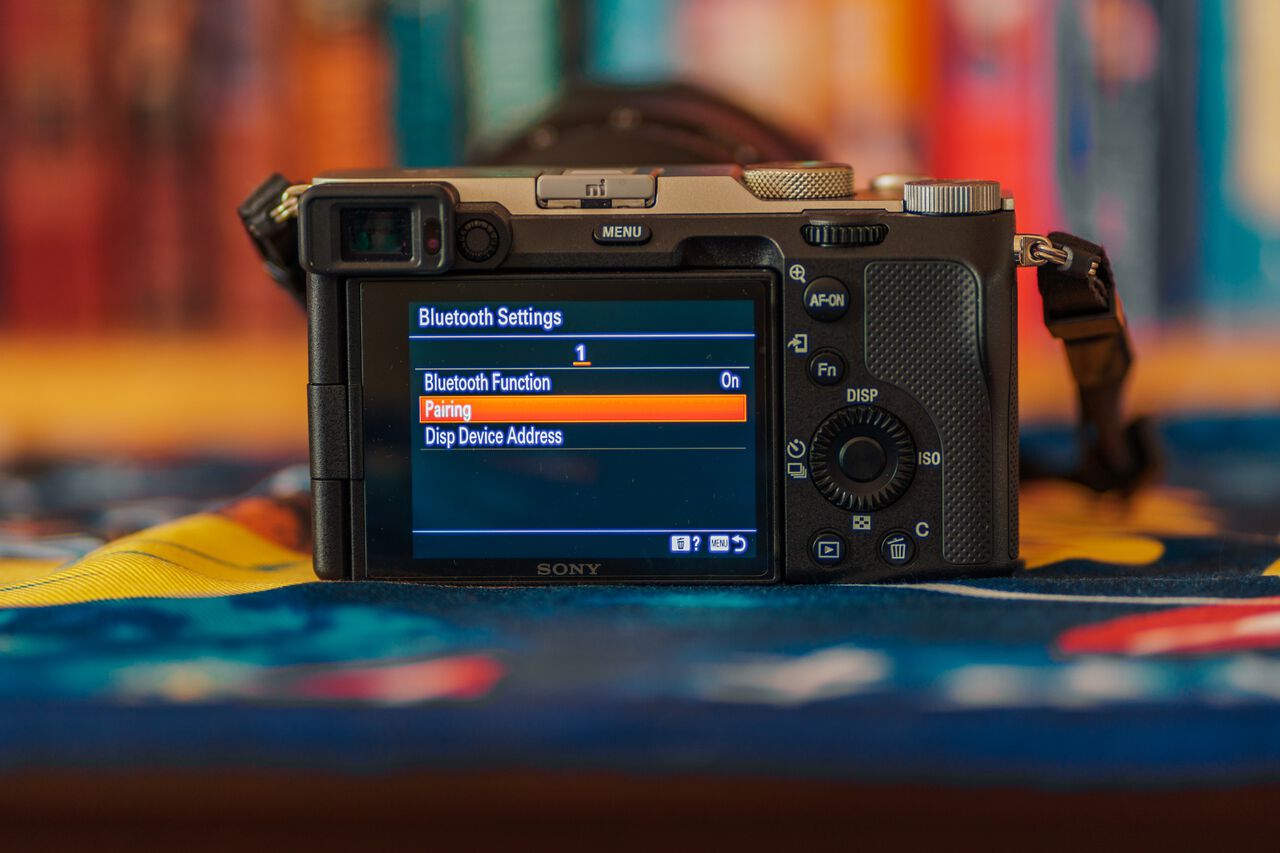
The Bluetooth remote also lets you half-press the shutter button, activating real-time tracking, as well as allowing you to record video and activate a custom function, among other things.
The remote is small, compact, and lightweight, which is great to carry around in your bags. Best of all, it allows the camera to autofocus every time a shutter button is pressed, solving the missing feature of the timelapse app.
If you are looking for a solution to your self-portrait problems with your Sony cameras, this is the best wireless solution you can get. You can also opt for a cable intervalometer, which allows you to maintain autofocus while shooting time-lapse. However, it is big and clunky, and you will have to plug it in and out whenever you want to use it. Ain't nobody got time for that!
Don't bother with the cheaper alternative like the JJC Bluetooth remote control; they are cheap, but they are extremely unreliable and aren't built to last. The JJC one died on me in less than a year of usage. If you are looking for a remote that will last you many years, you are better off investing your money in the Sony one instead. Believe me.
Use UHS-2 SD Cards

If you want to maximize the use of your new Sony cameras, you will need an SD card that can keep up with them. Most new Sony cameras, such as the Sony a7C, a7RIV, and a7SIII, come with a UHS-2 SD card slot that allows you to use the high-speed UHS-2 SD card to swiftly save high-quality images and videos in a split second.
You will clearly see the benefit of using a UHS-2 SD card when you shoot in burst mode. With the new Sony cameras, you can shoot up to 30 photos per second in RAW format, which is extremely impressive. And with a UHS-2 SD Card, these photos will be saved instantly without a buffer time that renders your camera useless until it completely saves all those photos, unlike when you use a slower SD card.
That doesn't mean that you can use a UHS-1 SD card on your new Sony cameras, but if you want to use its burst mode to its maximum capability, you are going to have to invest in a UHS-2 SD card with either a V60 or V90 speed class.
Get an External Battery Charger
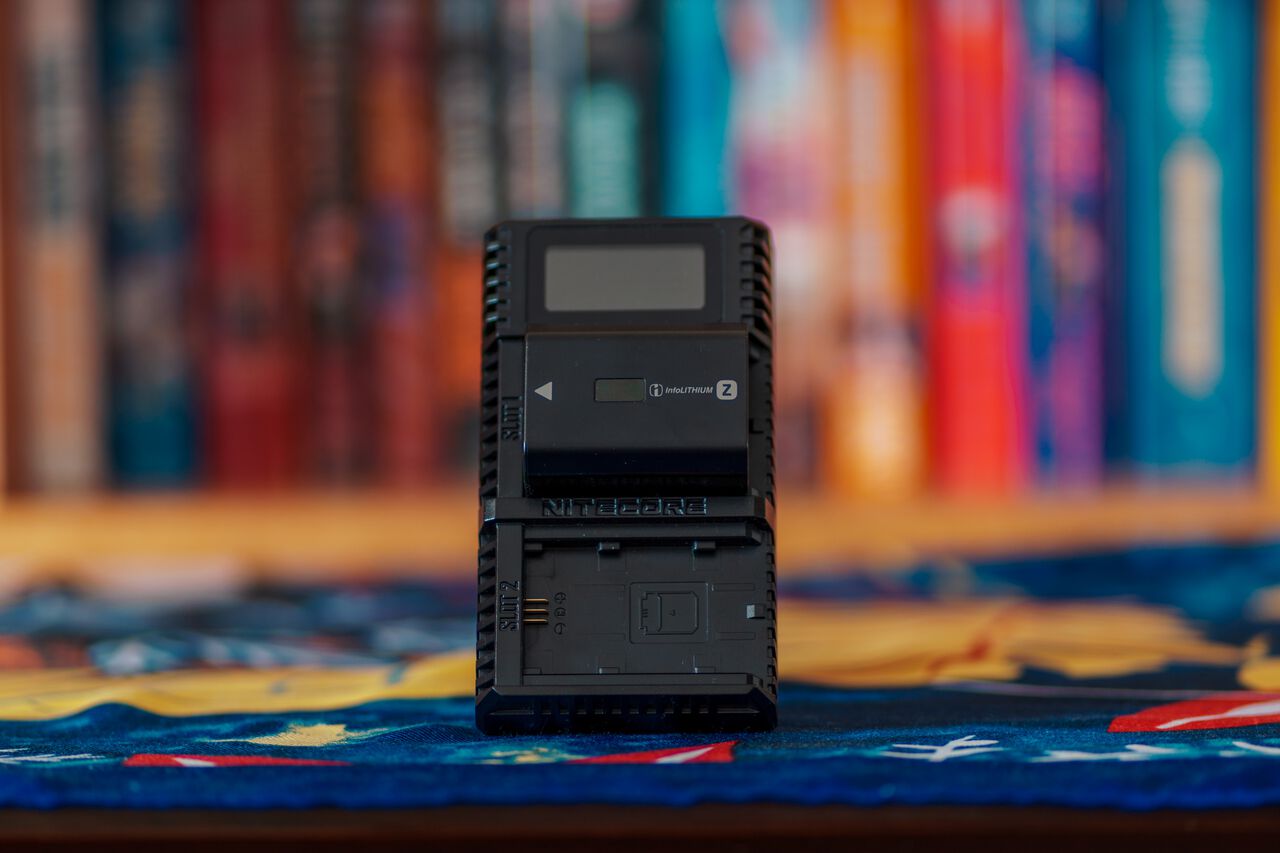
The newer Sony cameras no longer come with an external battery charger, and if you are looking for a better way to charge multiple batteries at once, I highly recommend you get the Nitecore USN4 Pro Battery Charger for the Sony NP-FZ100 battery, which comes with all Sony newer camera models.
The Nitecore USN4 Pro Battery Charger is a much better external charger than the Sony one, with more features such as a battery indicator screen. It can charge 2 batteries at once and comes with Quick Charge 2.0, which enables faster charging of 2 batteries. Best of all, it's way cheaper than the Sony one.
Combining the Nitecore Quick Charge capable feature with the Baesus 65W multi ports charger that comes with Quick Charge technology USB-A port and 2 Power Delivery USB-C ports, you should be able to charge 2 batteries simultaneously in less than 2 hours, which no other external battery charger can do.
If you are looking for an external charger to charge your Sony a7C, a7RIV, a7III, and other cameras that use the NP-FZ100 batteries, you won't regret getting the Nitecore USN4 Pro charger. Just make sure to pair it with a charger that has Quick Charge technology version 2.0 and above to take advantage of the rapid charging.
Buy More Spare Batteries
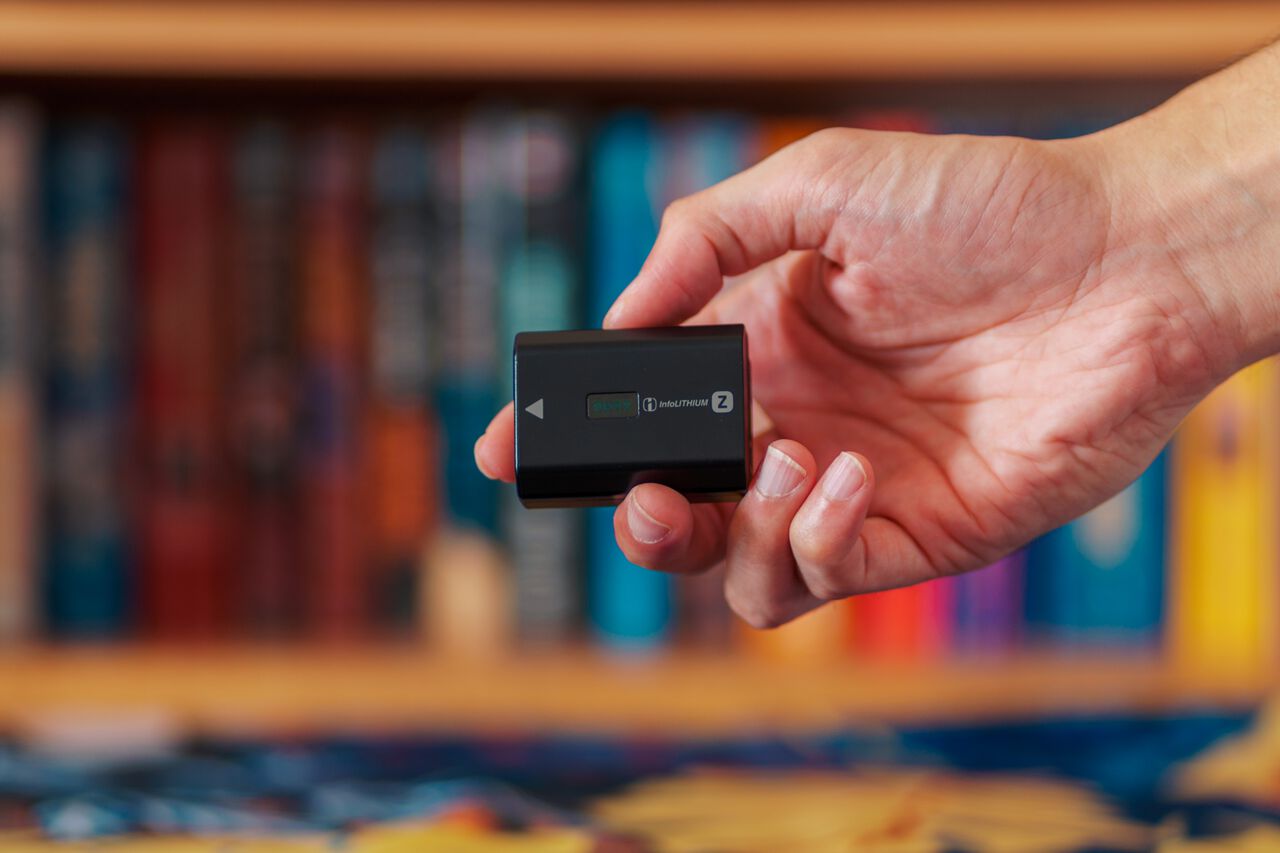
Talking about batteries, if you are looking for a spare battery in case you are out exploring or if you forgot to charge your battery and ran out of juice on the go, I highly recommend getting at least one spare battery and keeping it in your bag at all times.
When it comes to batteries, I recommend you get the official Sony NP-FZ100 battery instead of the third-party ones. The third-party ones are definitely cheaper, but they never maintain their initial charges as reliably as the Sony official NP-FZ100 batteries.
As you can expect, the Sony battery is extremely expensive. If you are looking for reliability, which I highly recommend you do with batteries, the Sony NP-FZ100 battery is the best one to get.
Plus, new Sony cameras have much better battery life than they used to, and you won't need a ton of spare batteries to last you a day. So, if you were going to get one spare battery, you might as well get the most reliable one.
Get a Rig for Better Ergonomic (For Sony a7C)
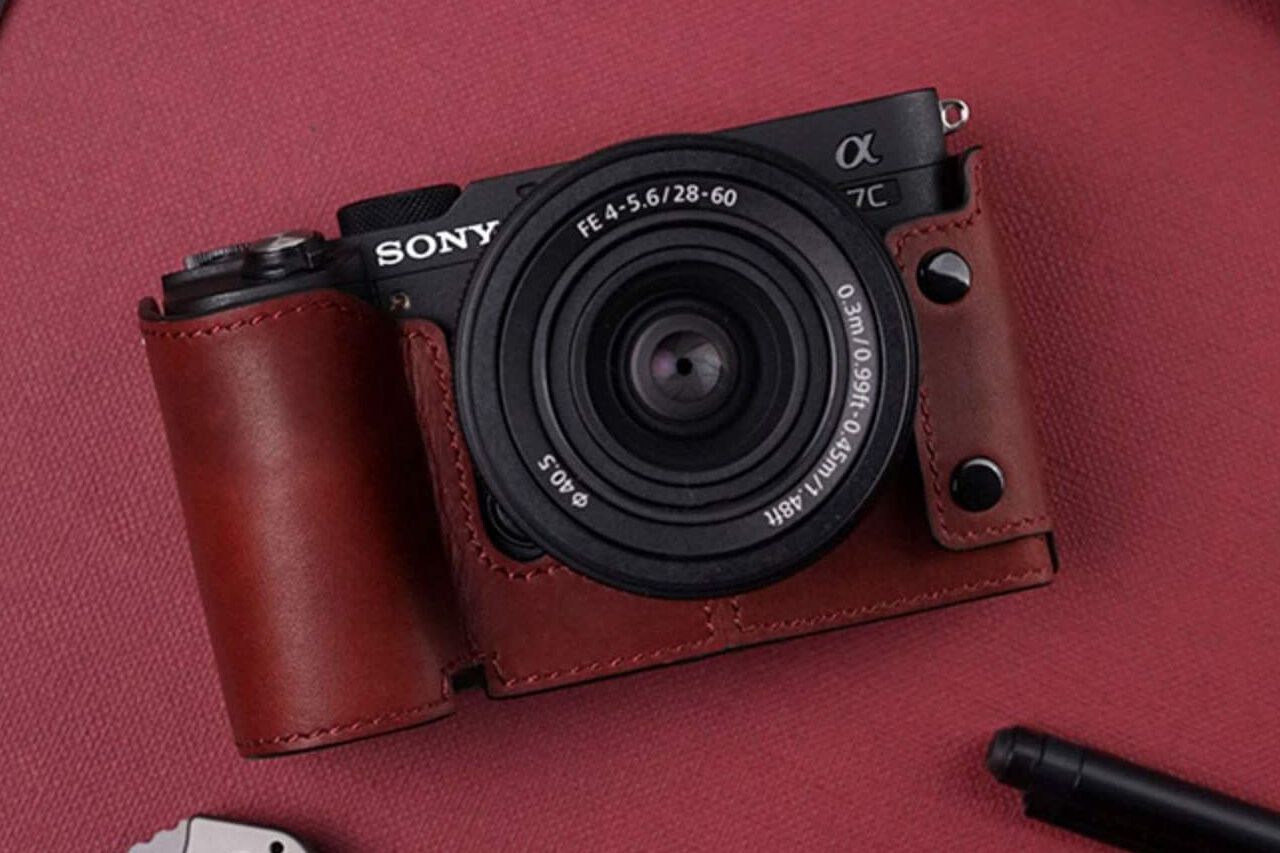
For those of you who have the new Sony a7C, you may find the small, compact body and shallow grip a little too uncomfortable to hold. I feel for you, and I have a solution for you. Get a grip! No, for real, get an accessory that will extend your Sony a7C grip area for easier handling, like a leather case or a rig.
With a leather case, your Sony a7C's grip will be extended slightly, allowing your pinky finger to finally rest on the case. However, if you opt for a proper camera cage or a rig that includes an extended handle, the grip will be much easier to handle. Additionally, you will have access to multiple mounting points for other accessories.
Although the shallow grip of the Sony a7C is not ideal, there are plenty of accessories out there for Sony cameras that you can use to help make your life as a travel photographer a little easier.
Personally, I'm getting used to the grip and thus do not feel the need to buy a rig yet. However, I might consider purchasing a leather case to protect my new camera from scratches, all while looking even more badass and cool than the Sony a7C with a silver top already is.

Disclaimer: This post may contain affiliate links. See our disclosure policy.
First Published:
Last updated: