Ukraine is one of the largest countries in Europe, and yet there are only a few travelers visiting it. Due to several internal conflicts in 2014, Ukraine had no choice but to close the country down in order to protect its territory. It was only as recently as 2019 that the country started to open its borders and welcome tourists and explorers like us to experience its beautiful culture.
In 2019, Ukraine has finally opened up and extended its E-Visa platform to over 52 countries around the world, and together with its EU ties (with most European countries already exempted from the Visa), the country is planning to capitalize on the tourism boom happening all over Europe.
As I learned about this, without hesitation, I decided to apply for a Ukrainian E-Visa right away. After traveling for a month in Ukraine, I am here to tell you about my personal experience applying for a Ukrainian E-Visa, the documents I prepared, and things I wish I knew before applying for a Ukrainian E-Visa.
Let's begin with the first question you should ask yourself: Do I need a visa for Ukraine?
- Do I Need a Visa for Ukraine?
- What to Prepare for a Ukrainian E-Visa Application?
- How Long Does it Take to Get the E-Visa?
- How Early Should I Apply for a Ukrainian E-Visa?
- Is it Difficult to Get a Ukrainian E-Visa?
- What is the Validity of a Ukrainian E-Visa?
- How Much Does a Ukrainian E-Visa Cost?
- What Travel Insurance to Use for a Ukrainian E-Visa?
- What to Pack for Ukraine?
- How to Apply for a Ukrainian E-Visa?
- What If My Visa Application got Rejected?
- More Things to do in Ukraine
- Ukraine Travel Video
- Further Reading for Ukraine
Watch it on Youtube
Do I Need a Visa for Ukraine?
If you hold a European passport, it is very likely that your country is exempt from the visa requirement, and you should be able to travel to Ukraine freely without having to apply for anything.
If you want to know whether your country is exempted or not, please consult the official list of entry policies for each country.
If you are required to get a visa before arriving, do not sweat as you might be eligible for the E-Visa, as I was. If you are from one of the following countries, you are eligible to get an E-Visa for Ukraine:
Australia, Bahamas, Bahrain, Barbados, Belize, Bolivia, Bhutan, Cambodia, China, Colombia, Costa Rica, Dominica, Dominican Republic, Ecuador, El Salvador, Fiji, Grenada, Guatemala, Haiti, Honduras, Indonesia, Jamaica, Kiribati, Kuwait, Laos, Malaysia, Maldives, Marshall Islands, Mauritius, Mexico, Micronesia, Myanmar, Nauru, Nepal, New Zealand, Nicaragua, Oman, Palau, Peru, Saint Lucia, Saint Vincent and the Grenadines, Samoa, Saudi Arabia, Seychelles, Singapore, Solomon Islands, Suriname, Thailand, Timor Leste, Trinidad and Tobago, Tuvalu, and Vanuatu.
If your country is not exempt from the visa and is not on the list above, unfortunately, you will have to apply for it in the regular way by visiting the nearest Ukraine embassy and applying in person.
I have a Thai Passport, so I am eligible for an E-Visa, and the process of applying for one is pretty much the same across the board. Therefore, even if you are from Australia or New Zealand, you can use this guide to help you with the application process.
What to Prepare for a Ukrainian E-Visa Application?
Like other countries, there are strict requirements for the documents you have to prepare to apply for an E-Visa. Here is a complete list of things I prepared before applying for a Ukrainian E-Visa:
- Photo: One 2x2 inch photo of you, shot for the purpose of applying for a visa (solid colored background, straight face, includes all features of your face, etc.) in a JPEG format. For me, I always have these on hand, so I simply capture the image with my phone, crop it, and upload it to your application on a Ukrainian E-Visa website.
- A Copy of Passport: One scanned version of your passport in JPEG format.
- Health Insurance: It can be any insurance from your home country as long as it covers at least 30,000 EUR. Simply buy one online and attach it to your application on the Ukrainian E-Visa website.
- Proof of Sufficient Funds: One copy of a 3-month bank statement with an amount of money that covers your entire trip in Ukraine. I just got mine from my online bank website and attached a 3-month transaction history I saved in PDF form to my application.
- Document Confirming the Purpose of Visit: Hotel bookings for the duration of your stay and flights in and out of the country. I have essentially attached a PDF document containing my one-month accommodation booking from Booking.com along with my arrival and departure flight itineraries.
And that's basically all of it. In your online e-visa application, you will have the option to upload these 5 documents, so be sure to prepare them in 5 files: 1 x JPEG photo of you, 1 x JPEG image of your passport, 1 x PDF/JPEG of 3 months' bank transactions, 1 x PDF/JPEG of travel insurance plan, and 1 x PDF of your accommodation and flight confirmation (make sure these are all in one PDF).
For an official list of documents required, visit the Ministry of Foreign Affairs website: An Official Checklist of Documents Required to Apply for a Ukrainian E-Visa.
One important thing to keep in mind is that they only allow you to upload files that are 2 MB or lower in size each, which is quite problematic when it comes to preparing the "Document Confirming the Purpose of Visit" PDF.
Make sure to optimize your PDF and JPEG so that their sizes are below the given limit, and ensure that all documents are readable. There have been reports that they might reject your application if they cannot read the contents of your documents.
For an online application to optimize your PDF and JPEG files, you can try PDF Resizer.
How Long Does it Take to Get the E-Visa?
They mentioned on the website that for E-Visa application, it will take no more than 10 business days to receive the result.
BUT from my experience, they can be a few days late, so it is very important that you apply at least a month in advance before your departure date, unless you want to pull your hair out as I did when I received my application result a day before my flight!
I submitted my application for a Ukrainian E-Visa on the 29th of May 2019 with a departure date of the 13th of June 2019, thinking that it would take less than 10 business days to get it approved. Two weeks passed, and numerous unanswered phone calls to the E-Visa department made me consider canceling my flight to Ukraine. However, an email arrived in the evening of the 12th of June 2019, just a day before my flight.
How Early Should I Apply for a Ukrainian E-Visa?
Unless you like living on the edge of your seat, I do not recommend applying for the E-Visa 10 business days prior to your departure date. Make sure you give it a week or two of buffer time, just in case of unforeseen delays when applying for a Ukrainian E-Visa.
Is it Difficult to Get a Ukrainian E-Visa?
The application process itself is pretty straightforward and can be completed in about an hour or so if you have all your documents prepared in the right file size and format.
After you have submitted your application, all you can do is wait (this may take up to 10 business days) as they will go into radio silence until your application gets registered and approved, which should happen instantly following the registration.
When your application is being registered, you should receive a confirmation email with a subject line as follows: "Registration of an e-Visa application form." The email simply means that someone has finally taken the time to look at your application.
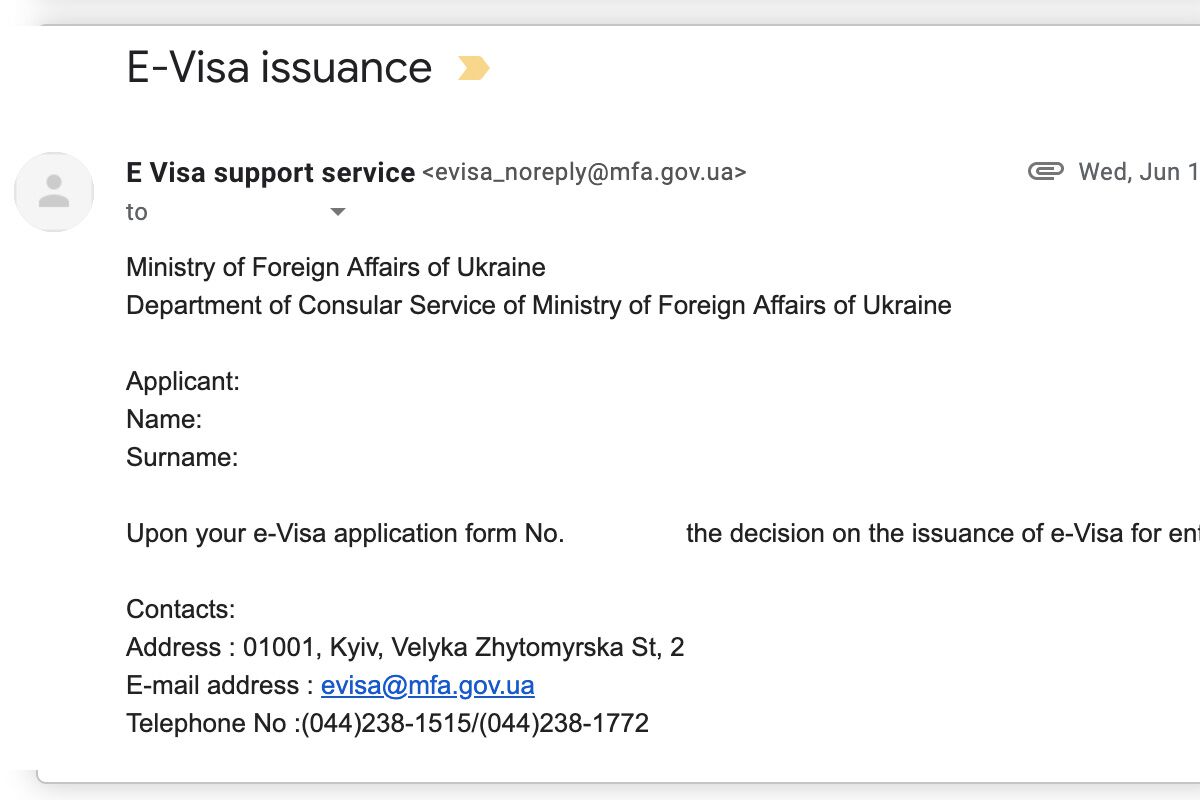
In 10-20 minutes after the registration email, you will receive another confirmation email with a subject line "E-Visa issuance". This email is the result of your E-Visa application, and if your application is approved, the E-Visa PDF will be attached to this email, and you are all set to travel to Ukraine.
What is the Validity of a Ukrainian E-Visa?
For a tourist visa, you will get the number of days reflected on your itinerary, which should not exceed 90 days within a 180-day period. The attached itinerary confirms 30 days of accommodation, so the E-visa I received was valid for 30 days after my flight for a single entry.
You can ask for a maximum of 90 days in a 180-day period on a tourist visa (type-C), and you can get either single, double, or multiple entries depending on the itinerary you have attached to your application.
Simply put, applying for a Ukrainian E-Visa is similar to applying for any country within the Schengen zone, as they will only grant you the number of days you requested in your visa application. Therefore, make sure to attach an itinerary that accurately reflects the duration of your intended stay and the number of entries you will require for your trip.
How Much Does a Ukrainian E-Visa Cost?
For a Ukrainian E-Visa, it will cost you 85 USD per application and it is non-refundable if you get rejected. That said, I heard that some people were able to reapply immediately after they got rejected without having to pay another 80 USD in the case of missing or unreadable documents.
What Travel Insurance to Use for a Ukrainian E-Visa?
In order to apply for a Ukrainian E-Visa, you are required to attach your travel insurance plan that covers the period you are in Ukraine. Fortunately, Ukraine is not as strict as when applying for a Schengen Visa, where you will need to buy one from an approved company.
For Ukraine, most of the local travel insurances are accepted as long as the plan clearly states the amount of accidental coverage that exceeds 30,000 EUR.
What to Pack for Ukraine?
As you may already know, I am an advocate of light traveling, and indeed, packing light for a journey like this is a unique art form. Here are some packing tips for your upcoming trip to Ukraine:
- Walking/Hiking Shoes: With all the walking and possible hiking during your travel, a comfortable pair of shoes is a must. I recommend the Timberland 3-Eye Classic Boat Shoes that are my go-to pair for long strolls and hikes.
- Breathable Shirts: Given the potential for hot weather, pack a few breathable shirts for your outdoor adventures.
- Shorts/Jeans: Anticipate lots of walking during your travels? Be sure to pack some breathable shorts and a pair of Levi's jeans for when the weather cools. For women, leggings are excellent for both hot and cold climates, so consider packing some as well.
- Fleece Jacket: For colder weather, layering is the key, and a fleece jacket makes an excellent insulating layer. I recommend the Columbia Steens Mountain Fleece (for women).
- Outer Shell Jacket: An outer shell jacket is great for windy or rainy conditions. I highly recommend the Columbia Watertight Jacket (for women). It's lightweight, breathable, and even comes in a cool orange color.
- Microfiber Towel: A Microfiber towel is the ideal backpacker's towel due to its lightness, quick drying, and compressibility.
- Camera: You should also pack a good camera for your trip so that you can capture all the beautiful experiences you might have. I recommend the Sony a7R V camera together with the Sony 24-70mm f2.8 GM II lens, which is probably the highest-performance camera and lens combination you can get right now.
- Power Bank: Keep your electronics charged on the go with a 20,000+ mAh Power Bank.
- Water Bottle: The Hydro Flask Trail Water Bottle is a great insulated water bottle to have with you in cities or on hiking trails. It is lightweight and can keep your water cold or warm for more than 12 hours. It's a total game-changer.
- Universal Adapter: You'll need just one universal adapter to plug in your electronics in any country you visit.
- Packing Cubes: Packing Cubes will help you save space in your backpack and keep all your belongings organized.
- Daypack: The Langly Alpha Globetrotter is my go-to everyday camera backpack. It's large enough to carry all my travel gear, and it comes with plenty of slots and pouches. Plus, it's stylish as hell!
- Large Backpack: You will need a large backpack to carry all of your stuff. I recommend the Osprey Atmos AG 65L backpack. With excellent weight distribution and a lifetime guarantee, you can't go wrong with Osprey.
For more information on what I pack in my backpack for this trip, check out: My Packing List: 60 Travel Essentials.
How to Apply for a Ukrainian E-Visa?
If you are new to the electronic visa, you are in the right place. Here, I will illustrate a step-by-step guide on how to apply for a Ukrainian E-Visa.
Even if you have done it before, there are some confusing elements on the website that might throw you off when applying for one yourself, so I am going to illustrate how I applied for the E-visa personally and how I got my application approved. Without further ado, let's begin with creating an account.
1. Create a Personal Account on Minister of Foreign Affairs Website
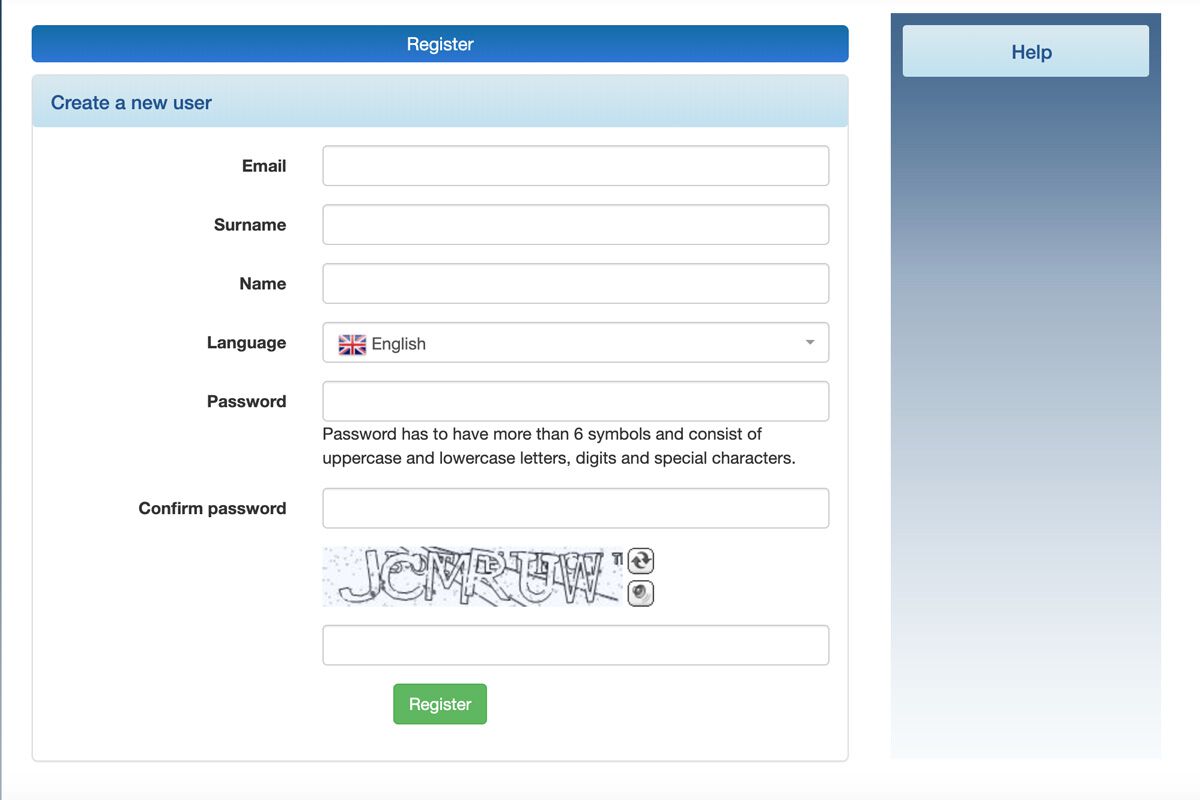
First and foremost, you will need to create a personal account on their website: http://evisa.mfa.gov.ua before you can apply for an E-Visa.
Fill in the registration form, choose your email address where you want to receive your E-Visa, and set a password on the following page. Once you are registered, simply log in with the account you just created and proceed to your E-Visa application form.
2. Fill in Your Application Form
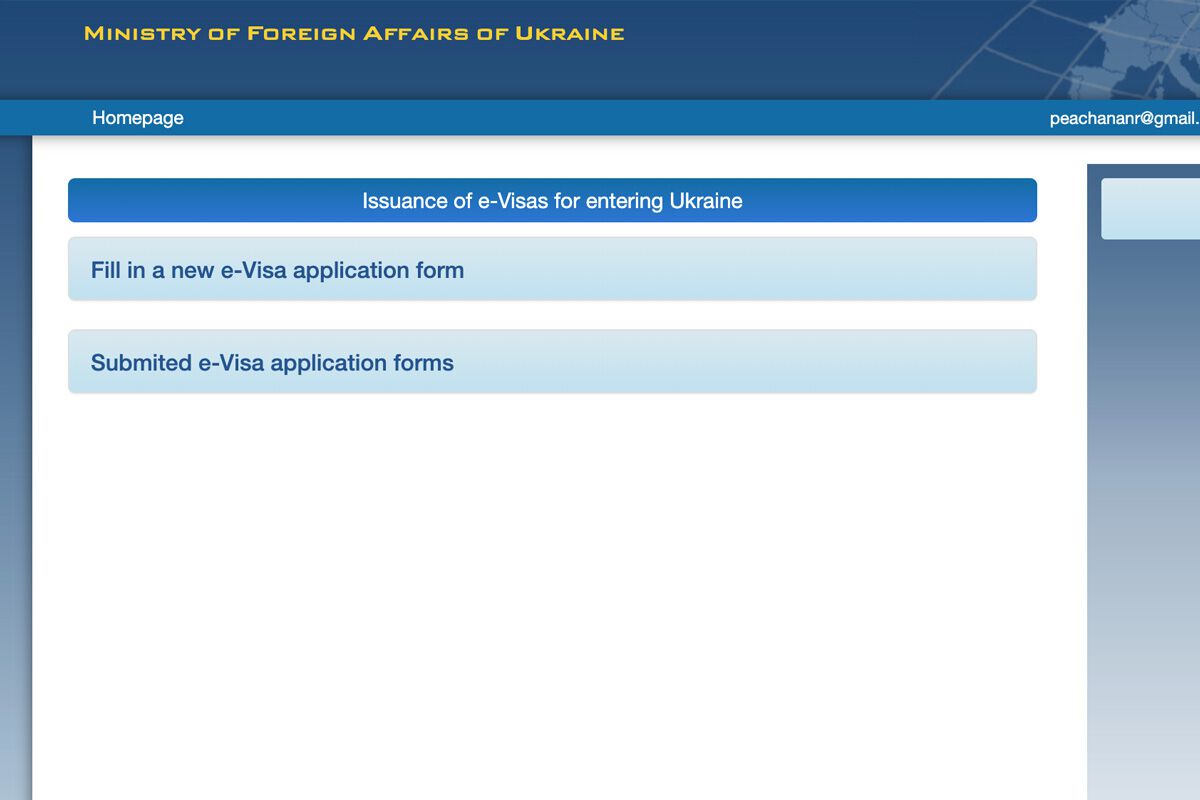
After logging in, you will arrive at the page shown above, where you can select an option to apply for a new E-visa application. Click the "Fill in a new e-Visa application form" and a new form will appear below.
With the form below, you will have to select the country of your passport, the E-Visa type you are going to apply for, which in this case will be "C-06 - Tourism". Select your passport type and type in your passport number in the rest of the fields. Click next when you are done.
Now, you will arrive at an actual application form page where you will have to fill out the form in detail. First, we begin with the General Information, which can be quite confusing to some.
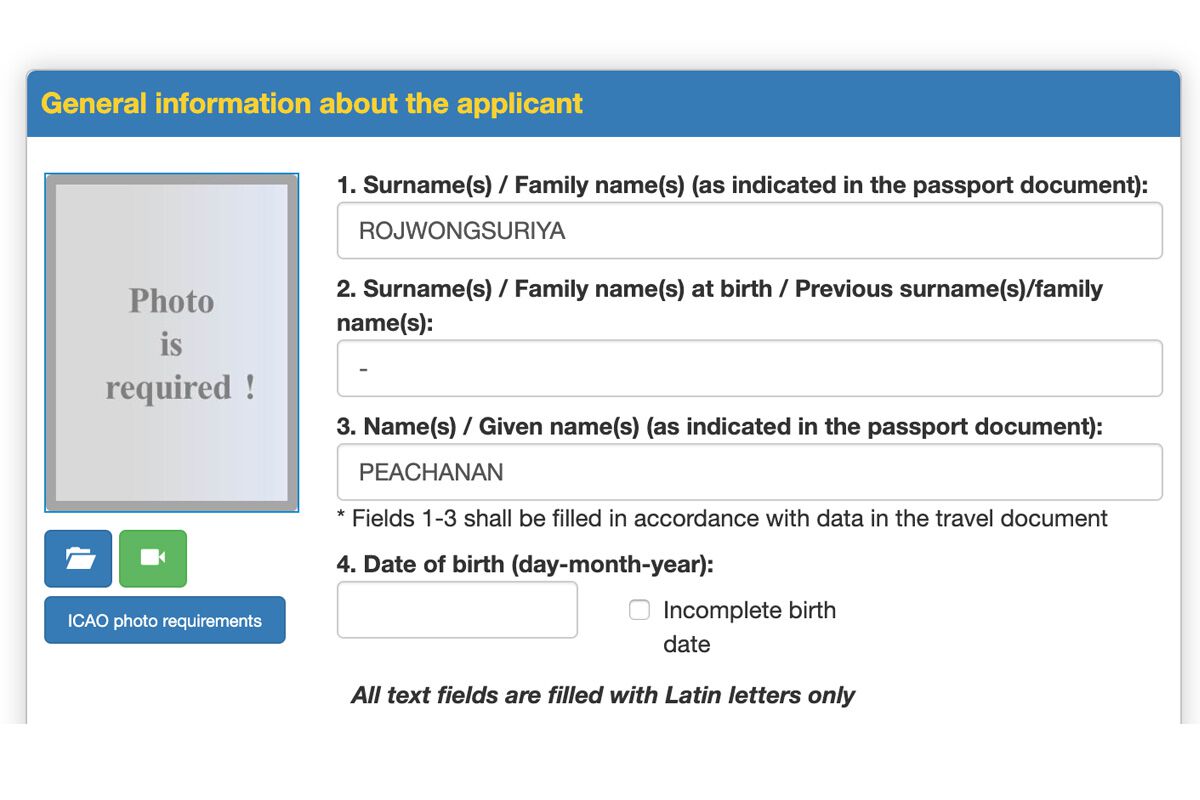
First, you upload your photo by clicking on the left-hand side blue-colored square button and picking the JPEG file of your photo. Make sure your photo follows the ICAO photo requirements.
Once you have uploaded your photos, you will need to fill in your general information, and this is where one might get confused. Since they do not allow empty fields, you will have to fill in all the fields, even if they do not apply to you. In this case, you should put your last name in the top field, middle name as shown on your passport in the second field, and first name in the third field.
If you do not have a middle name, put "-" in the field as shown above to indicate that this does not apply to you. Do not put your first name, middle name, or last name together in one field. You might get rejected if it doesn't conform exactly as on your passport details.
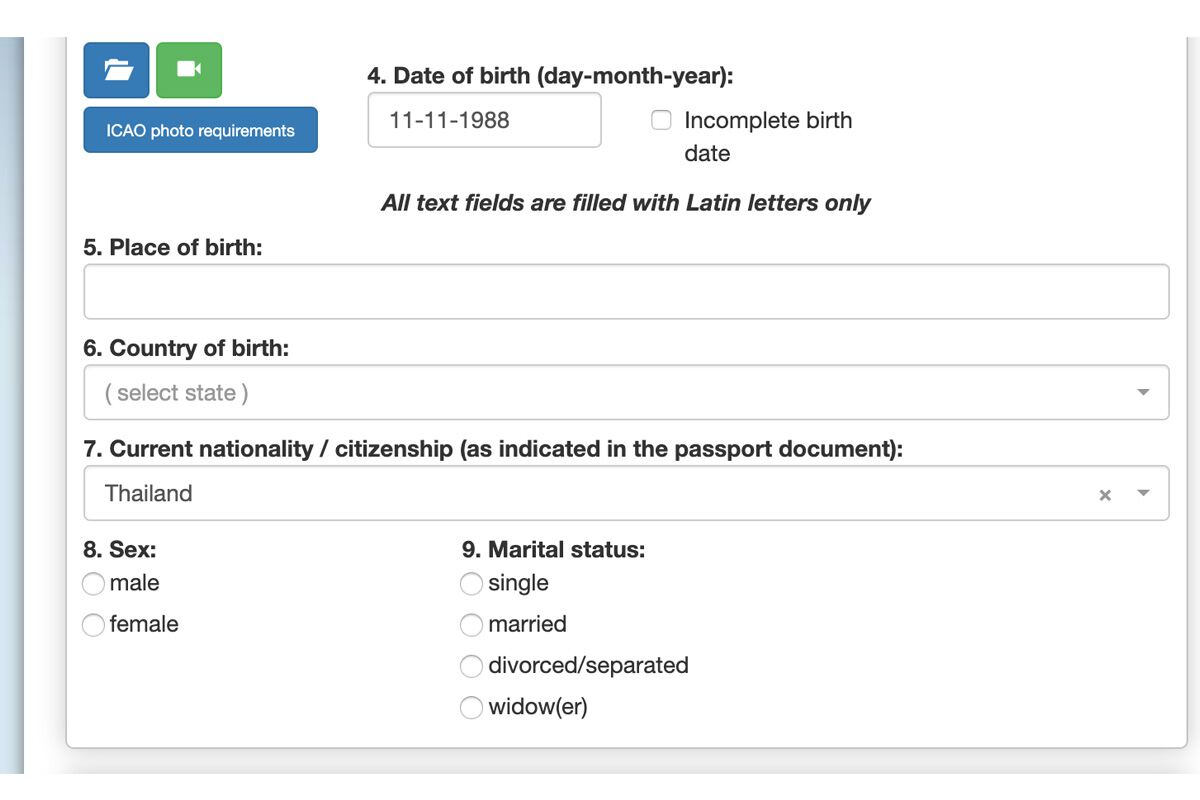
The rest of the General Information section is pretty straightforward, such as date and place of birth, country, nationality, sex, and marital status.
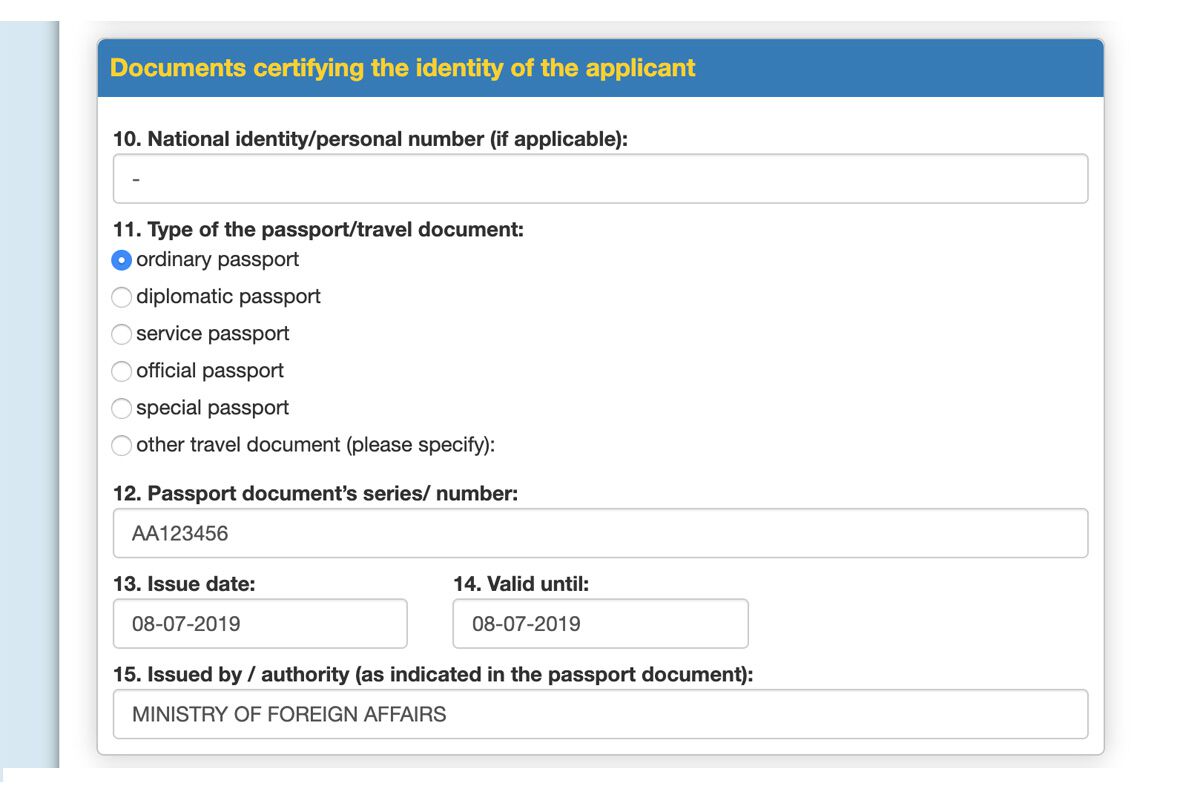
Next up is the "Documents certifying the identity of the applicant" section, which is pretty straightforward as well. Simply type in your national ID, pick your passport type, fill in your passport number, issue and expiry date, and the issuer of your passport, which in my case is the Ministry of Foreign Affairs, respectively.
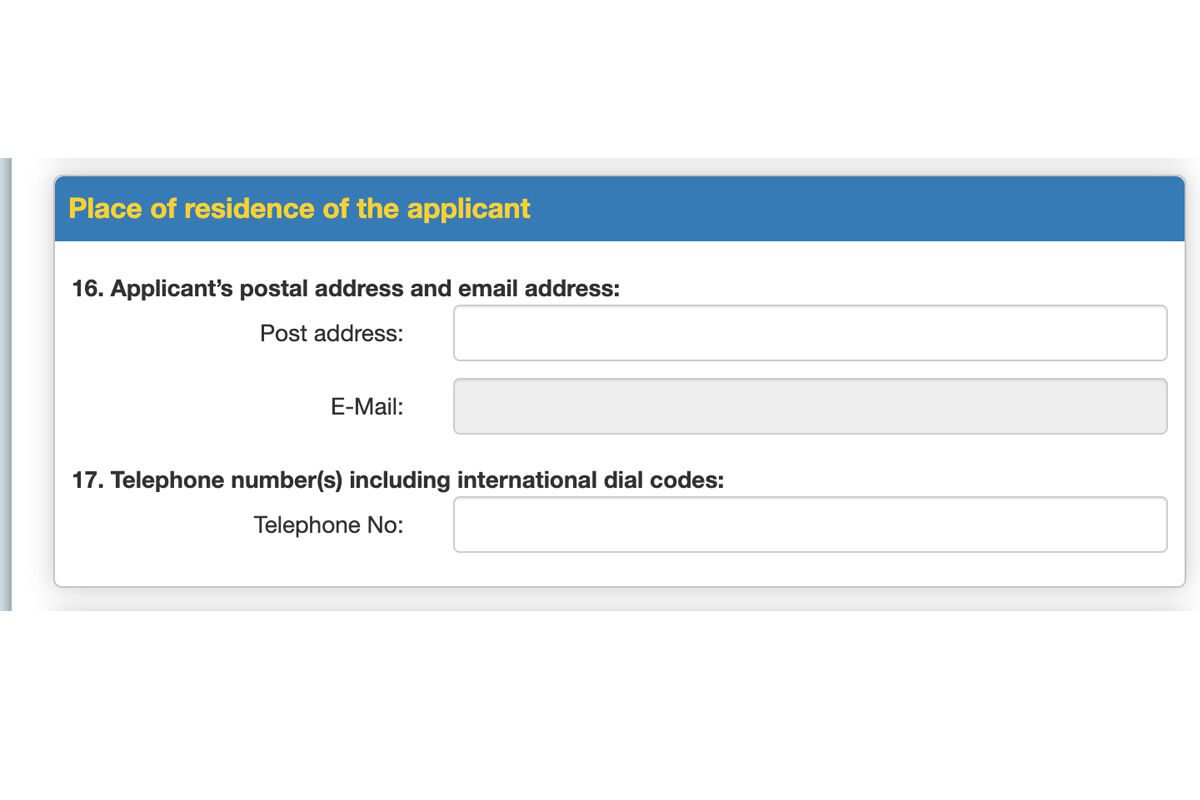
The next section, "Place of residence of the applicant", is also pretty straightforward. You simply fill in your address in your home country, your email address, and your contact number, including your country code, which in my case is +66 (Thailand international calling number).
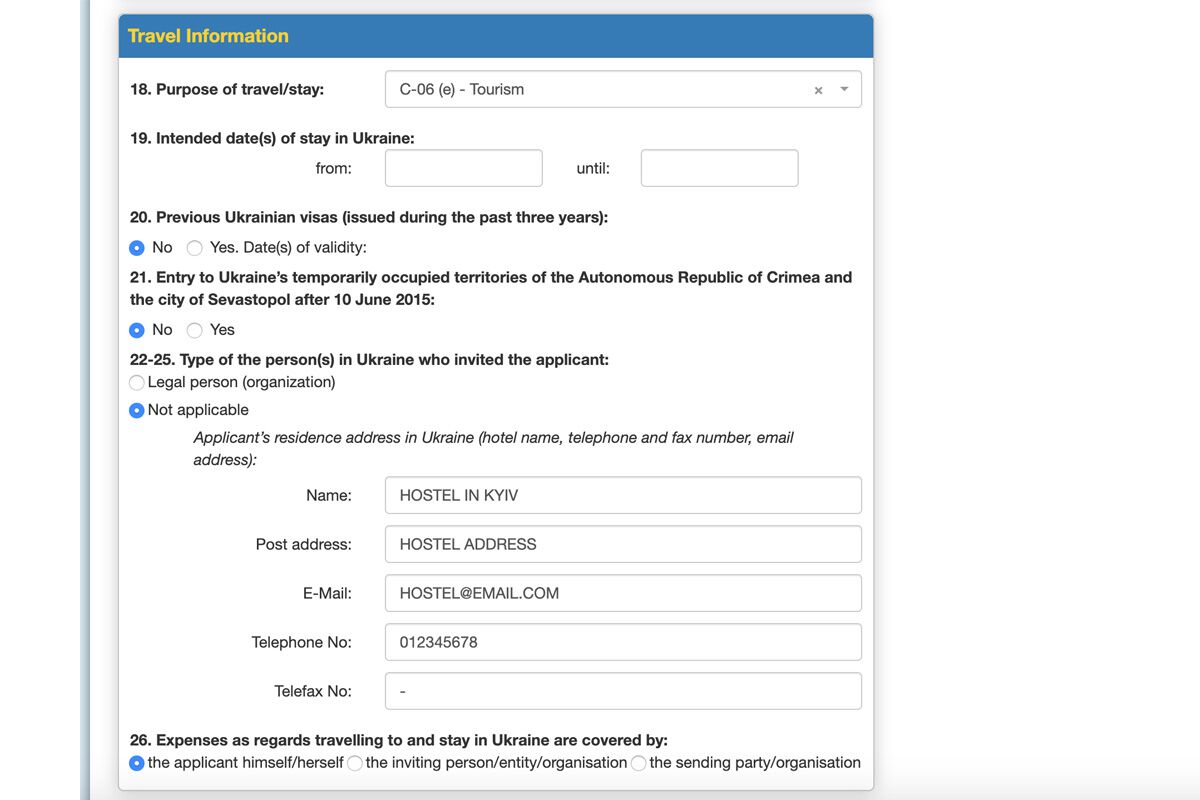
Next up is "Travel Information", where your first field is the type of Visa, which should be preselected already at C-06 Tourism. If not, please change it to C-06 Tourism if you are applying for a Tourism visa.
Now, pick the correct date of your arrival and departure. This will be shown in your E-Visa, and it might be referred to by the police if you somehow get checked at a checkpoint. So, choose a period that actually reflects your travel date. I was checked by the police in Kharkiv, and they asked me why I was still here even though I still had 4 days left on my E-Visa.
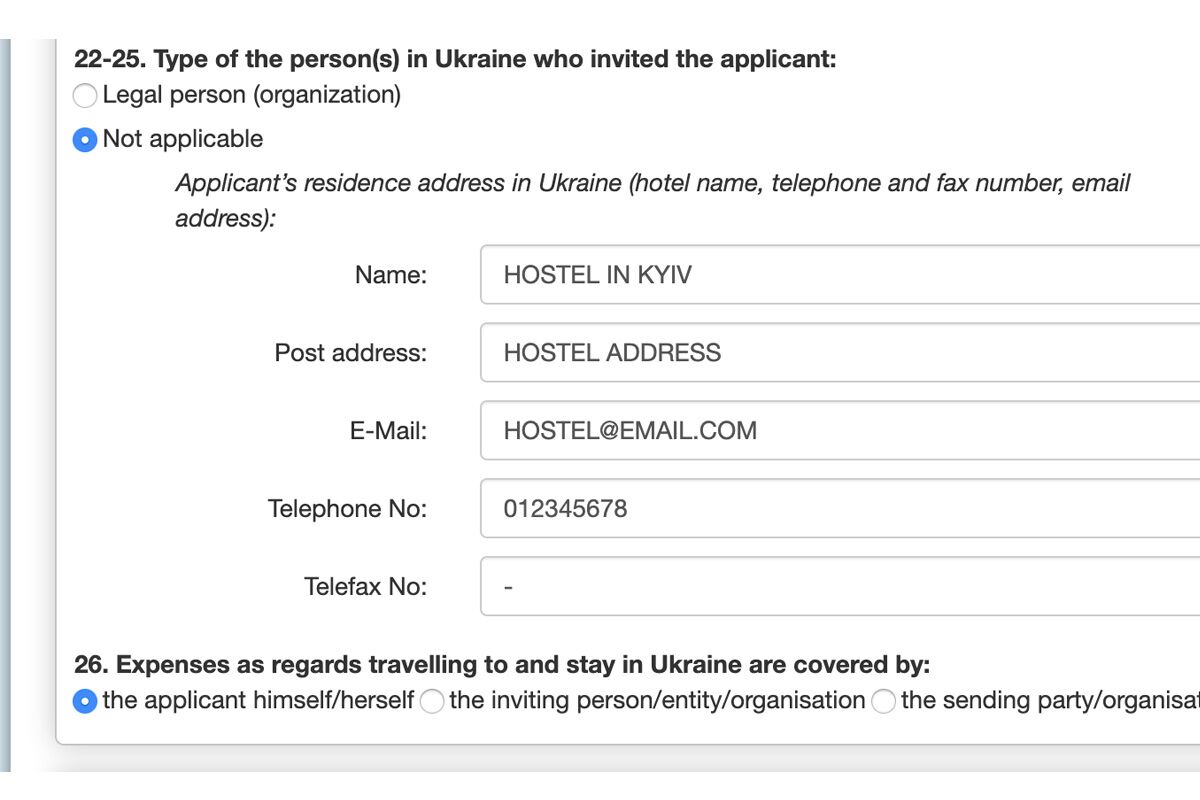
Following question #19 about the duration, continue and answer the questions on the form truthfully. Once you arrive at the question "#22-25 Type of person(s) in Ukraine who invited the applicant", select "not applicable" and you will have to fill in the address of your hostel/hotel where you are staying on the day you arrive.
If you are flying into Kyiv, simply put an address of a hotel/hostel you booked in Kyiv from the accommodation confirmation documents you have prepared and will be attached to the application in the next step. Put in - again on the Telefax field if your hostel/hotel doesn't provide you with a fax number (who would in this day and age?).
Last but not least, select the applicant himself/herself for "26. Expenses as regards traveling to and stay in Ukraine are covered by" to indicate that you are sponsoring your trip with your own money.
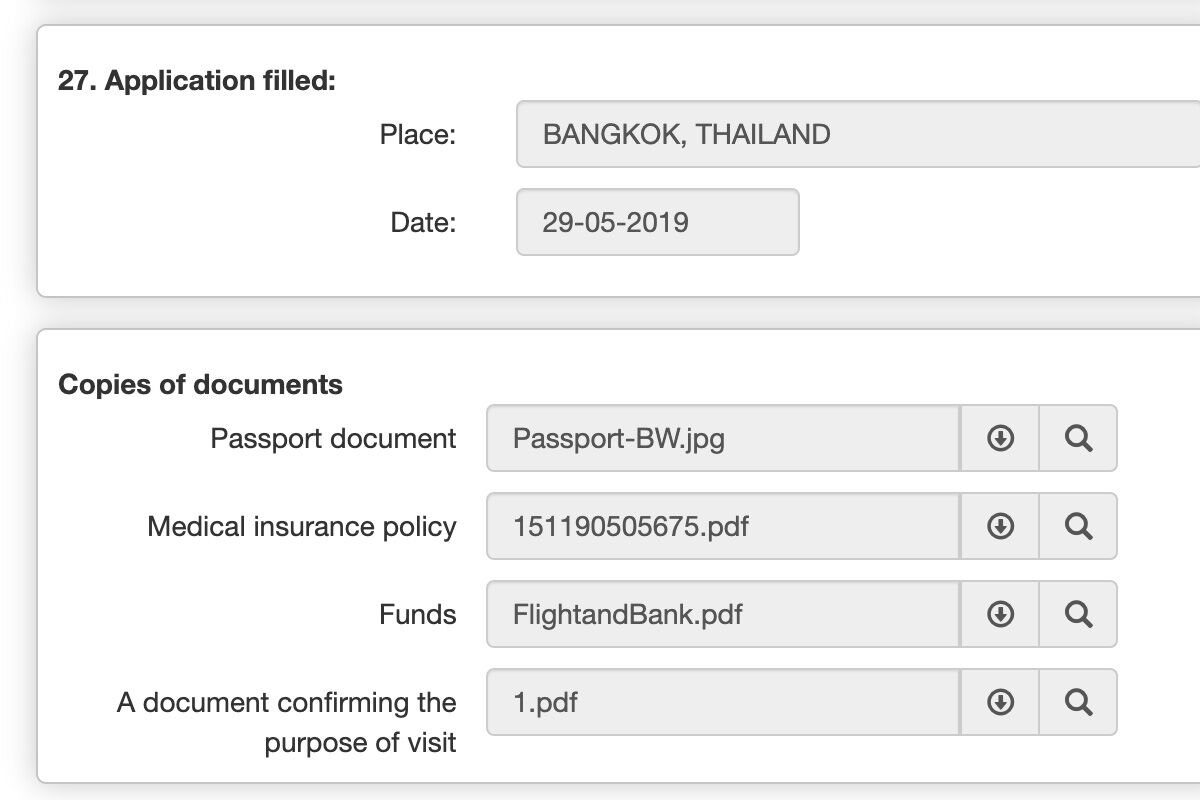
Under the "Application Filled" question, simply fill in your current location and the current date before moving on to the "Copies of Documents" section.
3. Attaching Required Documents
Last but not least, you will have to attach all of your prepared documents to the application before you submit it. In the first field, attach a copy of your passport in JPEG image format. Make sure that the file size is lower than 2 MB.
For the "Medical insurance policy" field, simply attach a PDF of your travel insurance plan, which should have been issued by your insurance company when you purchased the insurance online.
For Funds, you will have to attach your 3-month bank statement that shows you have enough money to cover your entire trip in PDF format. Make sure it's under 2 MB.
Last but not least, and this may get tricky due to the file size limit, you will have to attach your arrival and departure flight details together with all of your Booking.com accommodation confirmation emails in one PDF file in the "A document confirming the purpose of visit" field.
Since I booked over 30 days of accommodation for my one-month trip, the PDF file size did exceed the limit (8 MB). So what I did was remove all the unnecessary pages and only leave pages with my name and check-in/check-out dates (which is what they are looking for) to reduce the file size.
I then optimized my PDF with PDF Resizer, and even then, it was not enough. So, in the end, I moved my flight details into my Funds document that I attached previously under "Funds" to balance out the file size. This allowed my "Purpose of Visit" document file size to be below 2 MB, and then I was able to submit the form.
4. Wait until your E-Visa Application is Processed
After the form submission, you will not receive any email confirmation, but you can check if the form went through or not on your personal account page under "Submitted e-Visa application forms", where the status should say something along the lines of "Your Application has been Submitted" with the date of your submission under the status column.
After that, all you need to do is wait for 9+ business days (at the very least, since there were reports that they like to issue the visa close to the departure day, which happened to me as well) until you receive an email.
Again, I cannot stress enough how important it is that you submit your visa 9 business days, plus about a week or 2, before your departure date in case they are late.
After 9+ business days, you should receive an email update on your application status, which should change to "registered" and then "closed" within approximately 30 minutes. This is when you will receive the result of your E-Visa application.
If your visa is approved, you will receive your visa attached in the email, and you will have to print it and show the physical copy to the immigration officer when you arrive in Ukraine.
What If My Visa Application got Rejected?
If your application has been rejected, I would highly recommend that you try calling this number: +380 444 238 1772 and ask them directly for a chance to reapply without any additional payment. Unfortunately, they rarely answer their phones, as I have tried numerous times myself. However, it is still worth the effort if you wish to avoid paying another 85 USD.
More Things to do in Ukraine
If you are looking for more activities to do here, be sure to check out some of the available tours and day trips:
Ukraine Travel Video
Now that we have all the information we need, it's time to start planning your trip! Here are some resources to help you get going:
Are you planning to travel independently? Be sure to check out my guide on How To Plan A Backpacking Trip here.
Further Reading for Ukraine
Looking for more information for your trip to Ukraine? Here are a collection of articles about Ukraine that might help you with your trip planning:
- Looking for a complete backpacking itinerary for Europe? Here is the 3-Month Itinerary for Europe.
- Packing for a trip to visit a region as big as Europe is extremely daunting. Here's a packing guide to help you: What to Pack for Europe - The Essential Packing List.
- Want to visit Europe in winter? Better prepare for the cold. Here's a winter packing guide to help you: What to Pack for Europe in Winter - The Essential Packing List.
- Ukraine is one of the few hidden gems left in Europe, and in order to see the country and all it has to offer, you will need a complete travel guide. Here is a One Month Itinerary for Ukraine.
- Of course, one of the reasons why you are visiting Ukraine is to learn more about the Chernobyl nuclear disaster, and what better way to learn about it than to go in the field and see it with your own eyes. Here is a complete guide on how to visit Chernobyl.
- If you think Kyiv is only good for Chernobyl and Brutalist architecture enthusiasts, then you are in for a big surprise when you find out how awesome the city is. Here are the top 18 things to do in Kyiv, Ukraine.
- Are you a coffee snob like I am? If so, then you will love Kyiv and its unmatched indie cafe culture. Here are 8 best indie cafes you should check out in Kyiv, Ukraine.
- The Tunnel of Love is one of the most photogenic attractions in Ukraine, and it would be a shame to miss it on your trip to Ukraine. Here's a complete guide on how to visit the Tunnel of Love independently.
- Thinking of visiting the Tunnel of Love and not sure where to base yourself? I would recommend Lutsk, and here are 8 best things to do that will make you fall in love with Lutsk.
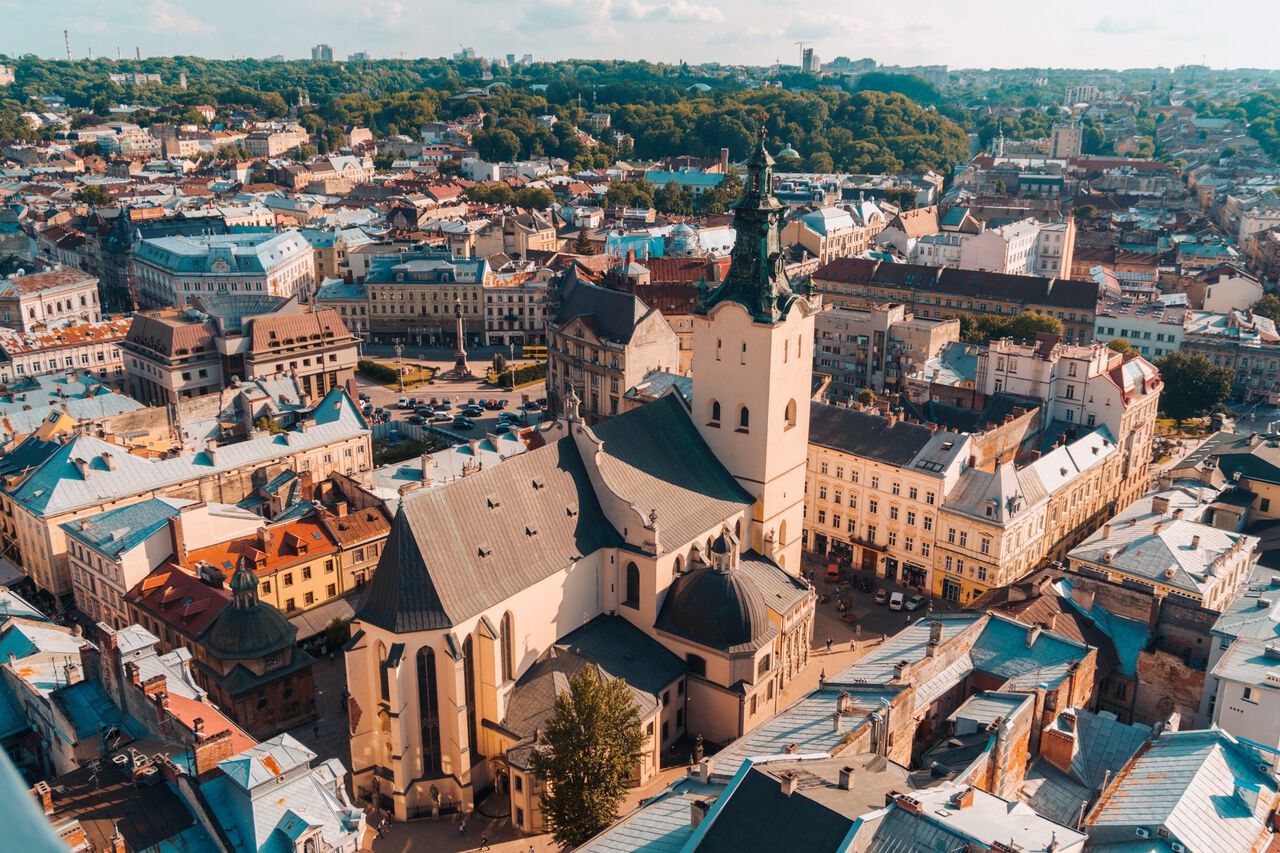
- Lviv is the cultural capital city of Ukraine. It is what St. Petersburg is to Russia, Prague is to Czechia, and Krakow is to Poland. It is the most European city out of all Ukraine, and it has so many things to do that you will need a great guide to navigate it. Here are 10 Best Things you should do in Lviv, Ukraine.
- Lviv is another great city to go cafe-hopping if you love coffee, and here are my Top 10 Cozy Cafes in Lviv that you should check out.
- Getting bored of cities? How about we go and hike some of the stunning trails in the Carpathian Mountains? Here is a complete hiking guide to Yaremche and the Ukrainian Carpathian Mountains.
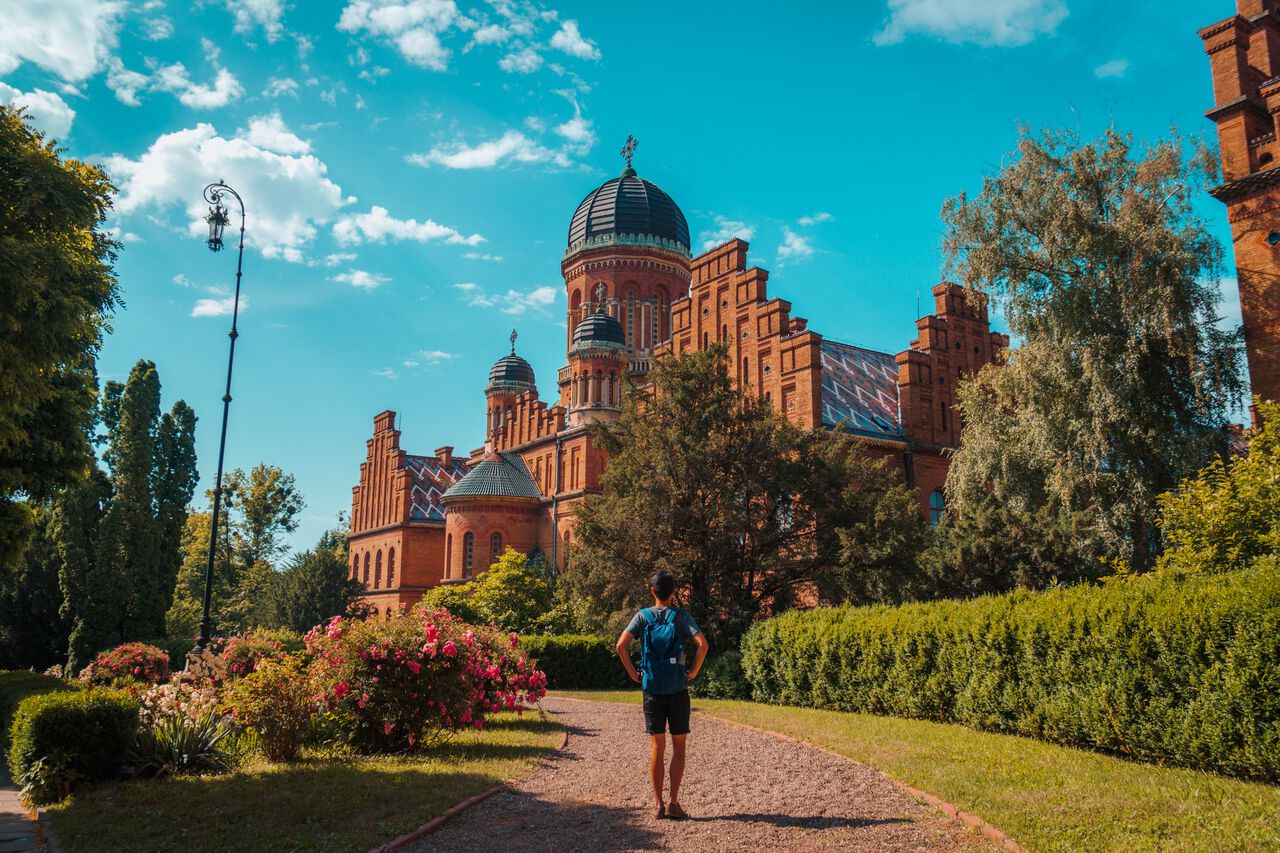
- One of the most impressive architectural wonders in Ukraine is Chernivtsi National University in Chernivtsi, a remnant from the Austro-Hungarian Empire era that still survives today. Here are 7 Best Things to Do in Chernivtsi, Ukraine.
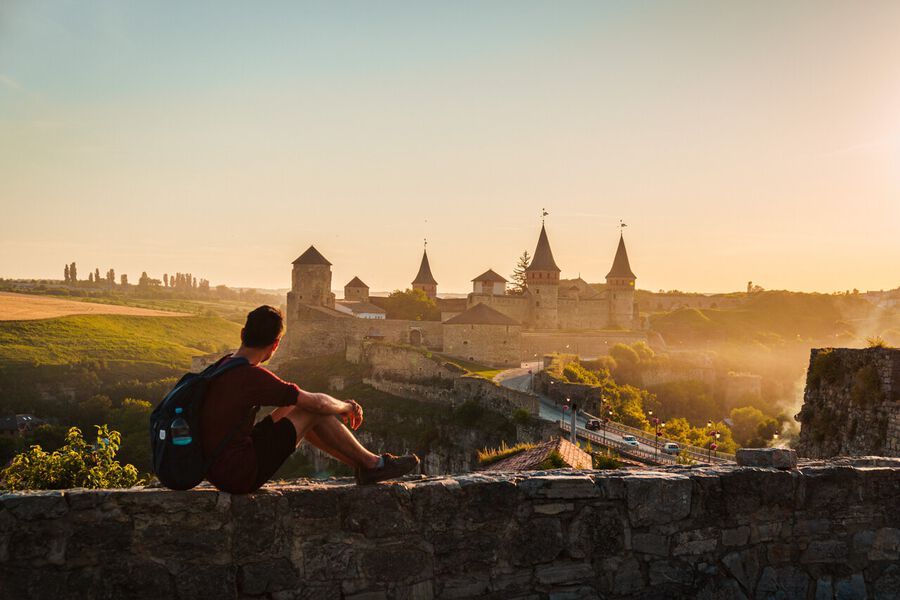
- Kamianets-Podilskyi, an island city home to Kamianets-Podilskyi Castle, one of the most beautiful castles in Ukraine, is a place that seems like it came straight out of a fairy tale and a place that you should not miss. Here's a backpacking guide and top 8 things to do in Kamianets-Podilskyi.
- Odesa is known as the Pearl of the Black Sea, and in order to understand why, you will need to dive deep into its history and even further down underground into its infamous catacombs. Here is a complete guide to tourist attractions and 8 great things to do in Odesa.
- You may not have heard of Kharkiv before, but once you see what I saw when I was traveling in that city, your mind will be blown away by how beautiful it is. Here are the 10 best things to do in Kharkiv, Ukraine.
- Did you know that Kharkiv is also home to the prettiest metro stations in Ukraine? Here are 8 of the most beautiful metro stations to check out in Kharkiv.
- My words are not convincing you about traveling to Ukraine? How about you see it for yourself with my Ukraine travel video? Ukraine Beyond Travel Video
- Want to know where to go after Ukraine? How about visiting Poland? Drop by Kosice in Slovakia or go bar-hopping in Budapest, Hungary. We have travel guides for those too.
- For all articles about Ukraine, visit the Ukraine Travel Guide page.
- You can see all my Eastern Europe-related articles on my Eastern Europe Travel Guide page.
- You can also see all of my Europe-related articles here: Europe Travel Guide page.
- For more of my travel guides like this, visit my Destinations page.
Disclosure: This post may contain affiliate links.




18 Comments
thank you so much for writing this post !! i learned so much from it, but may i ask you a EMERGENCY question?( im in russia now hitchhike all across russia) do i must attatched" airplane ticket of arrival and departure?" because i am planning to hitchhike in ukraine. i checked the official website they didnt say we need to have ticket , so may i ask you ??
Hey Eric,
I don't have direct experience traveling from Russia and this will depend entire on your nationality as well but if the website doesn't say you need it, then I think that's good enough. Just make sure you are looking at the right list. :)
Thank you so much for this information. I would like to confirm one thing about the Flight tickets. Is it mandatory to book confirmed flight tickets or just an Itinerary enough?
Hi Shameer,
The information they provided wasn't clear when I applied and so I got the confirmed flight tickets and they approved my application so if you can, I would recommend you get the confirmed flight tickets but if you do not want to pay for it, I believe a confirmed itinerary provided by either a travel agency or an airline should be enough.
Very informative! BTW, you should update the eligible countries for the e-visa. Philippine is one of the eligible countries. Cheers!
Great Blog BUT do you mind mentioning a bit more about the consular fee payment ?
As I have not received a link to pay the consular fees.
thanks in advance
If I remember correctly, you pay when you submit your application. Have you submitted the application? If you did, your application should be under Submitted visa applications section and you should have already paid for it.
I applied for my E visa on 2nd of November and my flight is on 1st of December. Does anybody know if I’m likely to get the visa before my flight?
Hello Pete,
It is such a lovely blog and helps in every aspect. Just a quick question regarding passport validity to apply for e-vsia? I have Indian passport do I need 3 months or 6 months validity to apply?
Hey Amit,
There's a high chance you will get your visa by then but it could be at the 11th hour because they tend to do that there. Otherwise, you can try calling them up (it's hard to get a whole of them but you can if you try long enough) a week before your flight. I hope this helps!