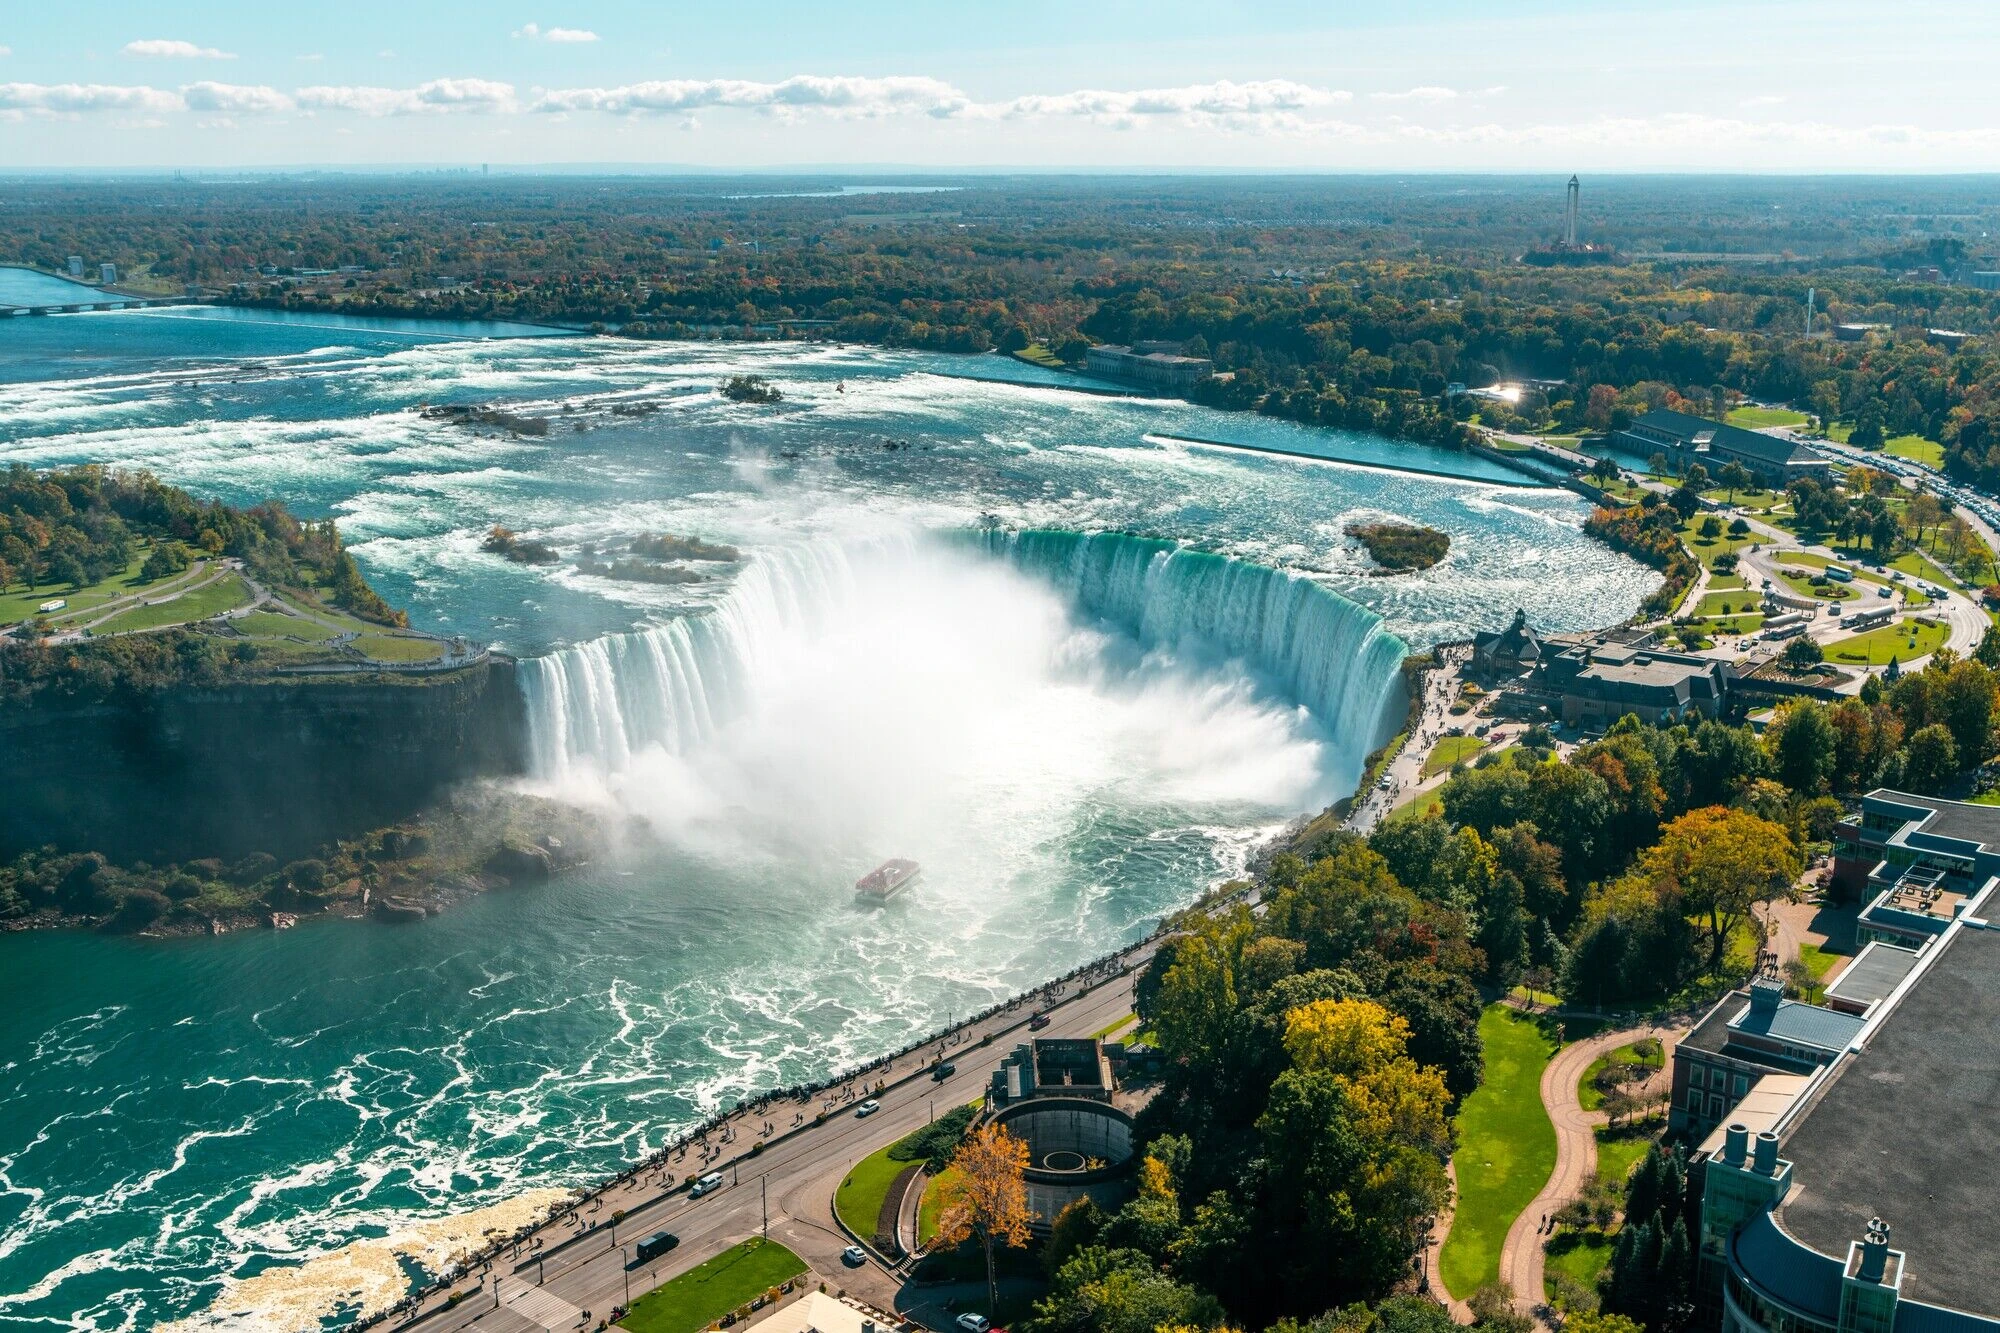
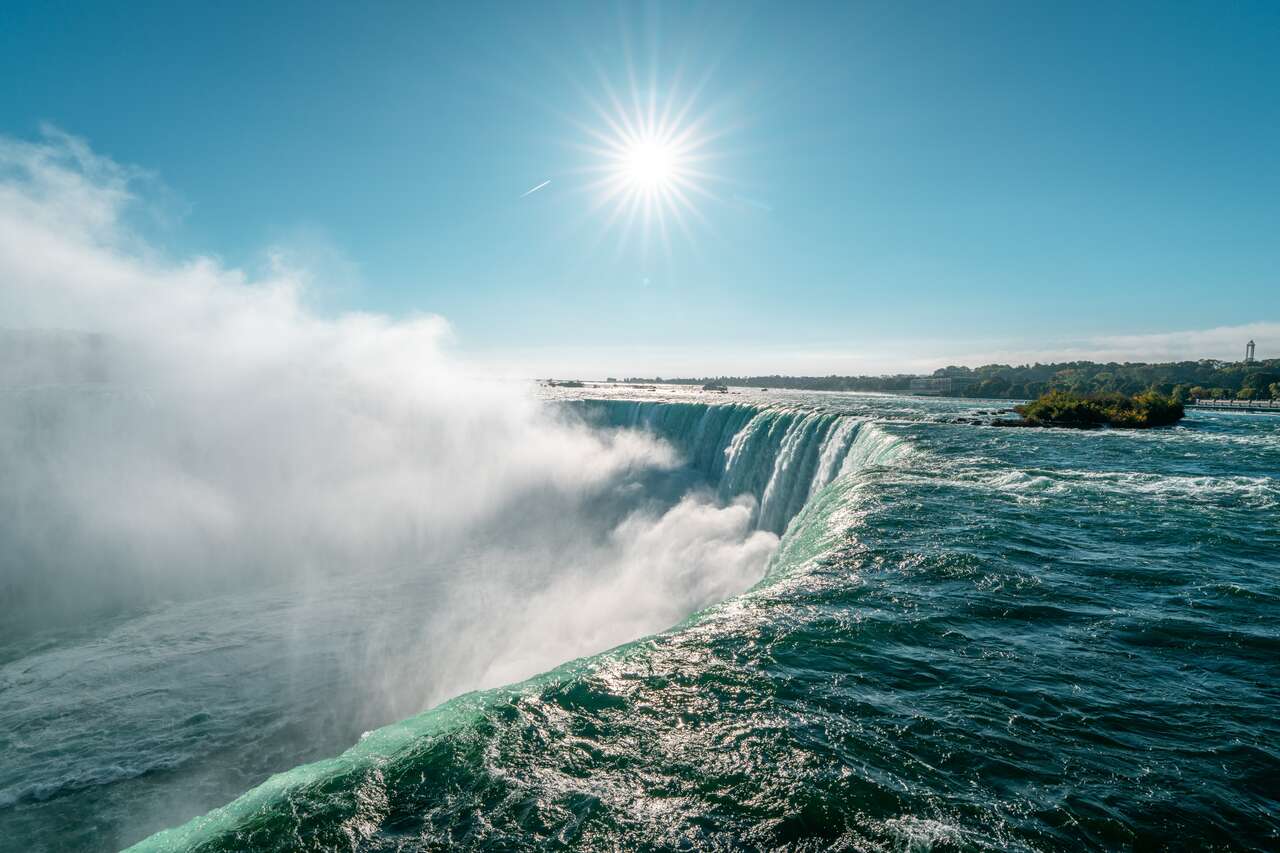
One of the highlights of visiting Canada for me was seeing the mighty Niagara Falls with my own eyes, and I finally made the trip of a lifetime when I was visiting Toronto, and my god, it was worth the hype! The falls are absolutely stunning, and that’s coming from someone who has seen many epic waterfalls in my life, including Victoria Falls and Iguazu Falls.
After spending a day at Niagara Falls and experiencing nearly everything it has to offer, I’ve put together the perfect one-day itinerary to help you plan an unforgettable trip. From tips on how to get there to must-see attractions, here’s your complete travel guide to exploring Canada’s breathtaking Niagara Falls.

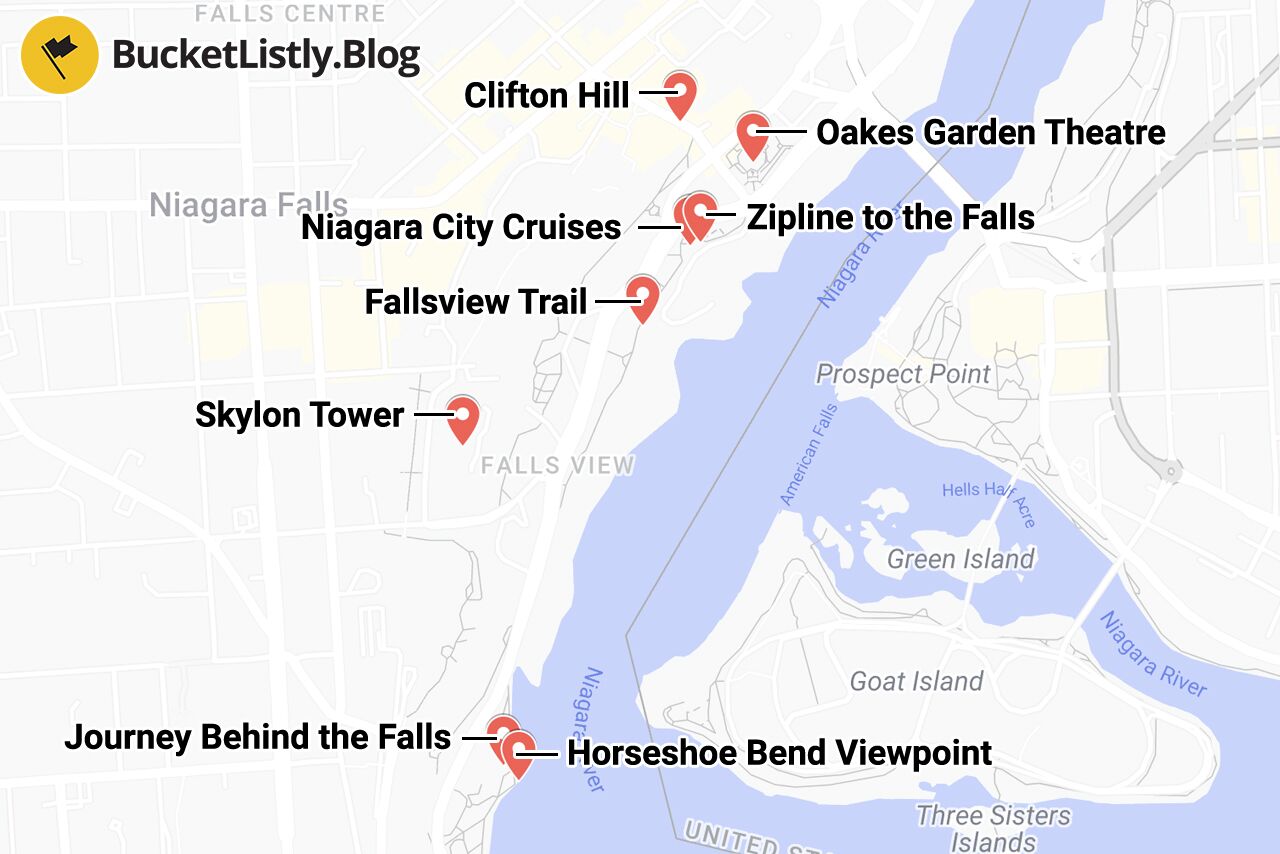
Niagara Falls Itinerary Map
Quick Summary
| ♥️ Must Visit: | See Niagara Falls from Above at Skylon Tower |
|---|---|
| 👍 Must Do: | Take the Niagara City Cruises |
| 💎 Hidden Gem: | Enjoy a quiet time at Oakes Garden Theatre |
| 🥘 Place to Eat: | Unwind at Clifton Hill |
| 🛌 Place to Stay: | Niagara Falls Marriott Fallsview Hotel & Spa |
| 🌤️ When to visit: | All year round |
| 🏃♂️ Getting around: | Walk |
8 Best Things to Do in Niagara Falls
1. See Niagara Falls from Above at Skylon Tower
- 📍 Location: Skylon Tower [Map Link]
- 🕐 Opening Hours: 10 AM - 10 PM
- 💰 Entry Fees: 11 USD
When I first saw photos of Niagara Falls from above, I thought I’d probably need to go on a pricey helicopter tour or get a permit to fly my drone to capture those epic shots. But the moment I arrived at the Skylon Tower, I immediately knew this was where those iconic photos were taken, not from a helicopter!
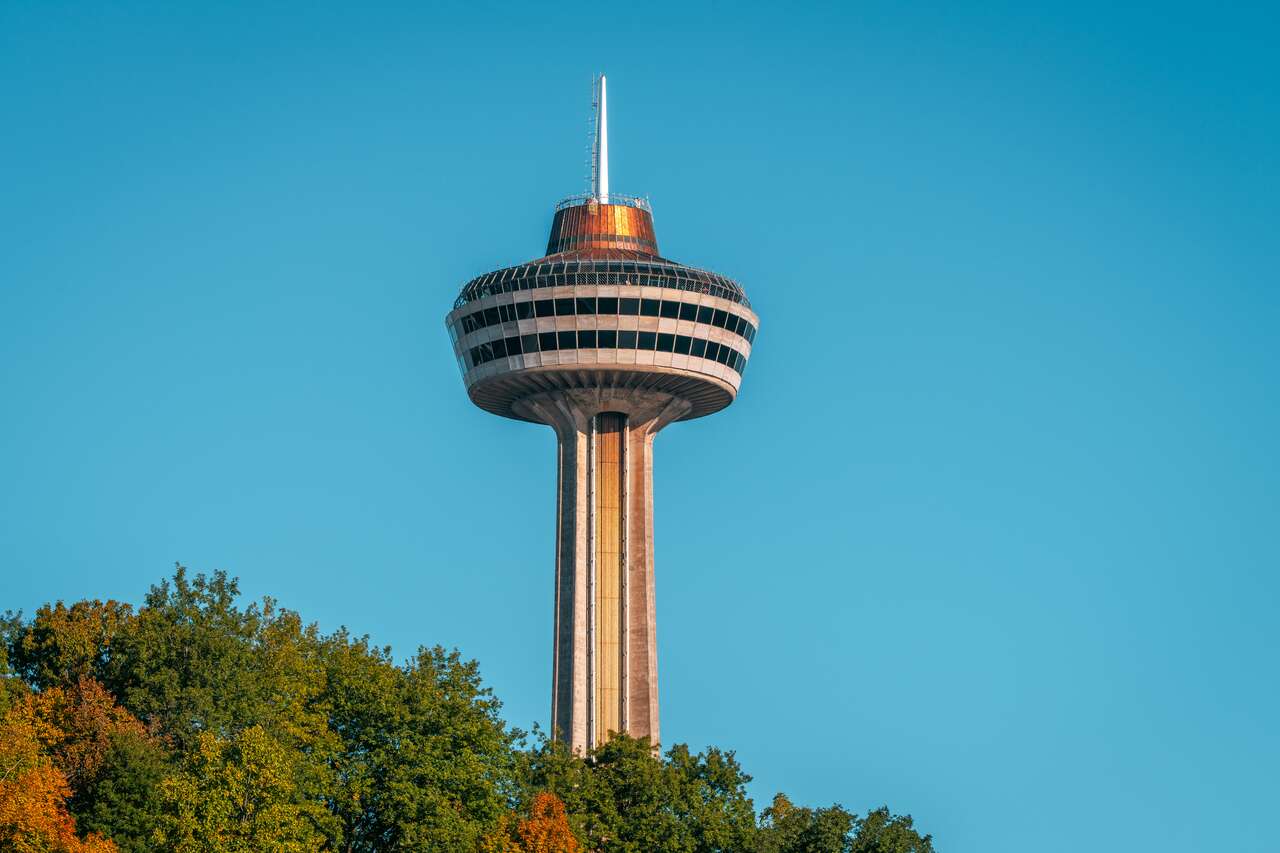
The Skylon Tower is an observation deck that stands 520 feet tall from ground level and towers 775 feet above the falls, offering a perfect 360-degree panoramic view of not just the falls but the entire region. Who needs a drone when you have the Skylon Tower, right?
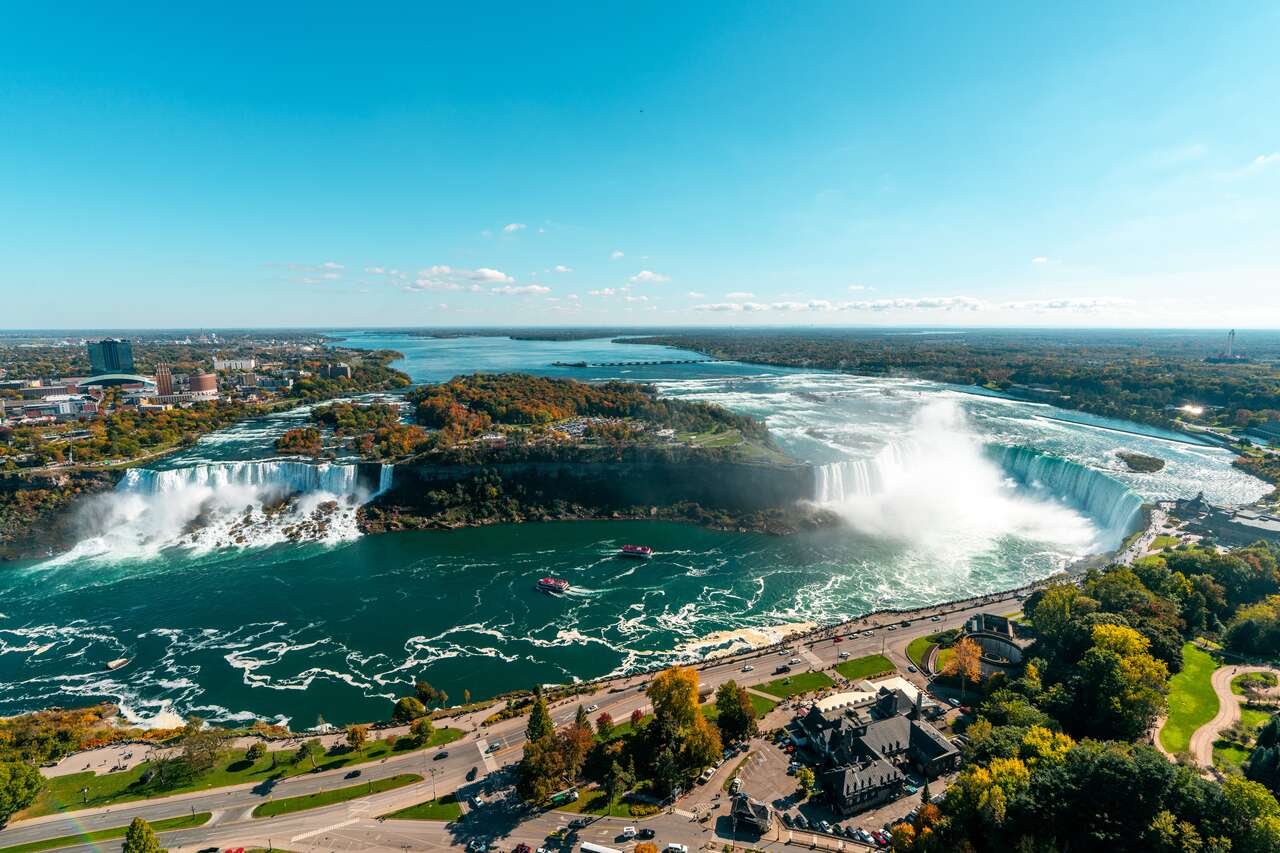
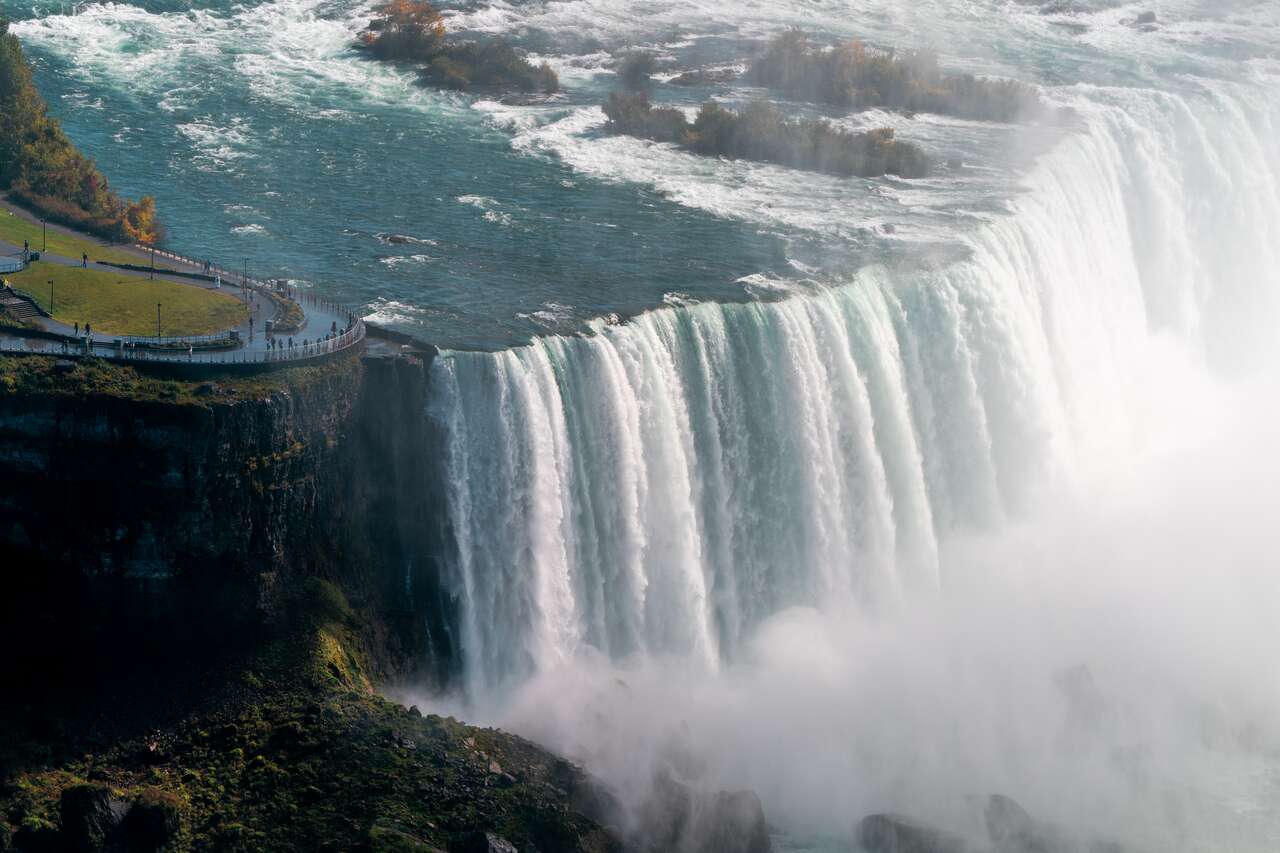
From up there, you can see the Horseshoe Falls and Niagara Falls in their entirety, which makes you appreciate the true scale of it all even more! You can also see much of the river that feeds into the falls, as well as the landscape surrounding it, not just the Canadian side, but also the US side. It’s probably the best viewpoint you’ll get of the falls, hands down.
- Cadillac Motel Niagara (Budget)
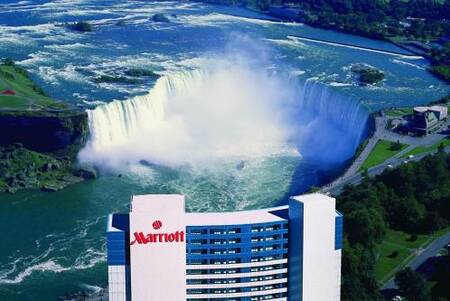
- Niagara Falls Marriott Fallsview Hotel & Spa (Mid-Range) 👍 Top Pick
- Sheraton Fallsview Hotel (High-End)
- Entry Ticket to Skylon Tower (2 hours) 👍 Top Pick
- WildPlay Zipline: Ziplining to the Falls (2 hours)
- Journey Behind the Falls Entry Ticket (2 hours)
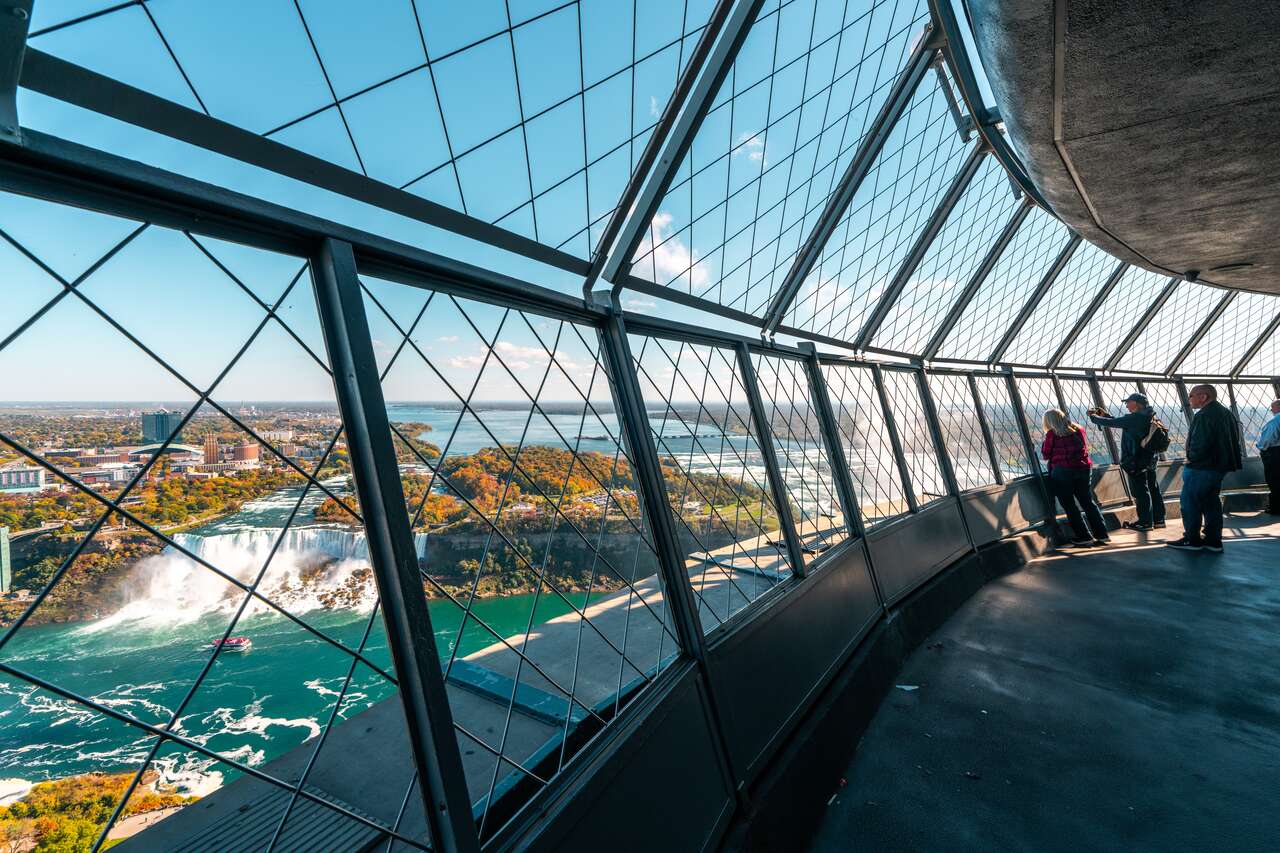
To get up there, you will have to purchase the ticket here and book a time slot. If it's not crowded, you can get there a bit early, and they will let you up even before your time slot. As you are ushered into the elevator, the staff will explain what to expect up there. You can spend as long as you like up there as long as it isn't too crowded.
I went up around 3 PM, and it wasn't crowded at all. Since I visited in October, the lighting was perfect. I imagine it can get quite crowded during peak season, especially at sunset, which is another reason to visit during the shoulder seasons. If you're a photographer, you'll get better lighting in the afternoon when the sun shines directly on the Horseshoe Falls, rather than it being in the shade.

The Skylon Tower is open from 10 AM to 10 PM on weekdays and 9 AM to 11 PM on weekends, with an entrance fee of 11 USD per person. Be sure to book your ticket in advance and reserve your time slot here to secure your spot. This is, without a doubt, the best viewpoint you can get at Niagara Falls, so make sure to head up the Skylon Tower when you're visiting!
Where to Stay in Niagara Falls?


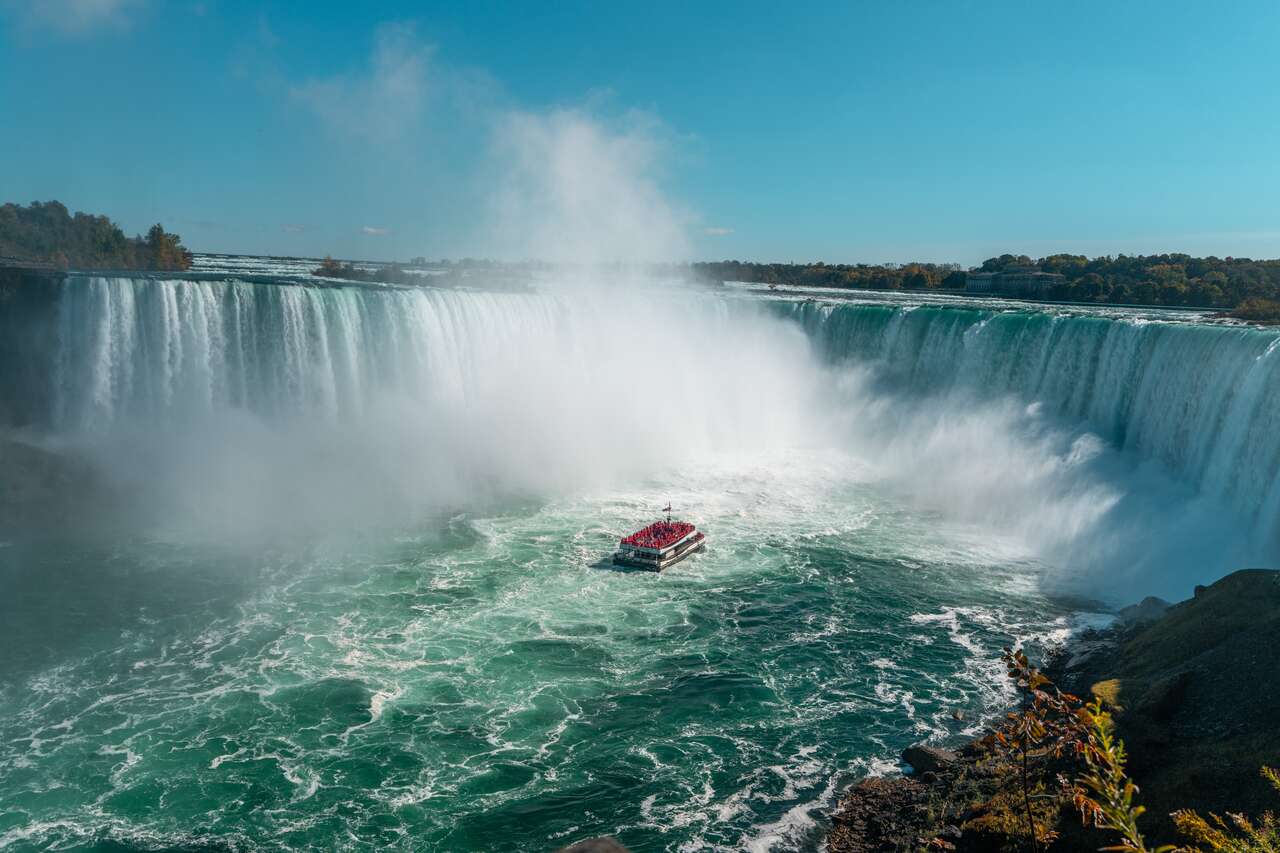
2. Take the Niagara City Cruises
- 📍 Location: Niagara City Cruises [Map Link]
- 🕐 Opening Hours: Daily 10 AM - 6:30 PM
- 💰 Entry Fees: 30 USD (42.95 CAD)
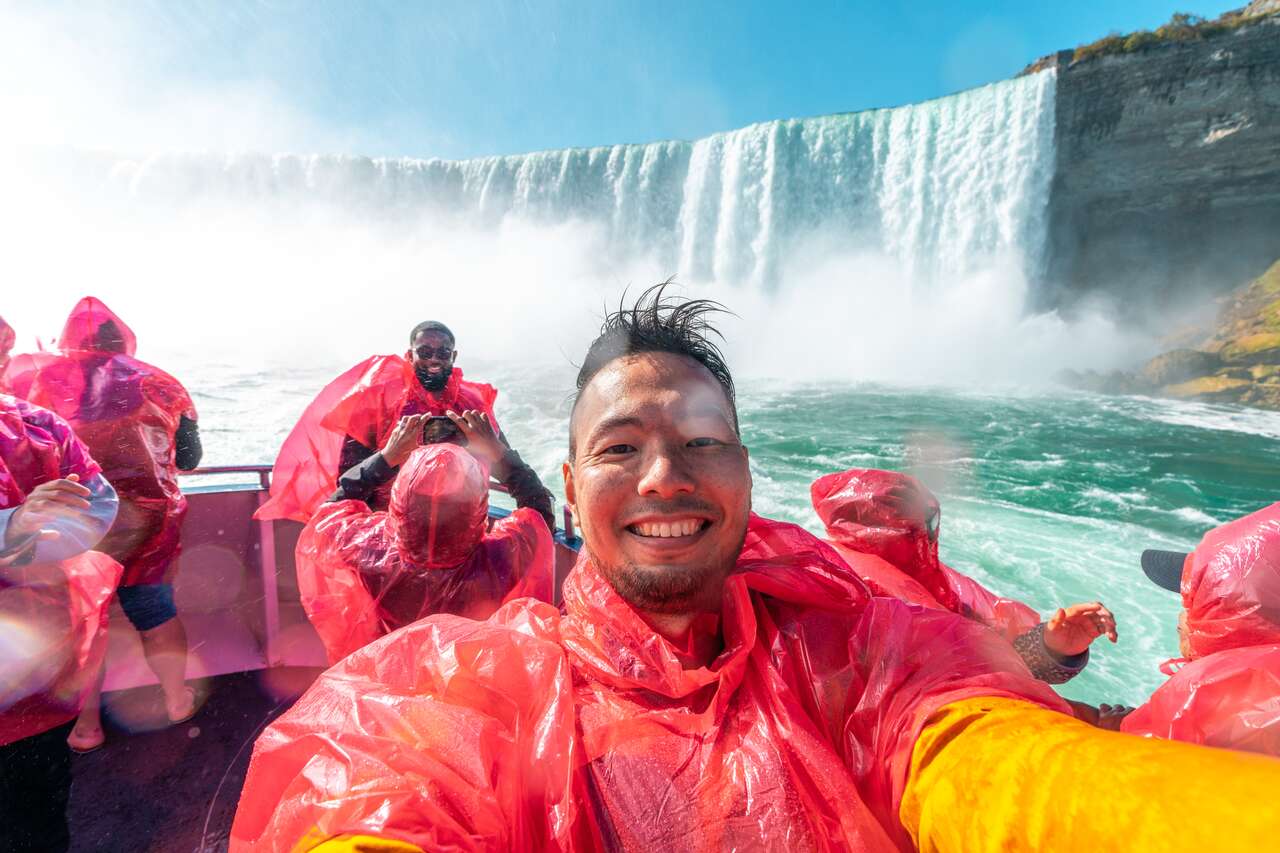
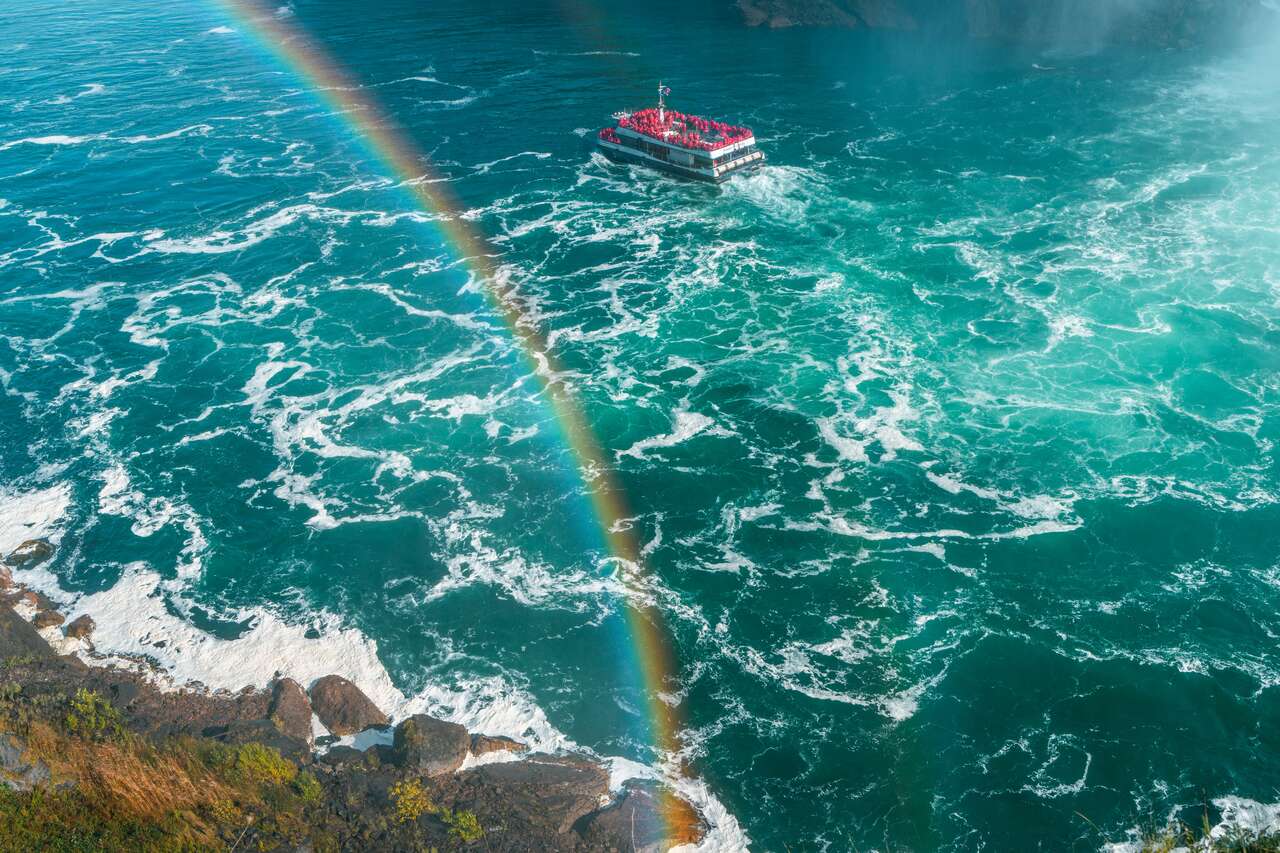
I thought taking a Niagara City Cruise would be one of those crowded, touristy activities that probably wouldn't be very enjoyable, and I convinced myself it was just a tourist trap. But since I had to try it out for work 😉, I decided to give it a go, and oh my god, was I completely wrong! It would have been a huge mistake to miss it just because of my poor preconceptions!
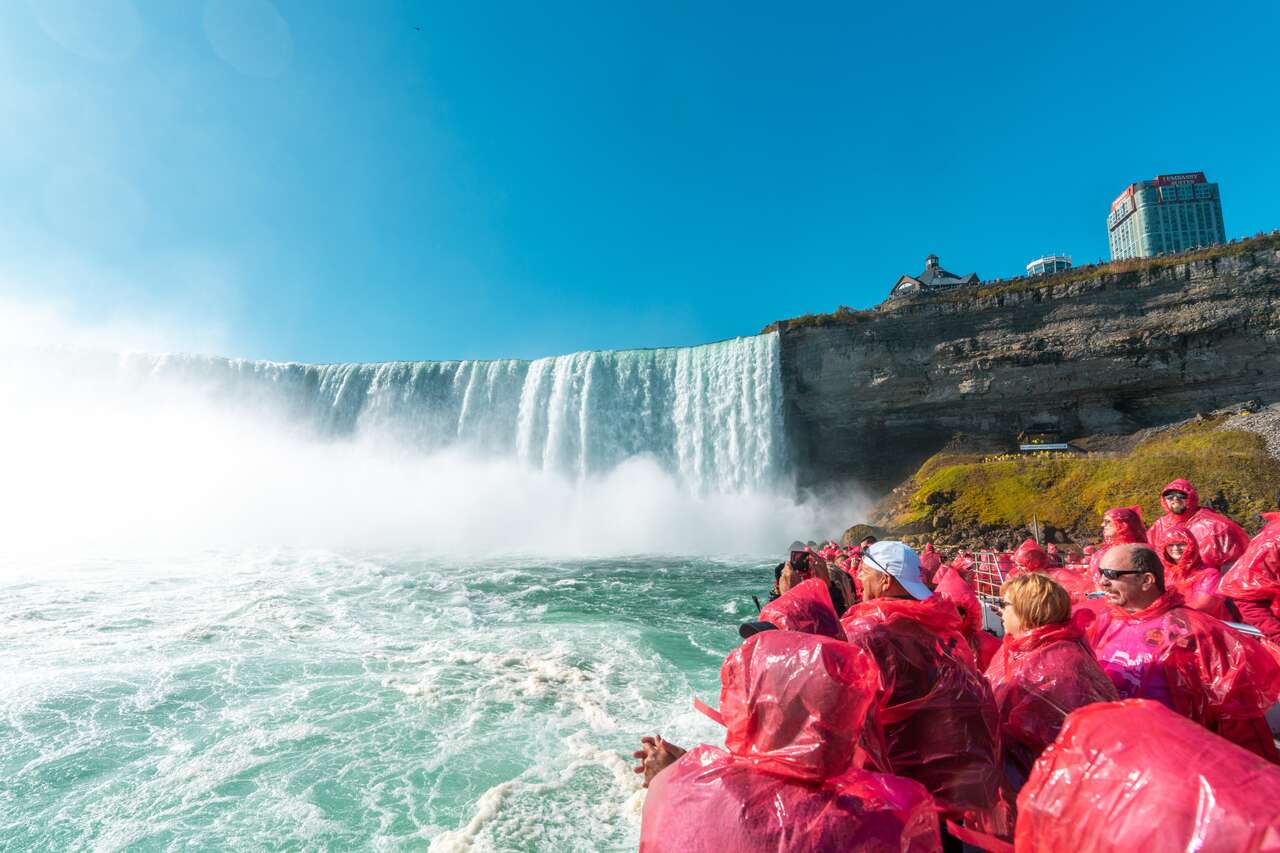
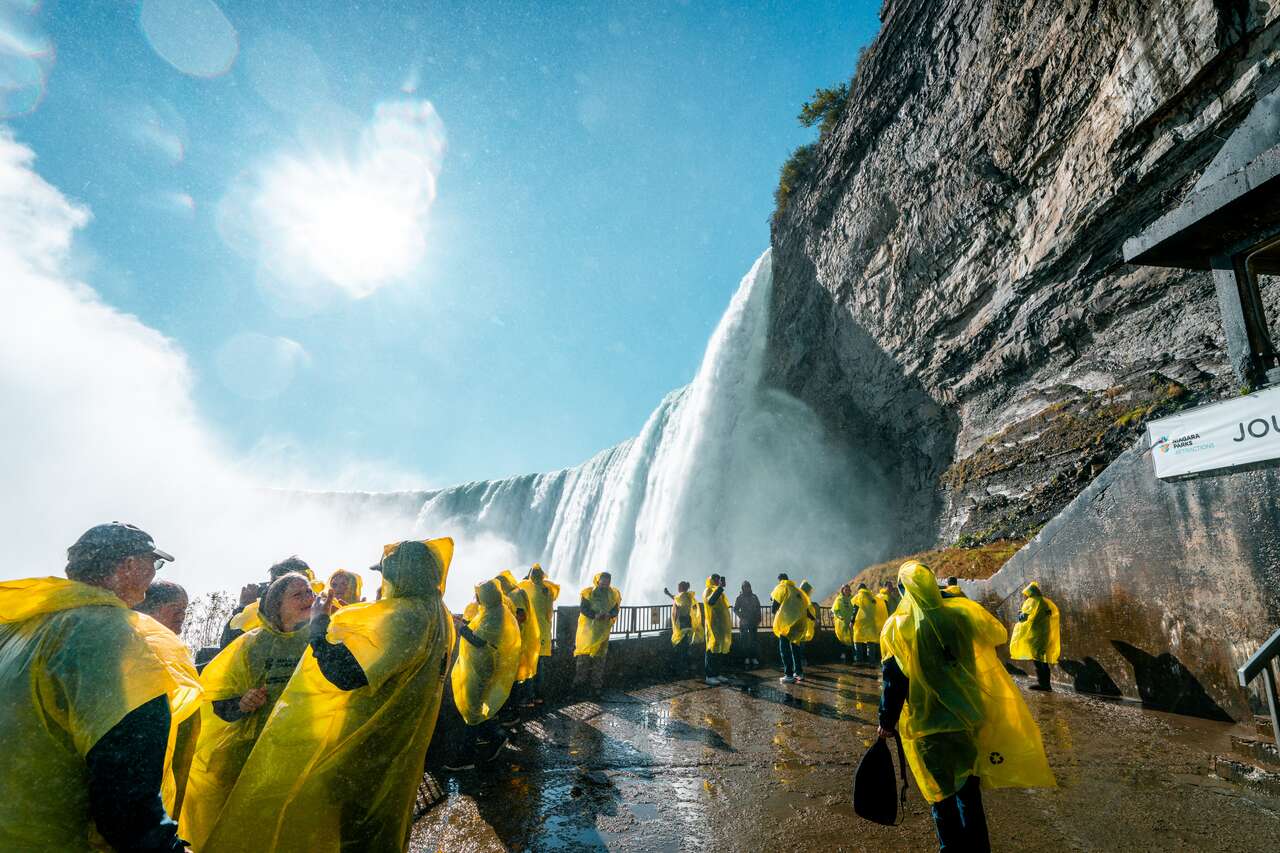
Taking the Niagara City Cruise was probably the most fun activity you can do here, and you'll feel much closer to the falls than with any of the other activities I’ve mentioned. Of course, you’ll be right in the middle of the Horseshoe Falls’ epic spray as you cruise along the river, getting up close and personal with the falls, by that, I mean getting completely soaked by it 😂.
The boat ride will also take you incredibly close to the waterfalls on the US side, allowing you to see just how much more epic the Canadian side really is 😂. You’ll definitely appreciate being on the Canadian side rather than the US side!
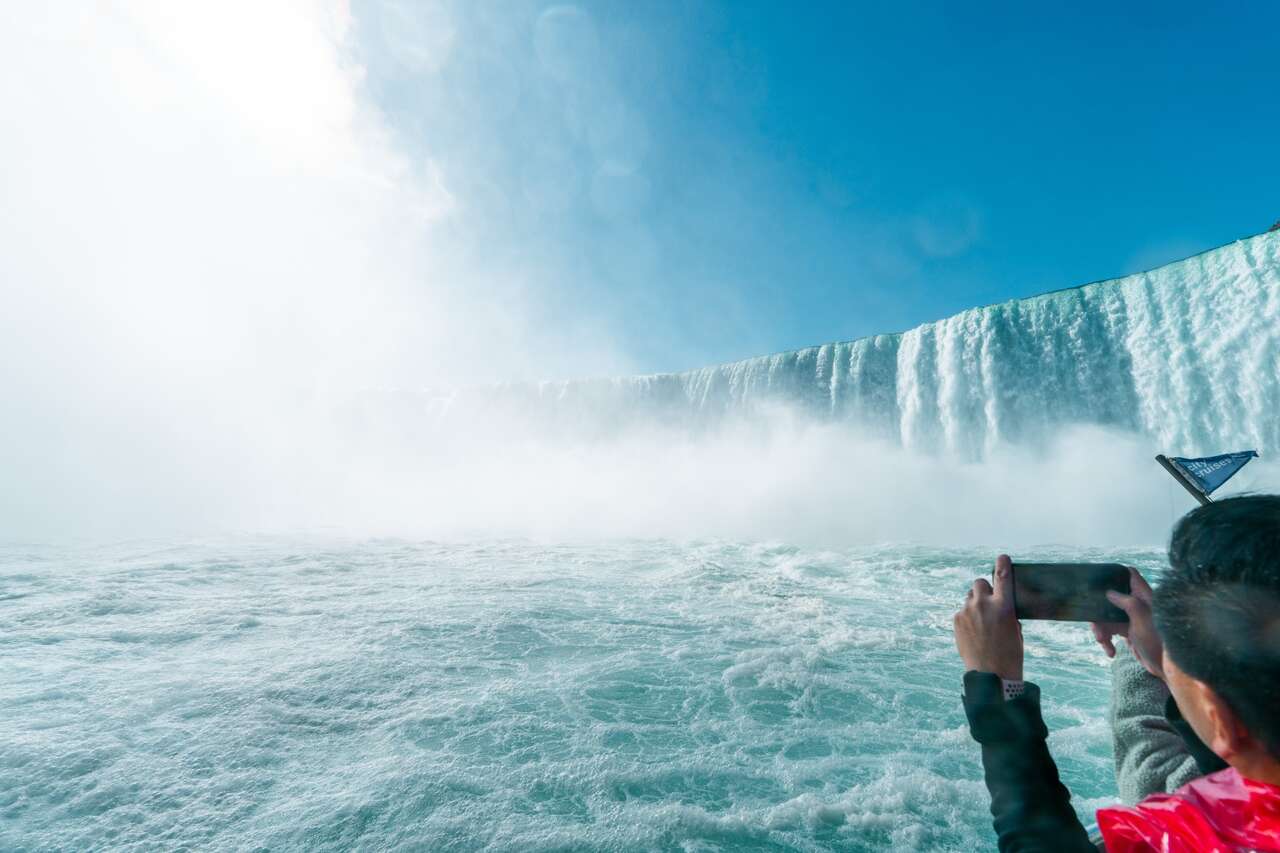
The cruise took about 20 minutes, which was plenty of time to get completely soaked by the waterfall and snap tons of awesome photos for the memory. You can probably tell from the photos that I had a blast here 😂.

To get on the cruise, you can either book your ticket online and select a time slot before your visit, or you can purchase it at the kiosk by the falls, where you'll be assigned the next available time slot. There were quite a lot of people when I was there, but the way they managed the crowd was very efficient and orderly. I was able to get on the cruise in less than 20 minutes of waiting, which I thought was pretty impressive.

The ticket price is 30 USD (42.95 CAD) per person, which isn’t cheap, but it was definitely worth the experience in my opinion. With the ticket, you’ll get a rain poncho to help you avoid getting soaked (though, you’ll still get wet anyway 😂), and you can either recycle it or keep it as a souvenir at the end of the voyage. The cruise operates daily from 10 AM to 6:30 PM, with departures every 15 minutes. Despite the price tag, I think you're going to love this once-in-a-lifetime experience, trust me!
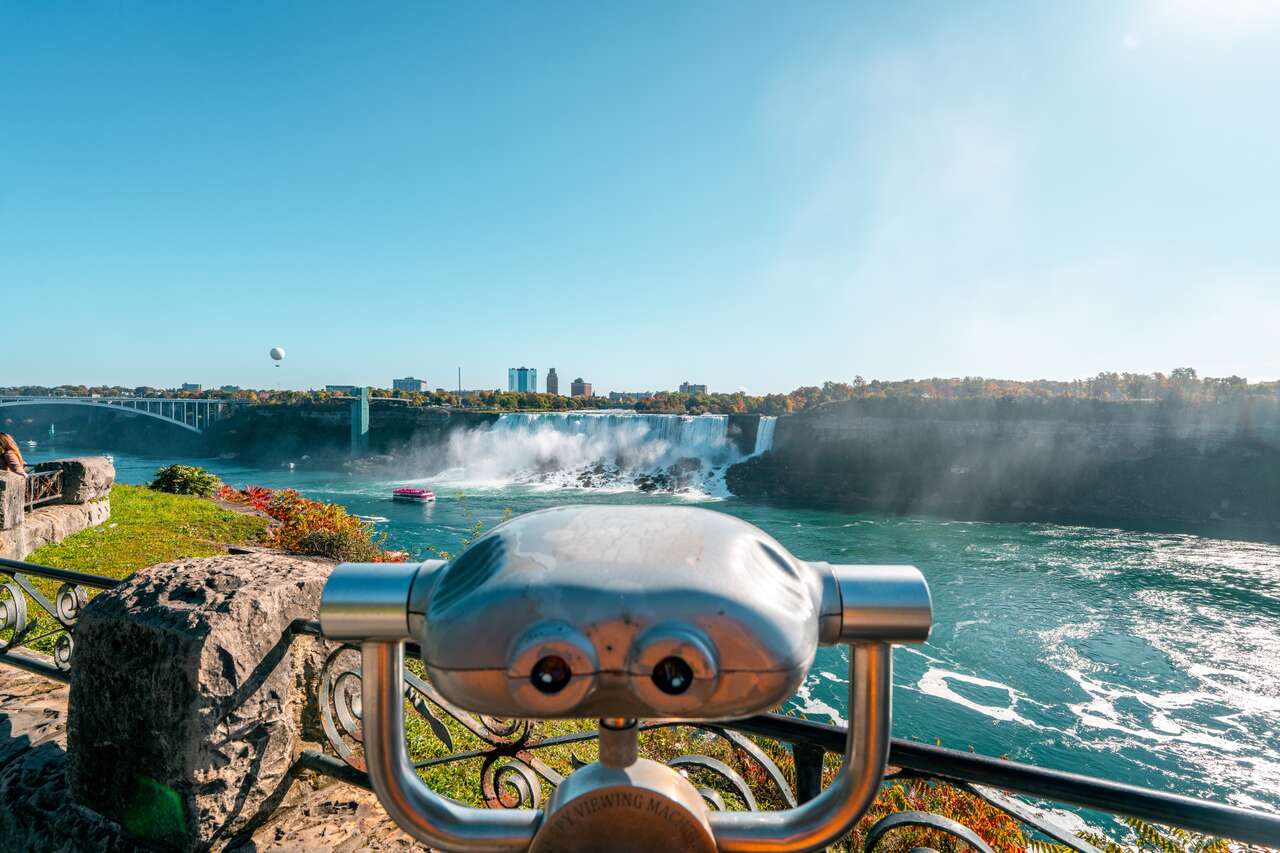
3. Admire the Horseshoe Falls from the Viewpoint
- 📍 Location: Horseshoe Bend Viewpoint [Map Link]
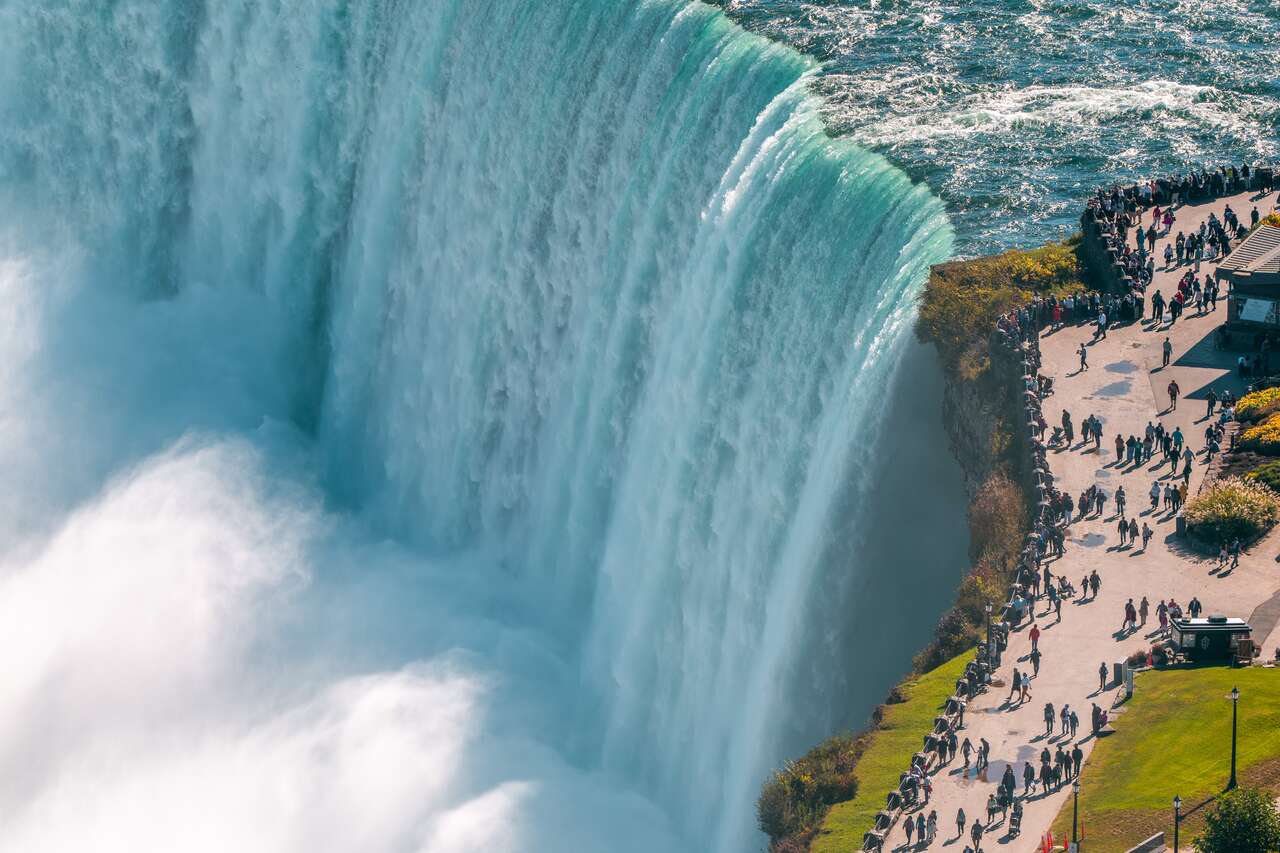
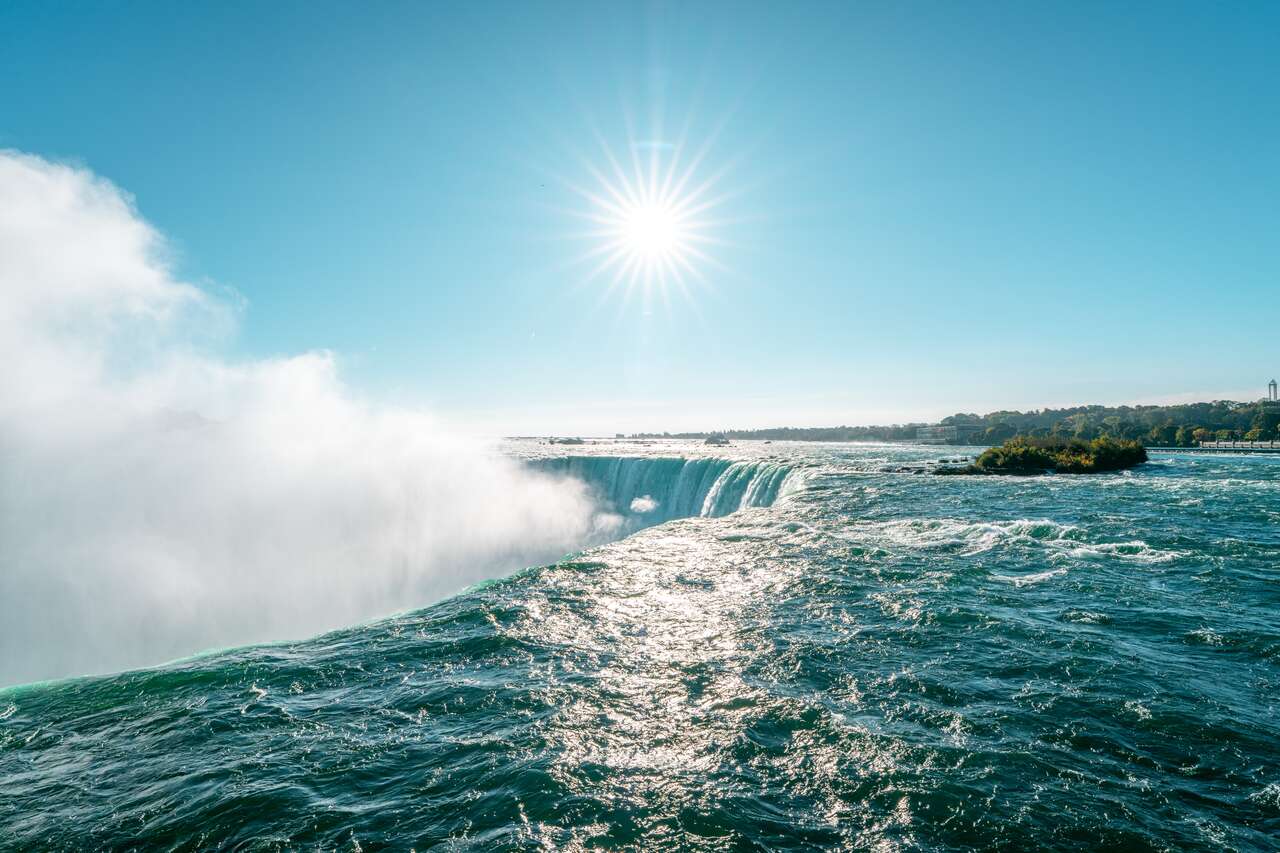
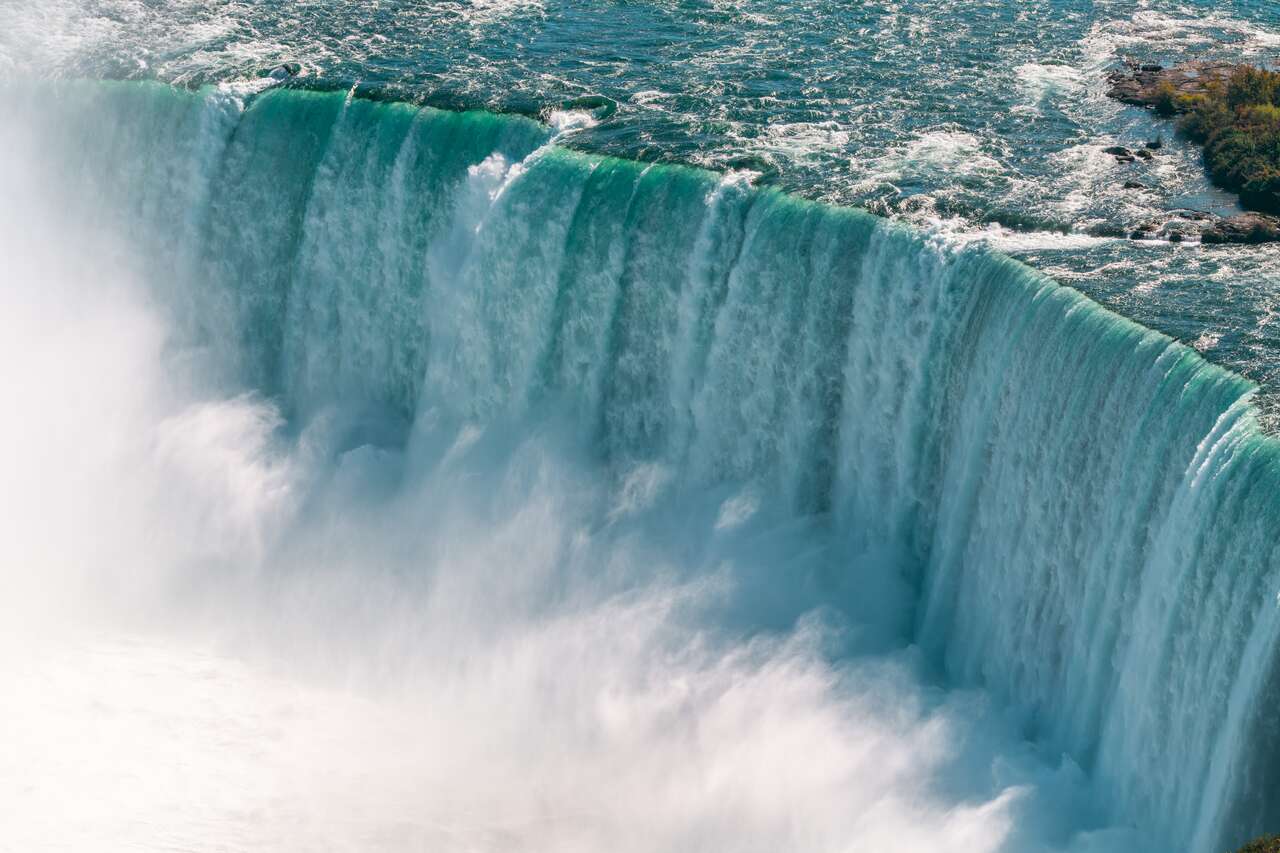
The moment you arrive at the falls, you’ll be greeted by the incredible sight of the Horseshoe Falls, one of the most iconic and prominent features of Niagara Falls. In fact, it’s probably the view most commonly shown in pictures of Niagara Falls. The best viewpoint you can get (from the ground, that is) is at this Horseshoe Bend Viewpoint, located right in front of the visitor center.
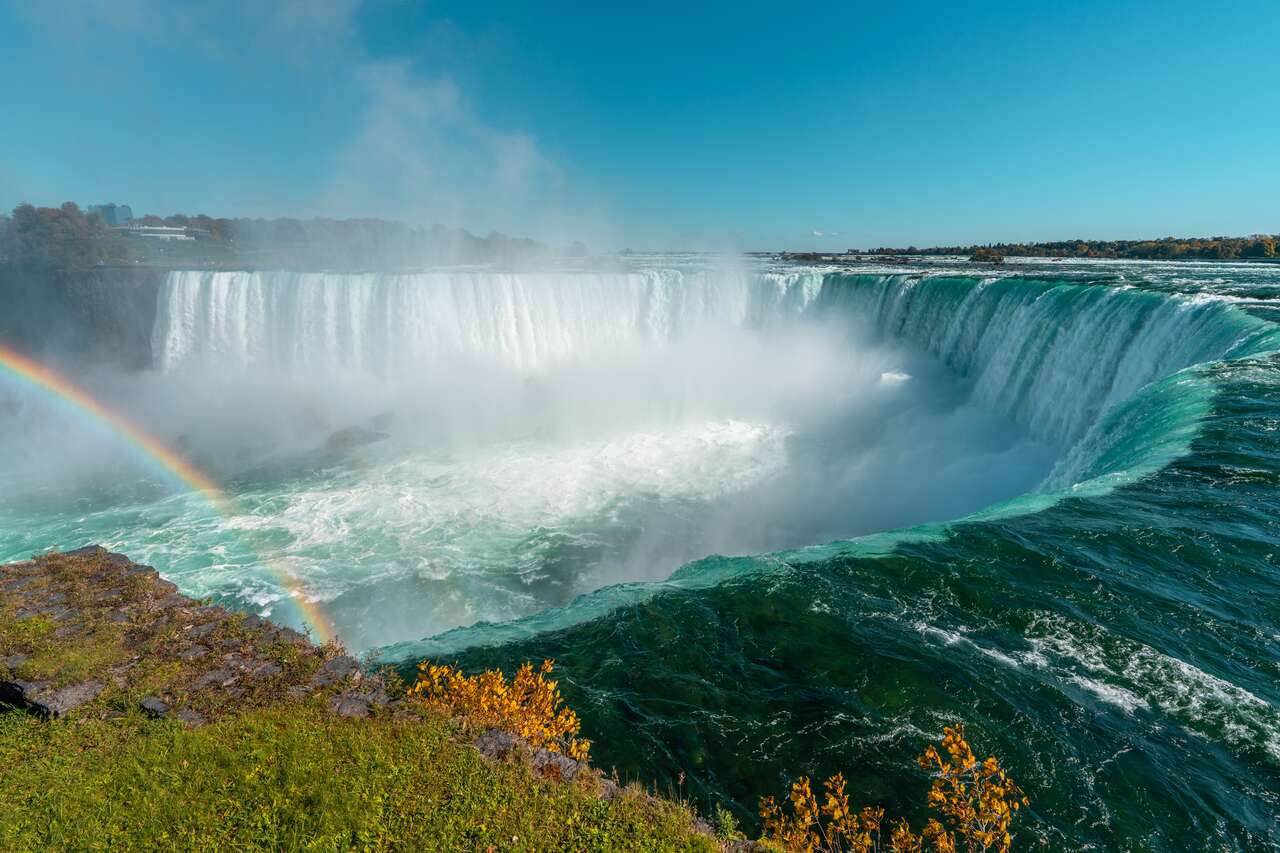
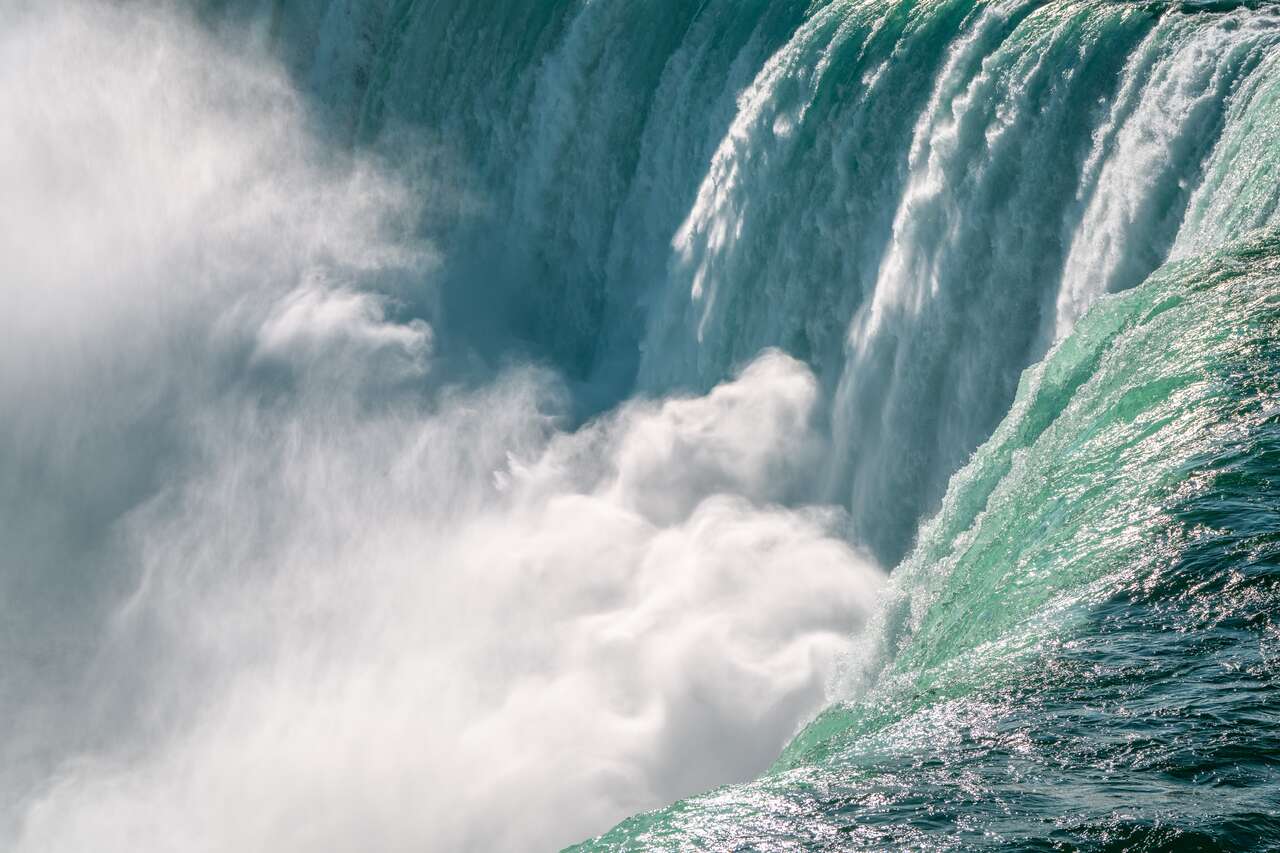
This is where you can truly appreciate the sheer power of the current, as it plummets over 57 meters (188 feet), creating an epic spray that spreads for miles. Sometimes, when the sun is out, a small cloud forms, blocking the sun and painting the sky with not just one, but a double rainbow!
I found that you're more likely to see rainbows in the afternoon when the sun is shining directly on the falls (from the Canadian side, at least). This is another great reason to hang around the falls throughout the day so you can experience it in different lighting. It's also a popular spot for selfies, so expect to wade through crowds to find the perfect spot for your own photo.
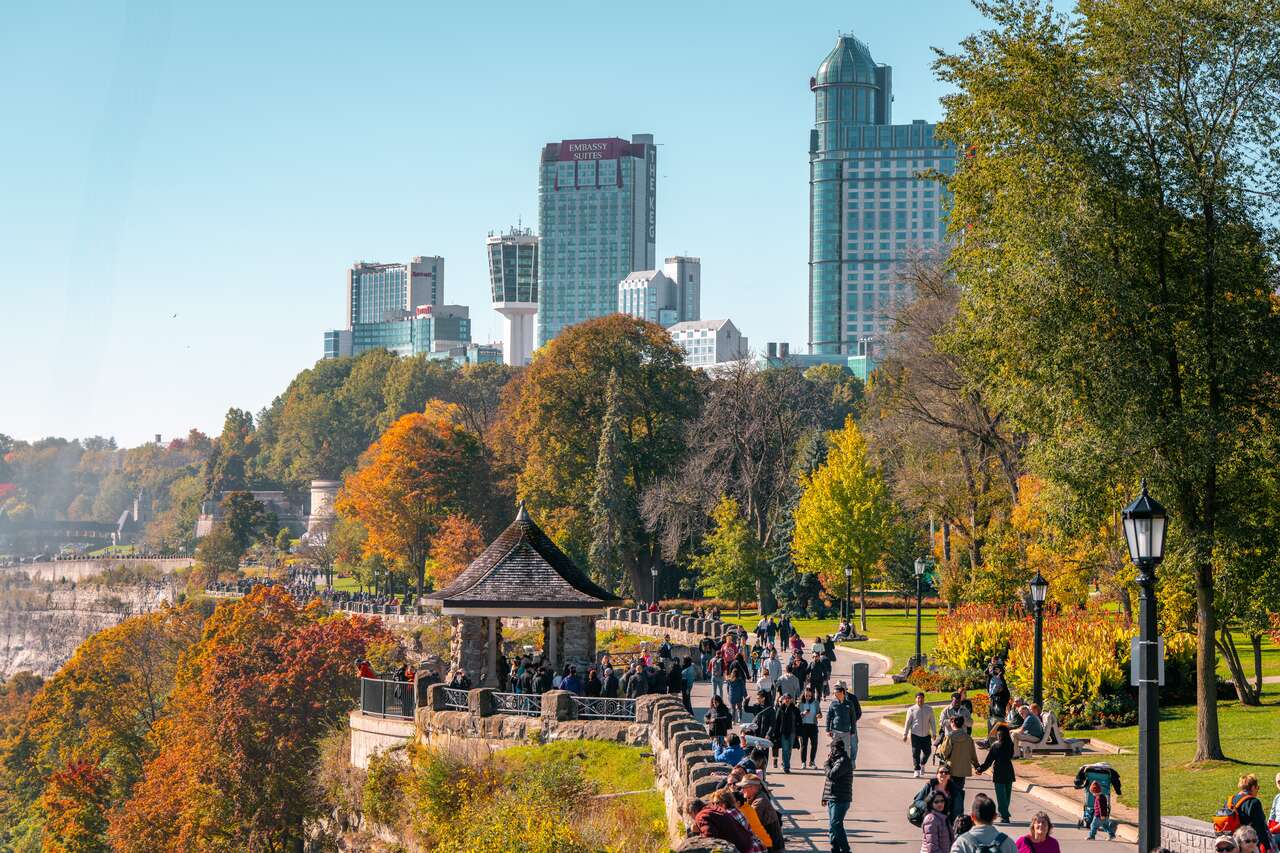
4. Walk the Fallsview Trail
- 📍 Location: Fallsview Trail [Map Link]
All of the attractions I’ve mentioned are connected along the beautiful Fallsview Trail, a scenic pathway that runs along the Niagara River on the Canadian side, offering some of the most breathtaking views of Niagara Falls. You will find plenty of viewpoints along the pathway, so if the Horseshoe Falls viewpoint is too crowded, you can always stroll a little further down the river to enjoy a more distant yet stunning view of the falls.
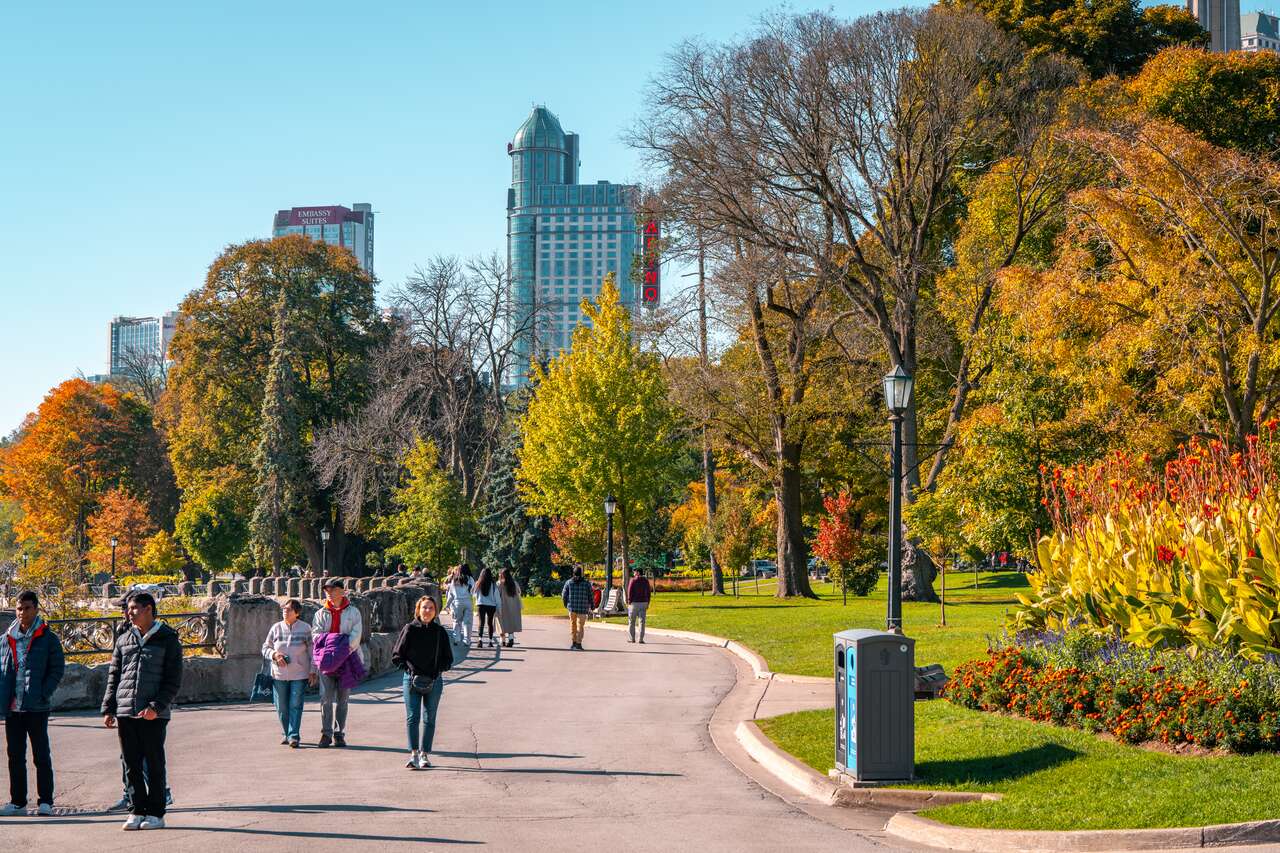
The pathway is approximately 1.1 km, and it will take you about 15 minutes to walk from one end to another. It's a pretty easy walk along a flat pathway, and anyone of all ages should be able to do it. The view along the trail is absolutely incredible, so be sure to look back at the fall every once in a while.
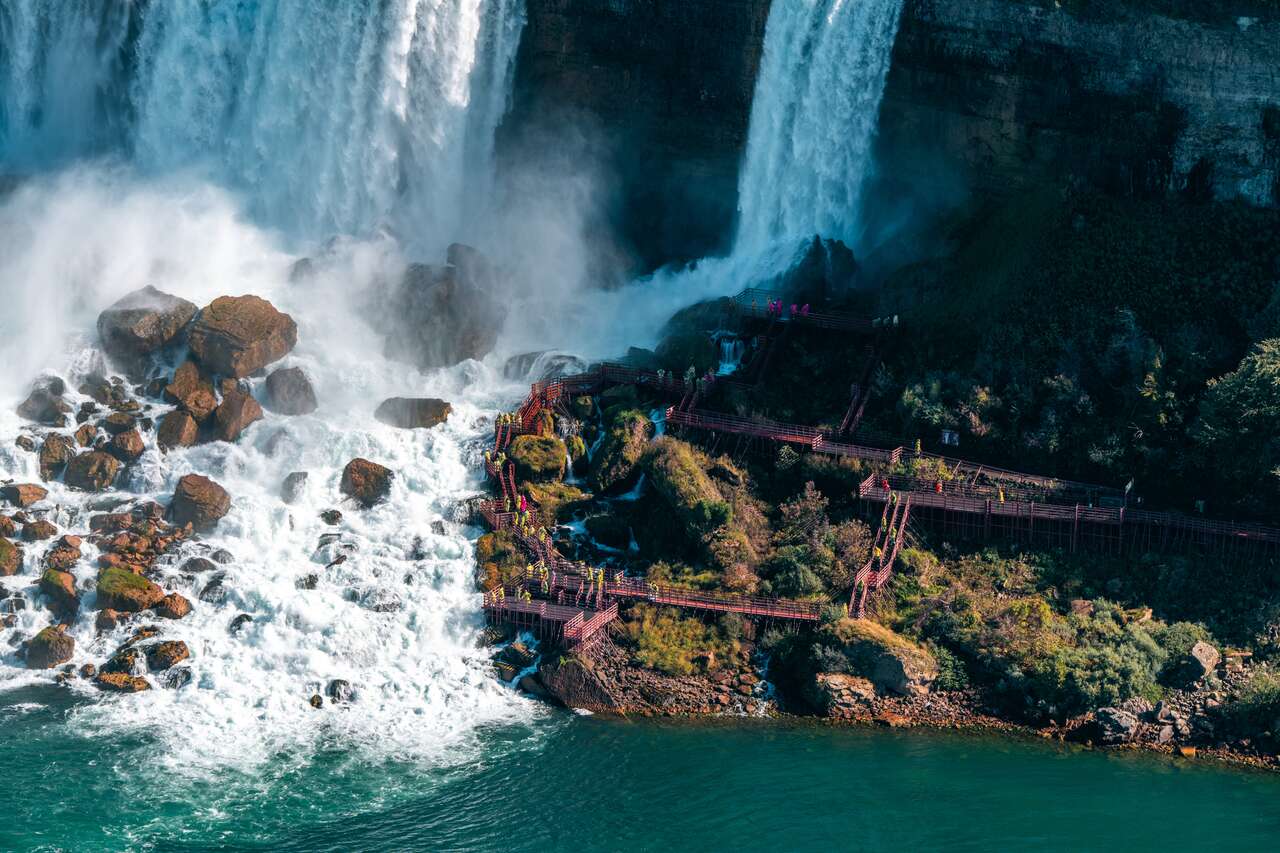
You’ll not only get to see the Horseshoe Falls from the pathway, but also the American Falls and Bridal Veil Falls on the other side of the river. The path is lined with lush greenery, gardens, and well-maintained walkways, making it a perfect place to stroll and fully absorb the incredible views of Niagara Falls at your own leisure.
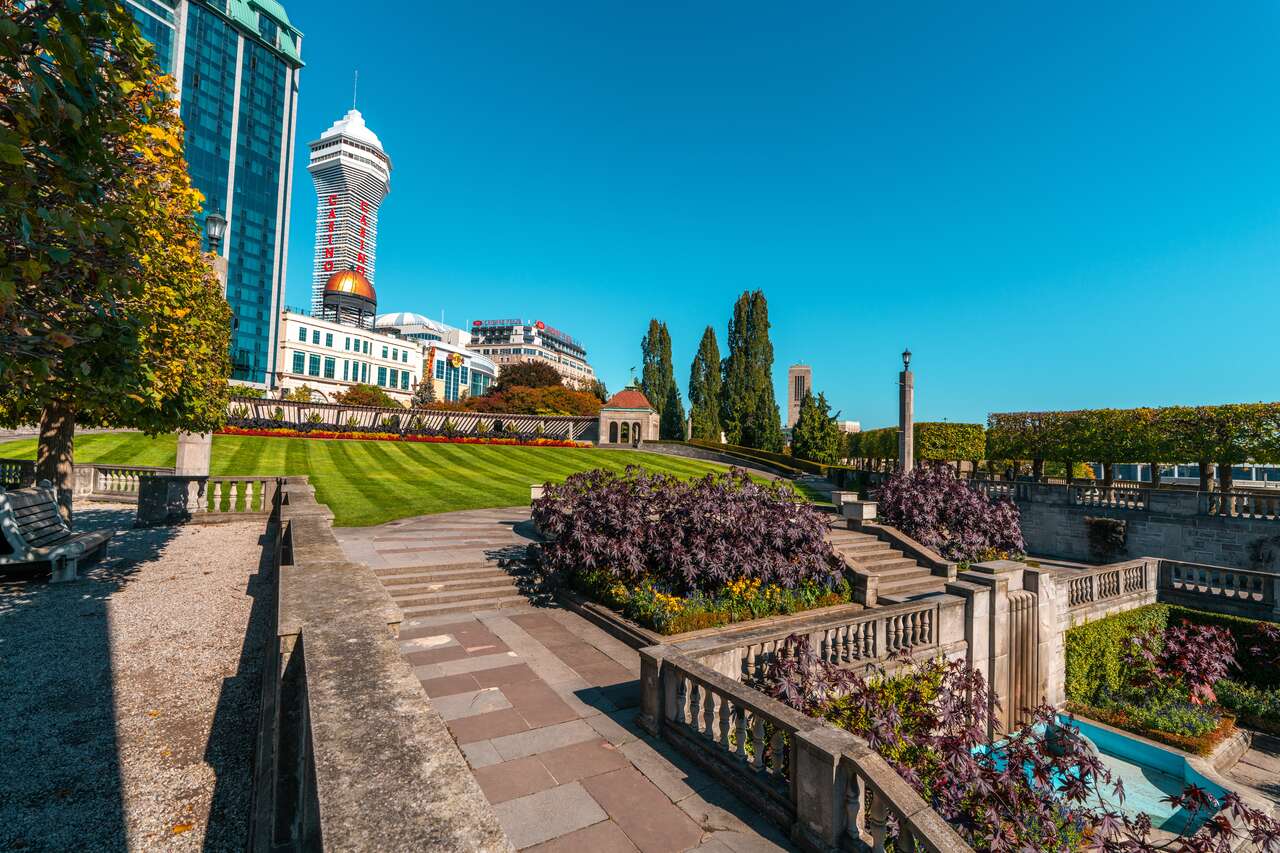
5. Enjoy a quiet time at Oakes Garden Theatre
- 📍 Location: Oakes Garden Theatre [Map Link]
One of the gardens I really enjoy is Oakes Garden Theatre, located near the brink of Niagara Falls, between Queen Victoria Park and the Niagara Parkway. It's much quieter than Queen Victoria Park, offering a much-needed sense of solitude, which can be hard to find in a popular place like Niagara Falls. In fact, when I was relaxing on one of its benches, looking at the falls from afar, I didn’t see a single person around, just peaceful surroundings.
The garden features a combination of meticulously designed formal gardens, fountains, and unique sculptures, much like a European-style garden, but on a smaller scale. This is probably why not many people notice it, as most go straight to Queen Victoria Park or the Fallsview Trail.

Fun fact: the space is named after the late William Oakes, a former landscape gardener who helped shape the area. In the middle of the garden, you'll find a small open-air theatre that occasionally hosts small-scale performances for passersby. However, it's usually empty and quiet, making it the perfect spot if you're looking to take a break from all the exploration.
6. Unwind at Clifton Hill
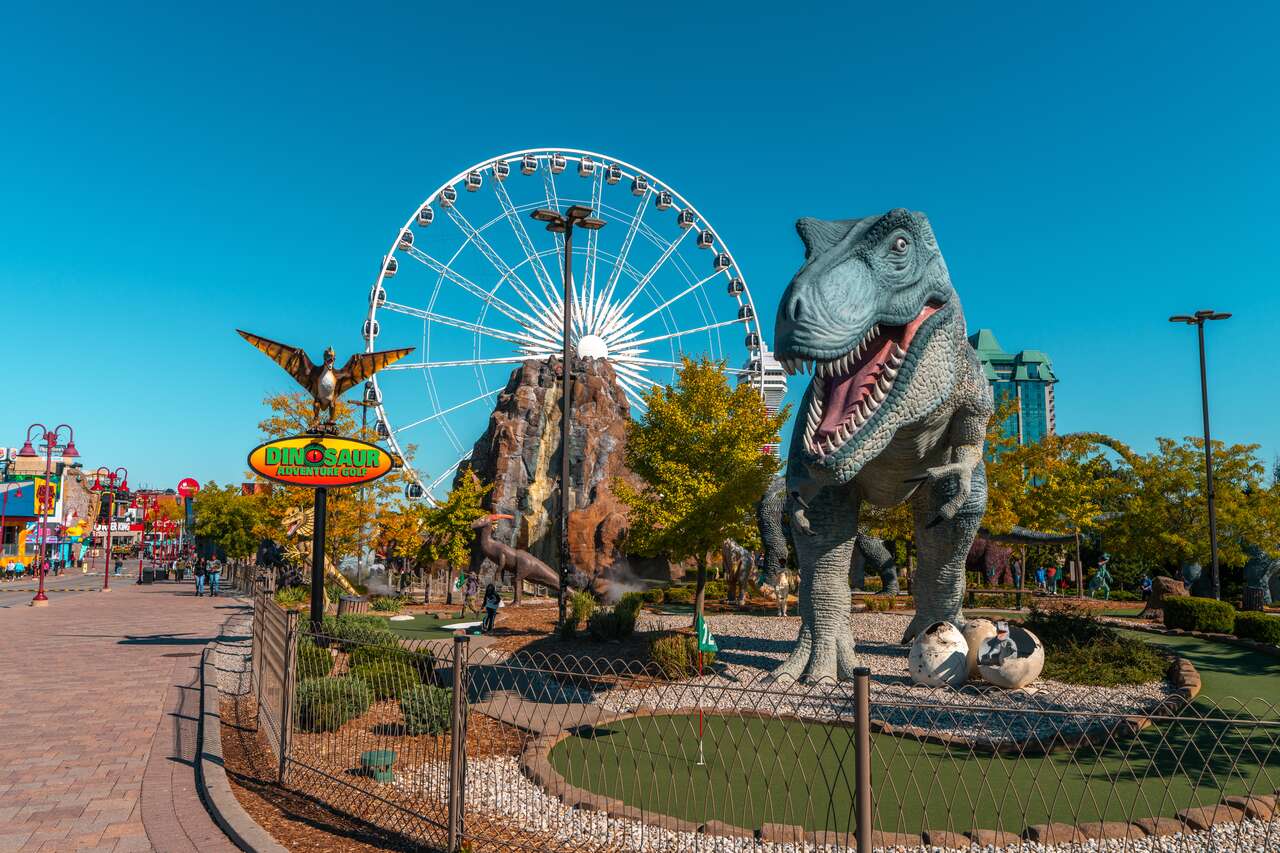
- 📍 Location: Clifton Hill [Map Link]
On the other end of the spectrum, if you are looking for a lively place to hang out, Clifton Hill is definitely where you want to be! Clifton Hill is a famous street and entertainment district located near Niagara Falls, and it is famous for its wide variety of attractions from a giant Ferris wheel to Haunted Houses, and more.
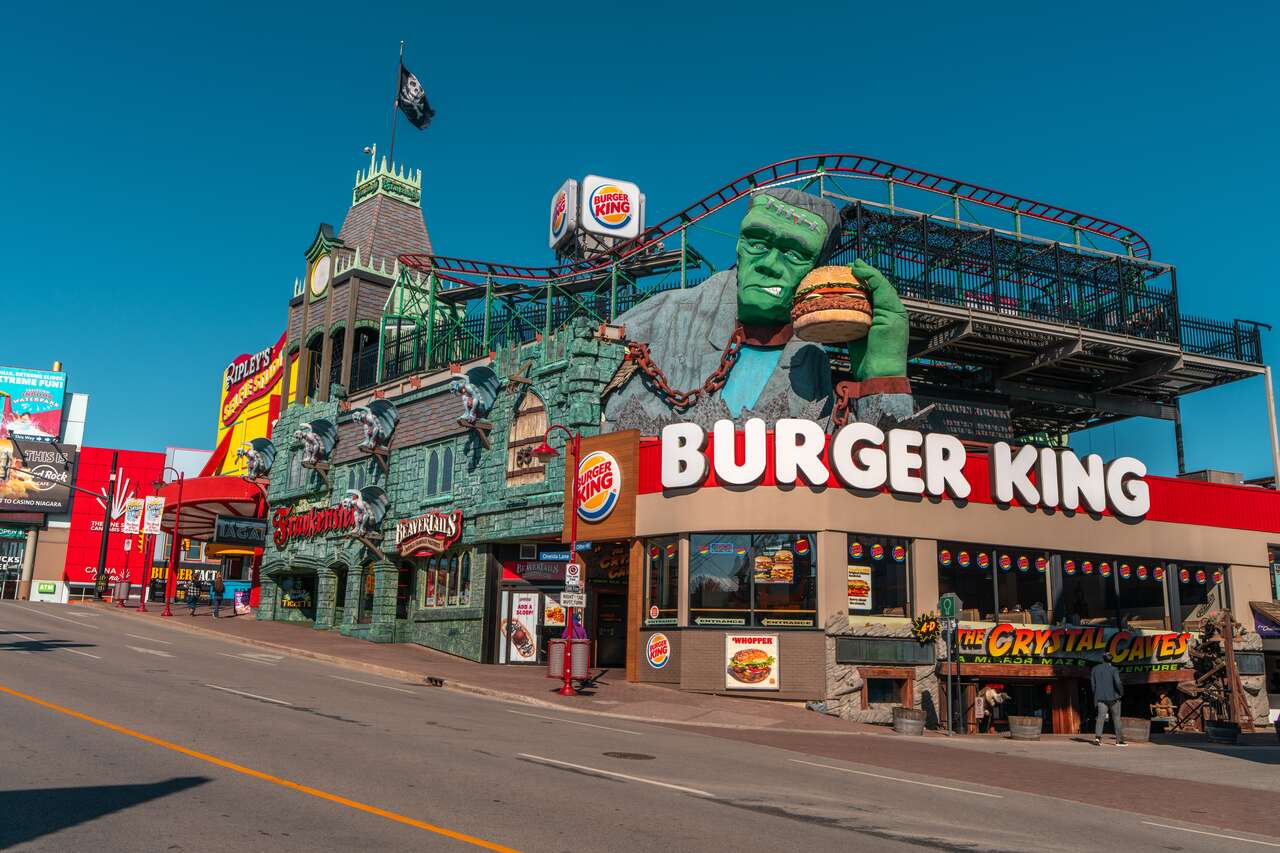
Clifton Hill also offers amusement rides, a dinosaur park, the quirky Ripley’s Believe It or Not! Museum, and Wax Museums, all of which can keep you entertained for hours. There are also a variety of restaurants and cafes, making it a perfect spot to take a lunch break while you explore the falls.

One of my favorite spots here is the Great Canadian Midway, an arcade game center, which I thought was a thing of the past. But this one is still going strong! Maybe it's just my nostalgia from being born in the late '80s and early '90s, but I think it's pretty cool that a place like this is still alive and kicking. Be sure to spend some time and explore Clifton Hill while you are here.
7. Go Zip-lining at Niagara Falls
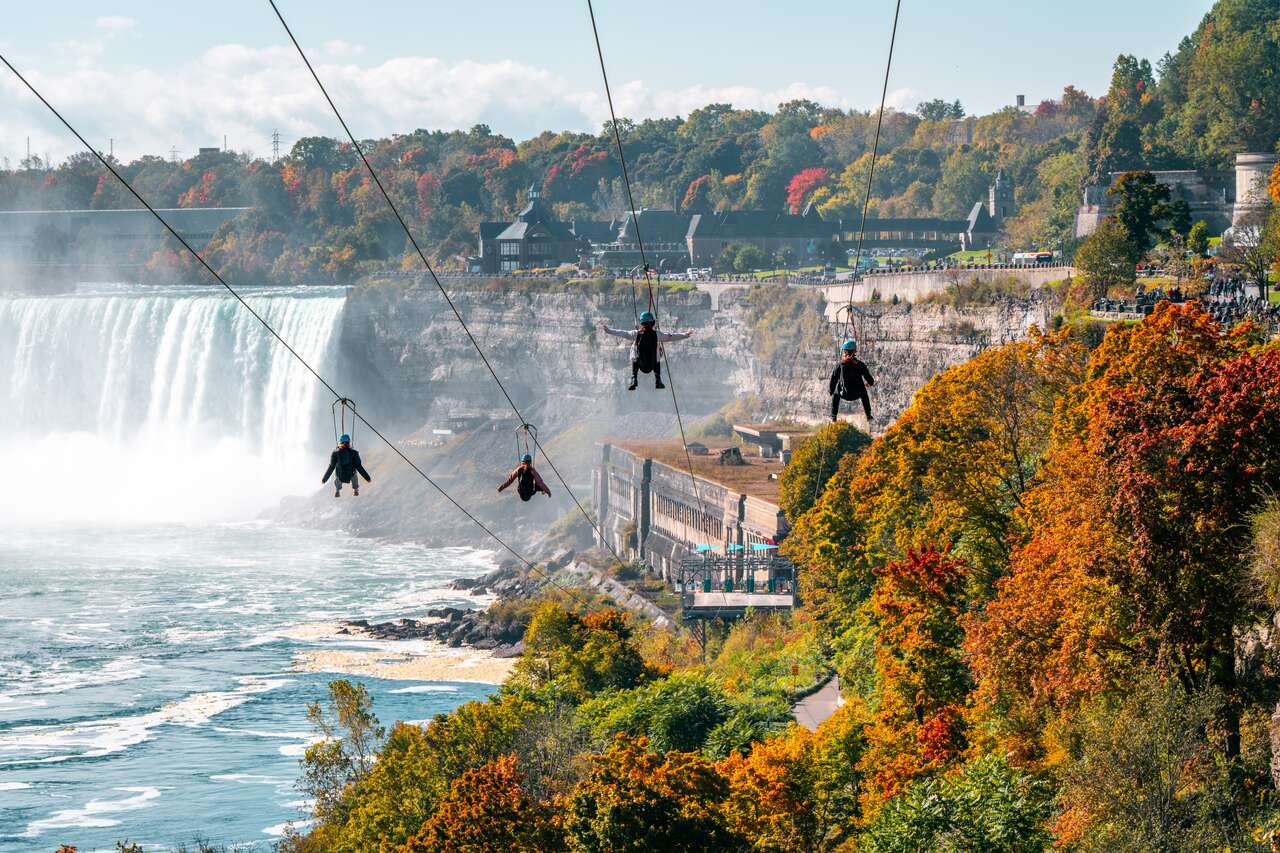
- 📍 Location: Niagara Falls Zip-lining [Map Link]
- 🕐 Opening Hours: Daily 11 AM - 5 PM
- 💰 Entry Fees: 60 USD per person
If you're looking for an adrenaline-pumping activity at Niagara Falls, you might want to check out WildPlay Zipline. You can zipline across the entire length of Fallsview Trail with an incredible view of the falls. It almost feels like you're ziplining straight into the falls, which I think is pretty epic!

The zipline costs about 60 USD per person and you will be approximately 67 meters above the Niagara River Gorge, gliding 670 meters past the American Falls, all the way to the base of the mighty Horseshoe Falls. It's a pretty epic way to see the Niagara Falls, and also a great way to get back to the other end of the Fallsview Trail without having to walk back 😂.
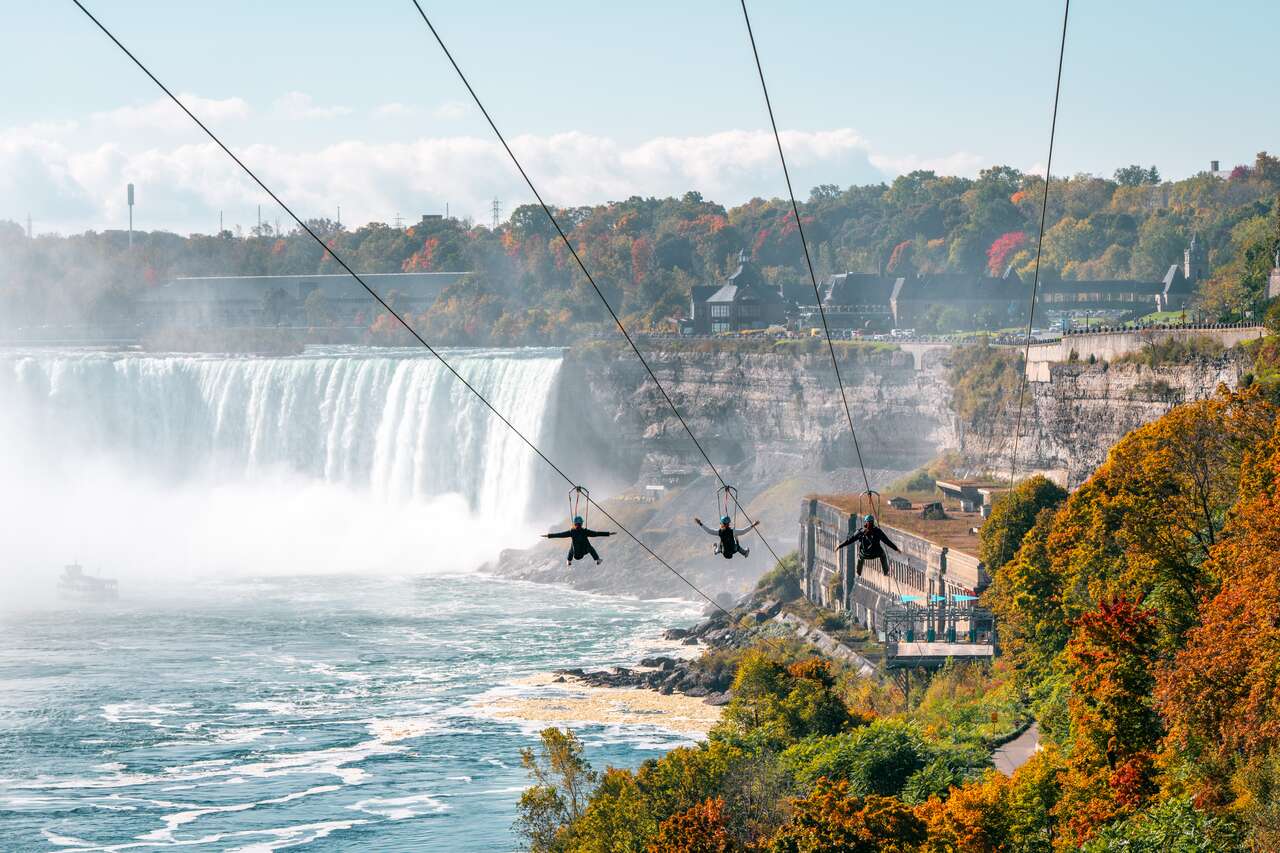
The zipline operates daily from 11 AM to 5 PM, and you can book your ticket and time slot here or purchase it on-site. However, be prepared for possible queues as they can only launch four people at a time. If you're looking for an exciting adventure at Niagara Falls, make sure to check out the WildPlay Zipline!
8. Journey Behind the Falls
- 📍 Location: Journey Behind the Falls [Map Link]
- 🕐 Opening Hours: 9 AM - 5 PM
- 💰 Entry Fees: 29 CAD (~21 USD)
Another epic thing to do here is the Journey Behind the Falls with Journey Behind the Falls 😂. You can probably guess what this activity is about, right? Journey Behind the Falls is a new attraction that lets you venture all the way down to the foot of the waterfall and literally walk beneath the Horseshoe Falls along its concrete tunnels.
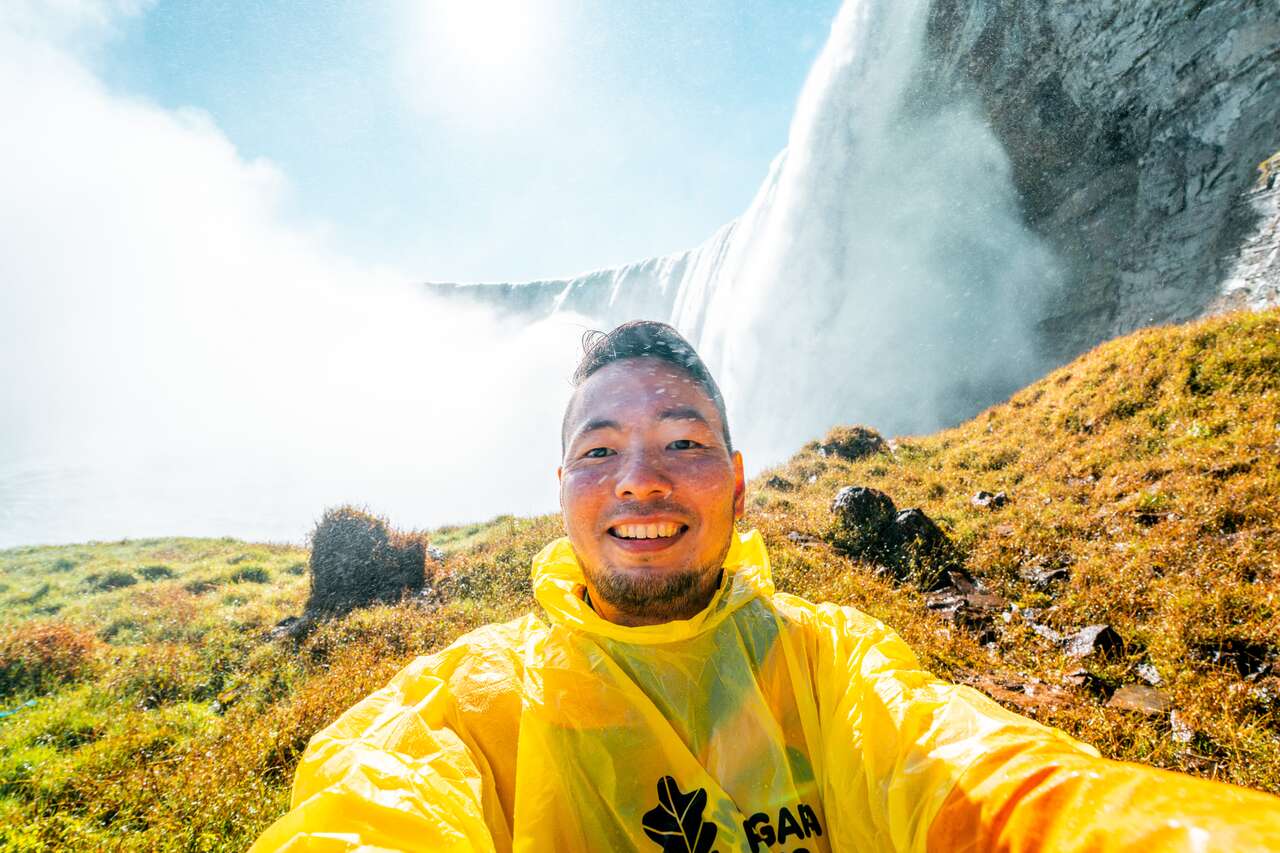
This activity gives you access to the tunnels and a balcony at the base of the falls, where you can truly appreciate the power of the current. Of course, you’ll likely get wet as you get up close to the waterfall, but don’t worry, they’ll provide a rain poncho for you as a souvenir.

The activity doesn't take long, you can complete it in about 15 minutes. I found the view from the balcony to be pretty epic, and you won't get such a perspective anywhere else. However, I thought the journey through the tunnel beneath the falls was a bit underwhelming.
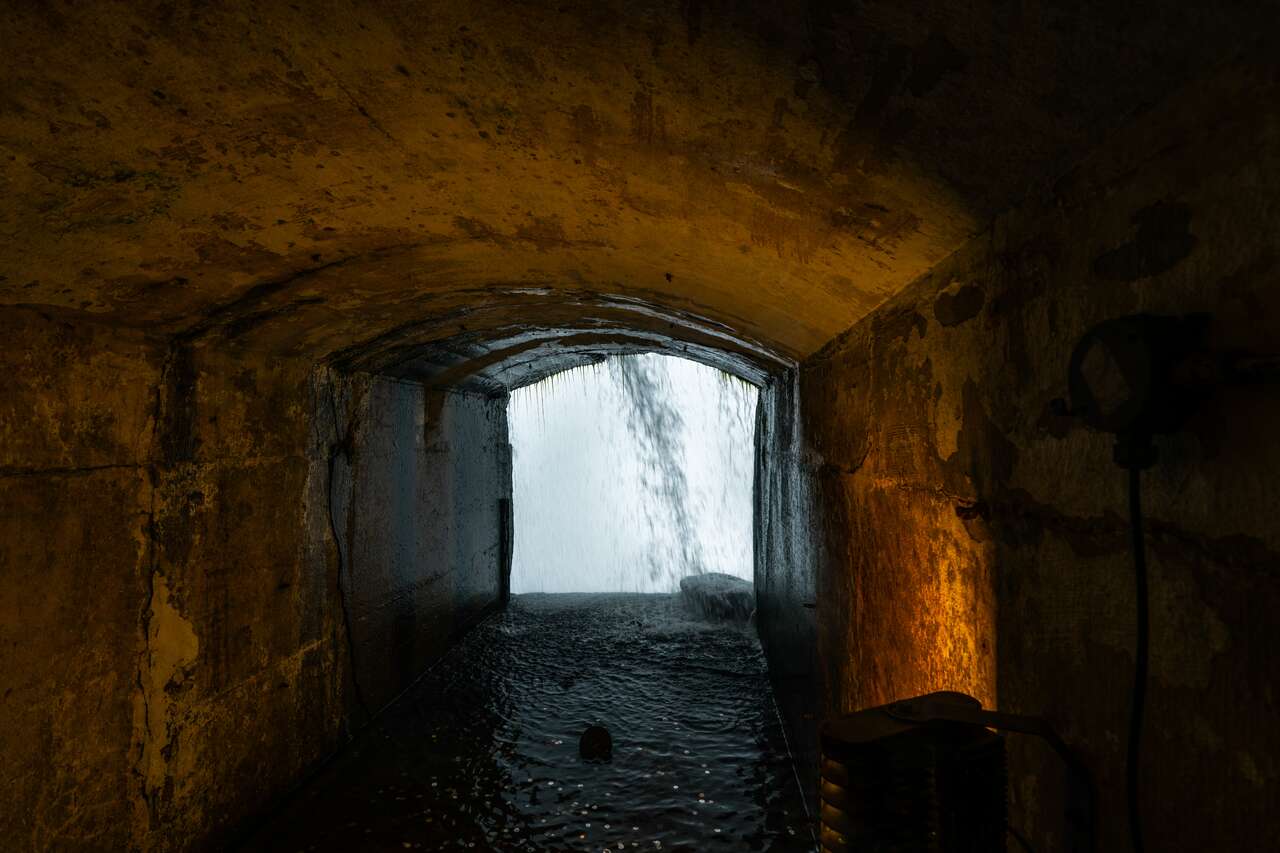
You're essentially in a concrete tunnel, peering at the water current through human-sized openings. While there’s a certain novelty in being literally under the falls, I personally preferred the viewpoint over the tunnel experience. The attraction is open from 9 AM to 5 PM on weekdays and 9 AM to 6 PM on weekends, with tickets priced at 29 CAD (20 USD) per person. You can purchase tickets at the visitor's center or online here.
When to Visit Niagara Falls?
You can visit Niagara Falls at any time of year, as the falls beautifully showcase the charm of each season. In fact, the falls can even look different depending on the time of day you visit! That said, I personally recommend going during the shoulder seasons, either in fall or spring, when there are fewer tourists compared to the peak summer months and the temperatures are still comfortable.
Winter, on the other hand, offers a magical experience with snow and ice, a sight that not many people get to see since most visitors stick to the summer months, which makes winter feel especially unique, in my opinion. All in all, you really can’t go wrong with any season here.
How to Get to Niagara Falls?
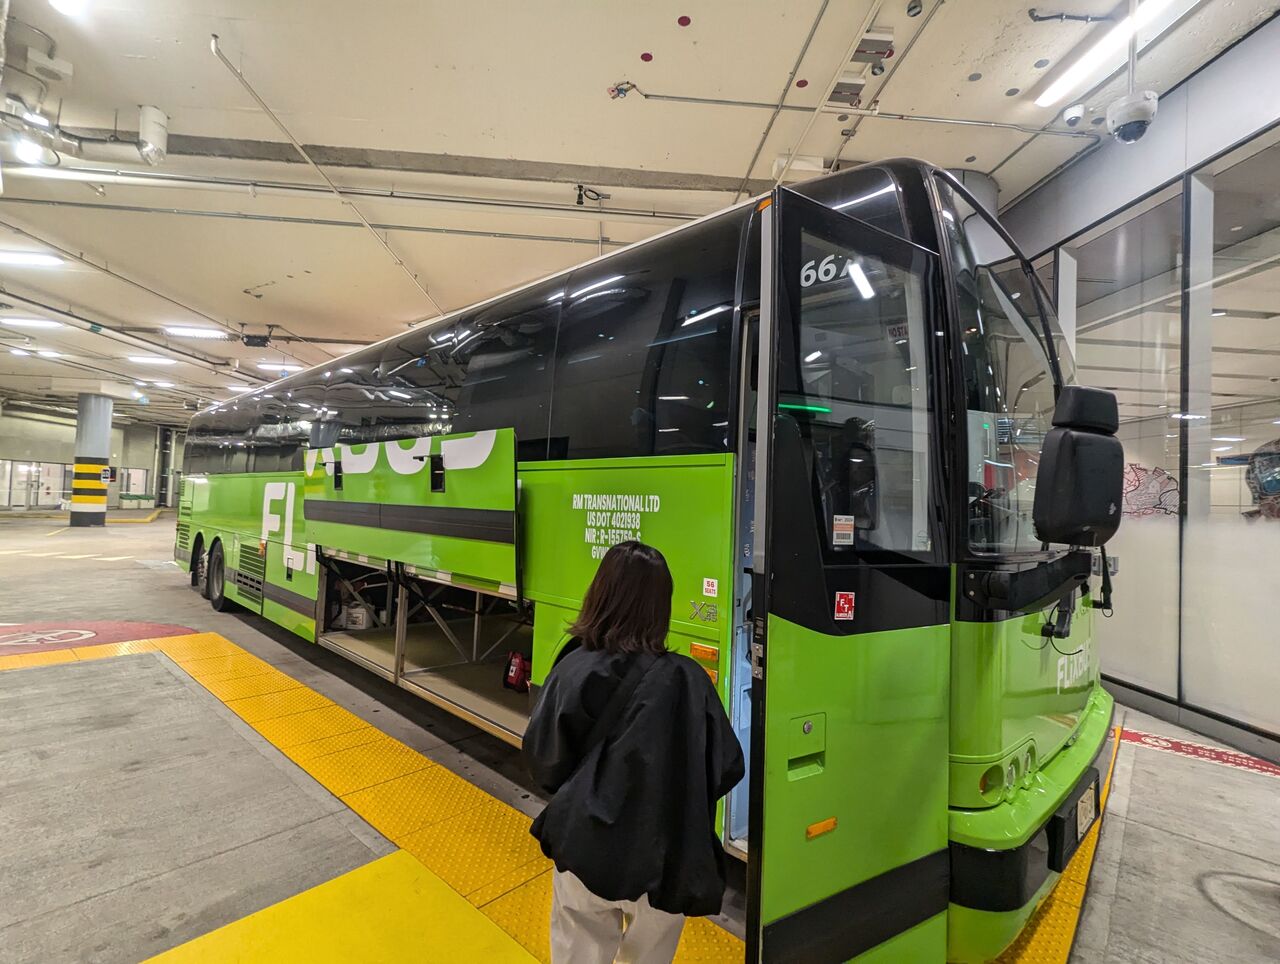
By Bus: If you're in Toronto, you can easily visit Niagara Falls as a day trip with Flixbus. They run about six buses daily from Toronto's Union Station Bus Terminal to Niagara Falls and vice versa, starting at 7:30 AM and running until 10 PM. The journey takes about 2 hours, depending mostly on traffic, as Toronto traffic can be pretty heavy.
The cost is 17 USD per person. The bus will drop you off at the Niagara Falls bus stop, which is conveniently located right next to the falls. Remember this bus stop, as you’ll need to catch the bus back from the same location.
I recommend taking the earliest bus to avoid rush hour traffic and arrive at the falls by 9:30 AM, giving you plenty of time to explore. Also, be sure to arrive at the bus station about 30 minutes early, as the building can be a bit confusing to navigate. The bus stop is typically at Port 11 on the second floor, but it’s a good idea to double-check when you get there. You can book the Flixbus ticket here.
By Tour: If you are in further away cities or even in the US, and you want to see Niagara Falls from the Canadian side in one day, the only way to do it is to go with an organized tour. You can find plenty of organized tours running every day and it typically takes about 7 - 12 hours depending on where you are visiting from. You can find plenty of organized tours here.
How to Get Around Niagara Falls?
By Walking: Niagara Falls and most of its attractions are concentrated around the waterfall area, and a beautiful pedestrian street connects much of the area, making it easy to explore Niagara Falls on foot!
How Long to Spend at Niagara Falls?
To truly appreciate everything Niagara Falls has to offer, I highly recommend spending at least 8 hours here. Even better, consider staying overnight near the falls so you can experience Niagara Falls at different times of the day as the light changes.
I arrived early in the morning and was able to see the Horseshoe Falls while it was still in the shade, and I stayed through to the evening when the light perfectly illuminated the falls. It was an incredible experience, and I’m glad I got to witness it throughout the day. If you’re a photographer, you might want to visit in the afternoon when the falls are bathed in direct sunlight, it’s much easier to capture great photos at that time.
Should I visit Niagara Falls on the Canada Side or the US side?
Much like Iguazu Falls, the Canadian and US sides of Niagara Falls are not created equally. The Canadian side is definitely superior in almost every way, although there are a few activities that are similar on both sides, such as the waterfall cruises.
One of my favorite things about the Canadian side is that it offers a better view of the Horseshoe Falls, and it’s home to the Skylon Tower, where you can capture some incredible aerial-like shots of the falls from above, something you can’t experience on the US side. Who needs a drone when you have the Skylon Tower?
The Canadian side also has Clifton Hill, where you can spend hours enjoying amusement rides, haunted houses, and exploring a variety of restaurant options. There’s simply more to do on the Canadian side, and I believe you'll have a much better experience here than on the US side.
How Much Money Do I Need for One Day in Niagara Falls?
From this one-day itinerary, we can calculate approximately how much money you will be spending here as follows:
Accommodation: Depending on whether you want to spend a night at Niagara Falls or not, your accommodation can cost from 0 to 65 USD.
Food: For 1 day, with 3 meals a day in Niagara Falls, you can expect to pay around 30 USD for food.
Transportation: For this itinerary, you can expect to spend around 35 USD on transportation, mostly for buses to and from Niagara Falls.
Activities: Depending on how closely you follow my itinerary, you can expect to spend between $5 and $6 on activities.
Total Budget for one day in Niagara Falls: 121 USD (186 USD if you stay overnight)
Disclaimer: This post may contain affiliate links. See our disclosure policy.
First Published:
Last updated: