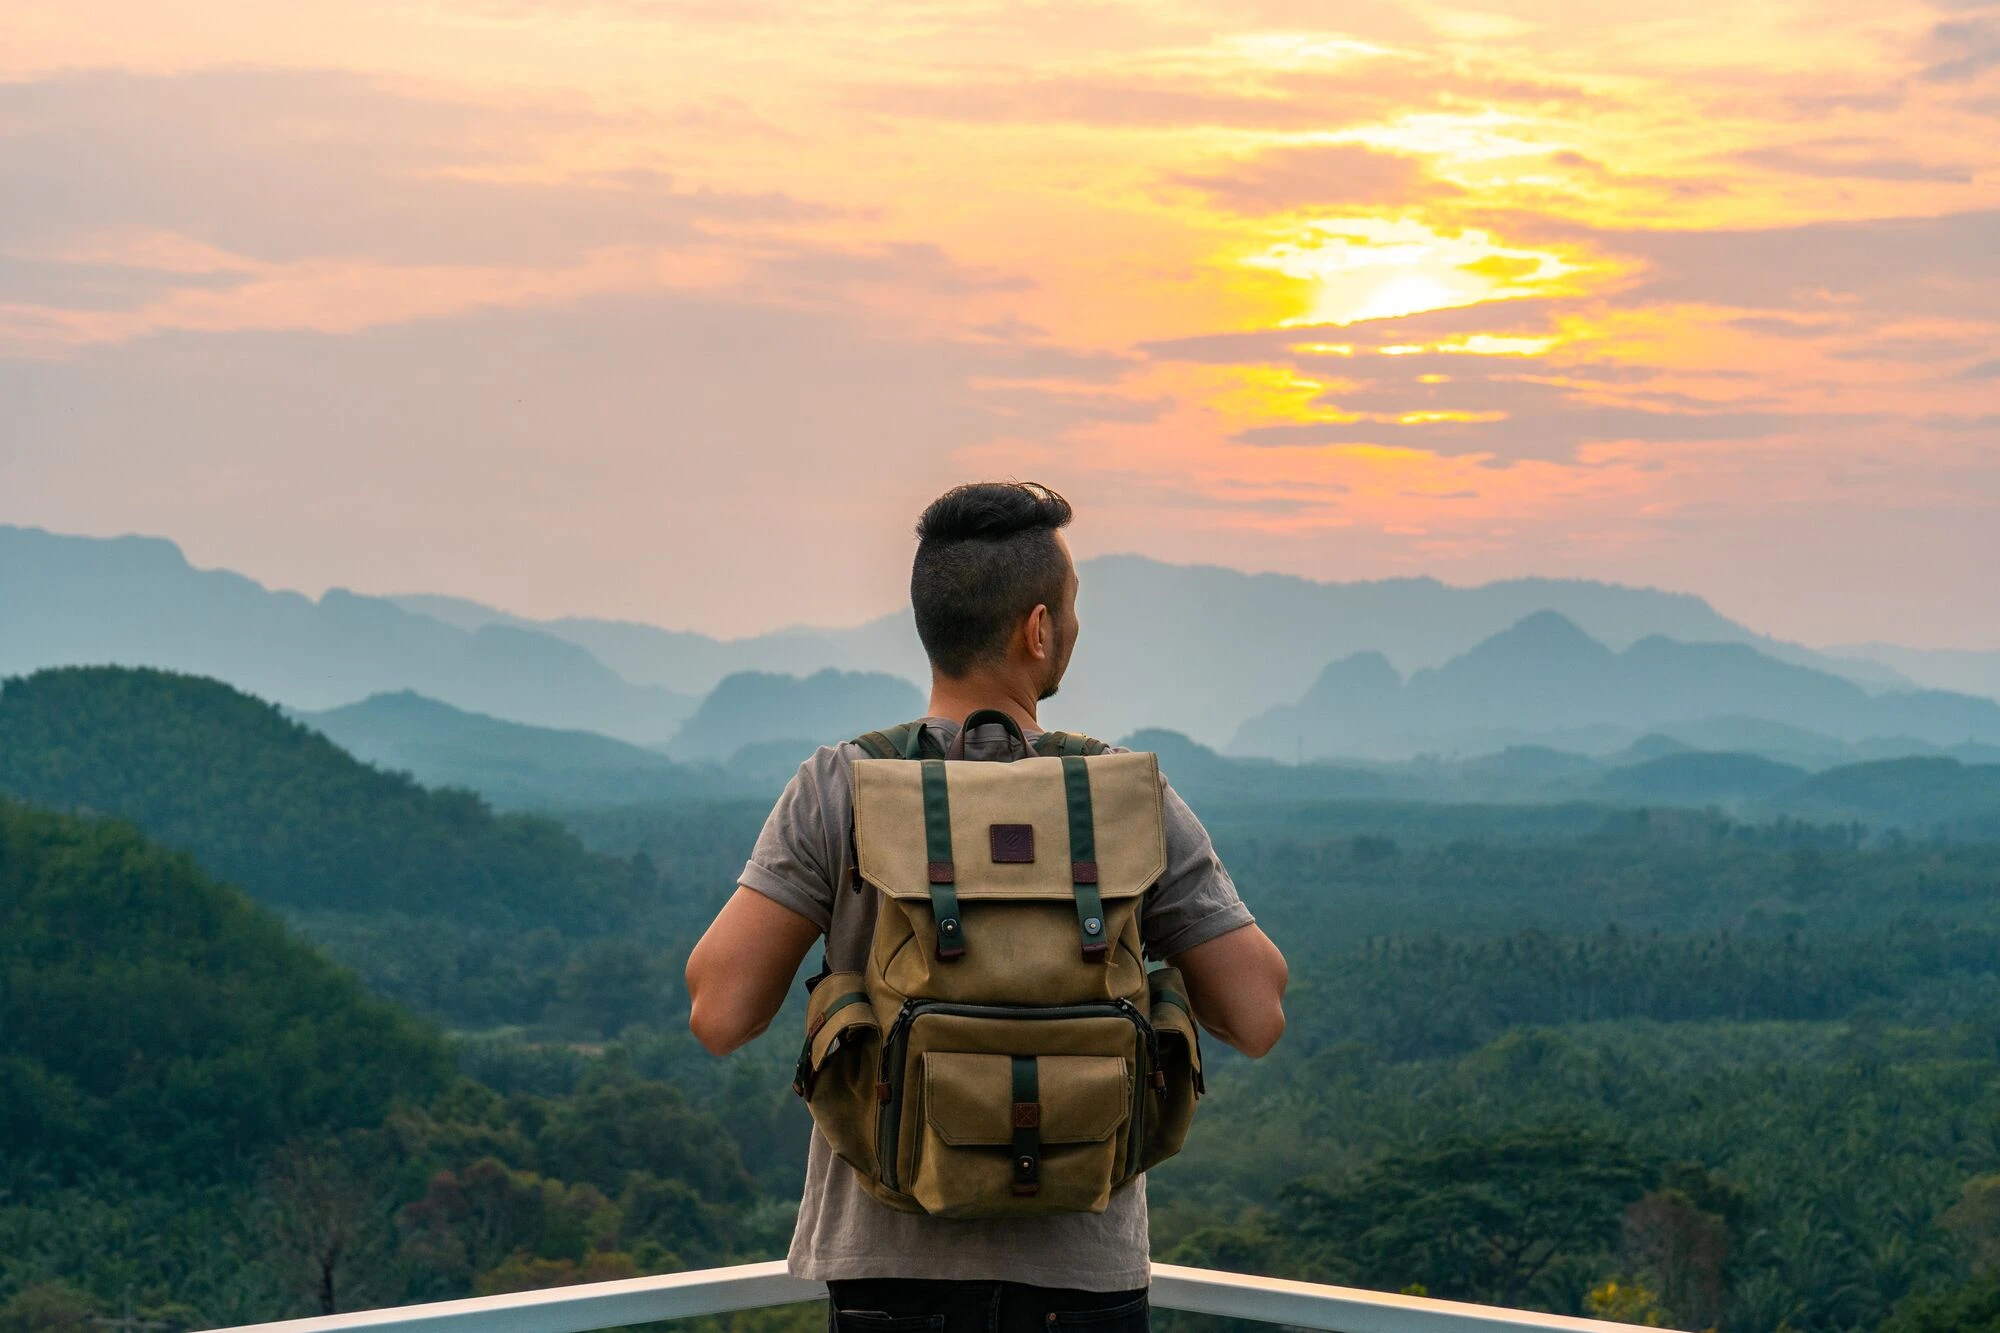
If you're looking to spend 2 weeks in Thailand, this itinerary is for you. We will be taking you across the country, visiting some of the most beautiful places my home country has to offer, from the historical cities of Ayutthaya and Chiang Mai to the stunning nature of Kanchanaburi and Khaosok. With a little touch of relaxation and adventure in Krabi, this itinerary has got it all.
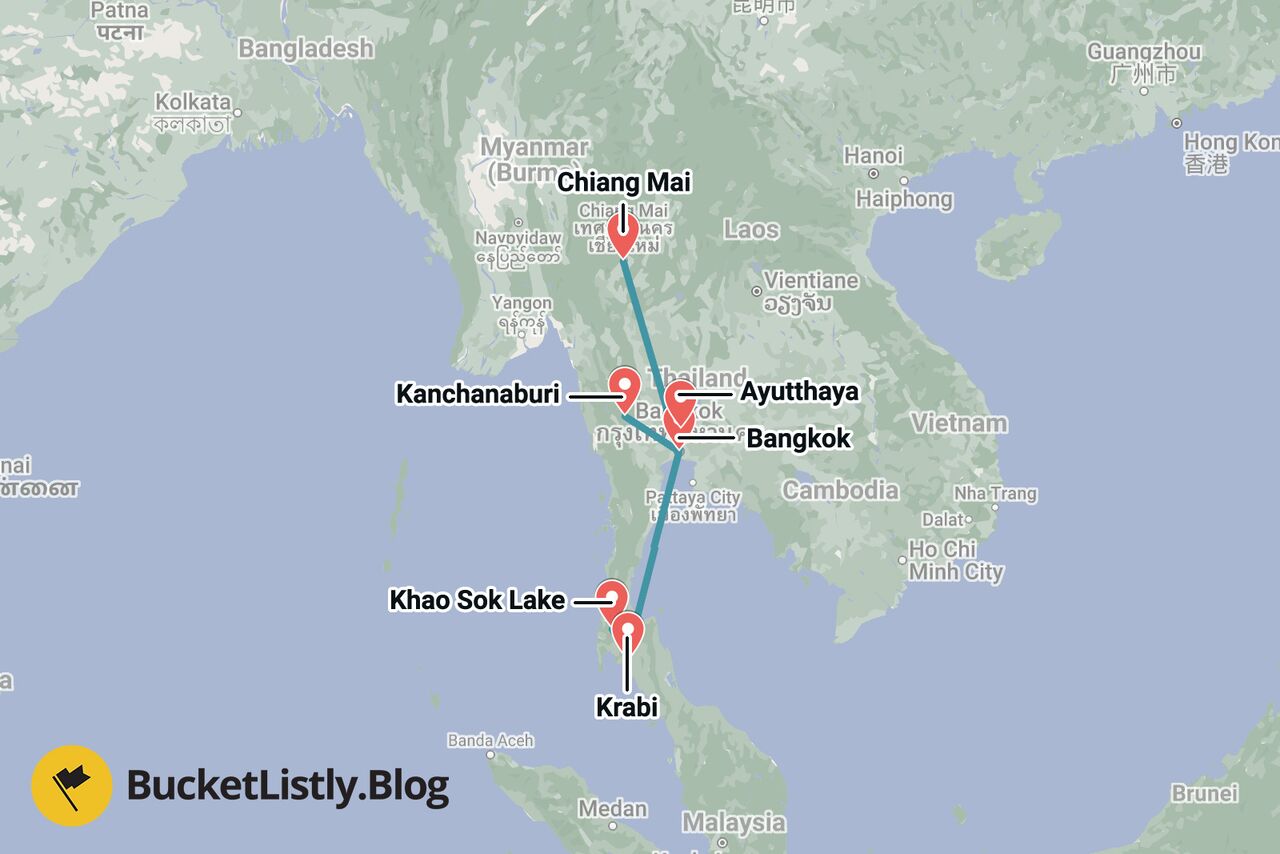
Within this guide, you will find all the information you need to plan a perfect trip, from the best places to visit, how to get around, where to stay, and more. Without further ado, here is a 2-week backpacking itinerary for Thailand for solo travelers. Let's first take a look at the route we will be taking on the map below.

Thailand 2-Week Backpacking Itinerary Map
Quick Summary
| ☀️ Day 1: | Bangkok |
|---|---|
| ☀️ Day 2: | Ayutthaya (Day Trip) |
| ☀️ Day 3-4: | Kanchanaburi |
| ☀️ Day 5-7: | Chiang Mai |
| ☀️ Day 8-10: | Krabi |
| ☀️ Day 11-13: | Khao Sok Lake |
| ☀️ Day 14: | Back to Bangkok |
2 Weeks Backpacking Thailand Itinerary
Day 1: Bangkok (3 Nights)

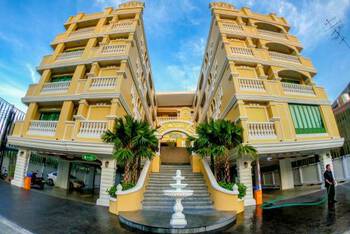
- 📍 Stay: Siri Heritage Bangkok Hotel
- 🕐 Time: 3 Nights
- 📖 Full Guide: 16 Best Things to Do in Bangkok
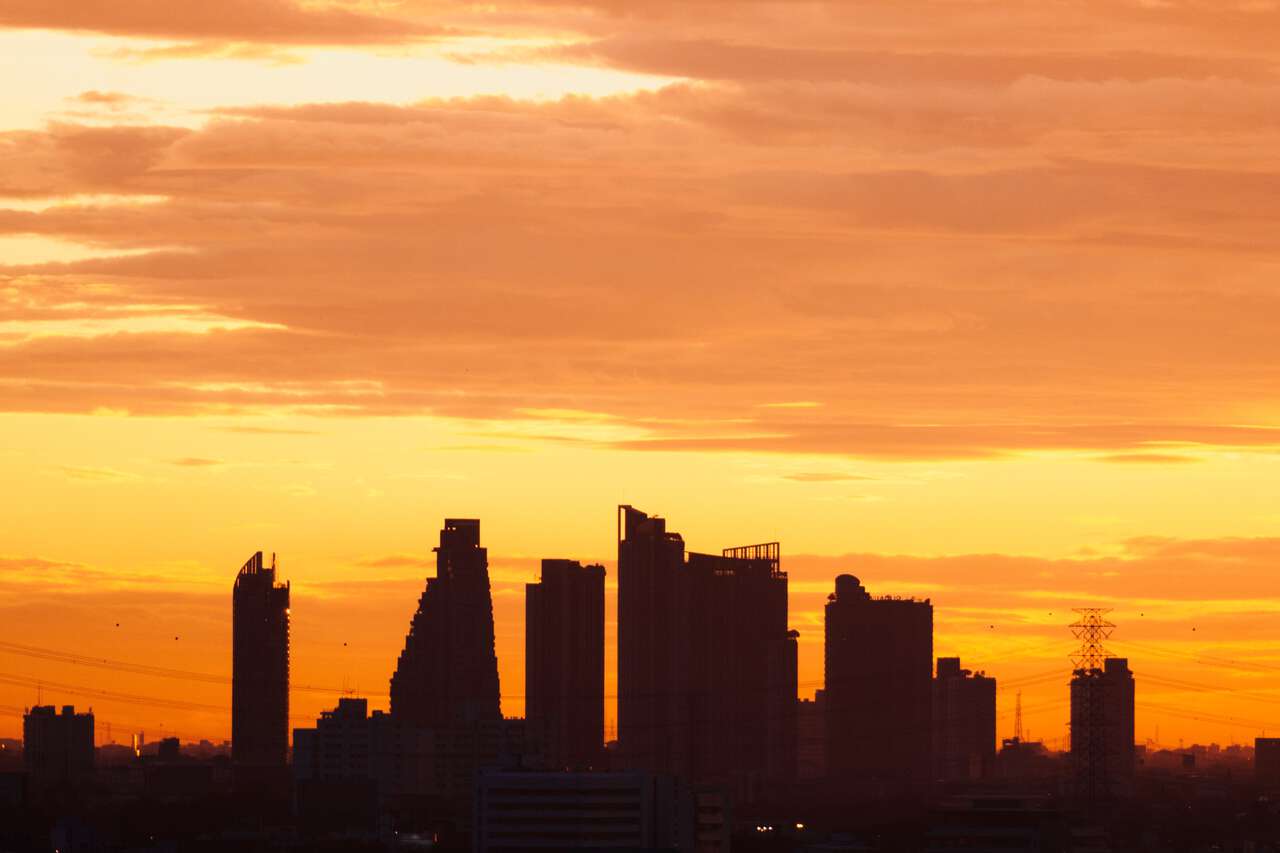
Our journey to Thailand begins in Bangkok, the capital city with over 10 million people. Bangkok is a city that may not be a favorite for many, but as a Thai who lives here, I can say that if you give it a chance to shine, Bangkok can be quite an interesting place to explore.
Bangkok is also a great place to get your footing in Thailand and experience its fascinating culture. If you are looking for a place to stay near Bangkok’s attractions, consider staying around Khaosan Road, which will allow you to easily visit many of Bangkok’s beautiful temples in one go. However, do not stay directly on Khaosan Road itself, as it can get pretty crazy at night. Instead, stay somewhere nearby for a better balance of convenience and comfort.
These temples near Khaosan Road are, hands down, the prettiest ones you will see in Thailand, and it would be a shame if you didn't get to see them. The first temple you should visit is the Grand Palace.
- Thailand Island Hopper (14 days)
- Northern Thailand Adventure (14 days)
- Thai Intro 12 Day (12 days)

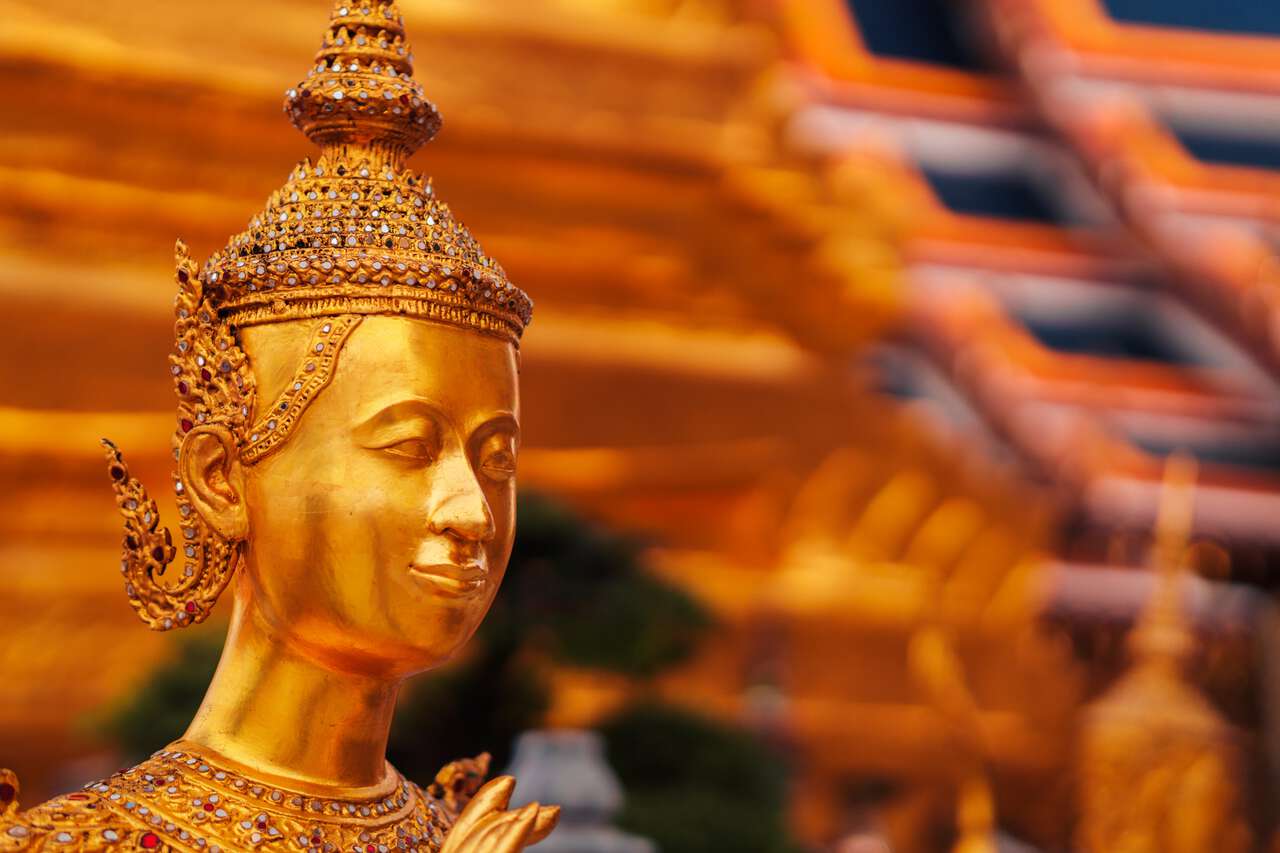
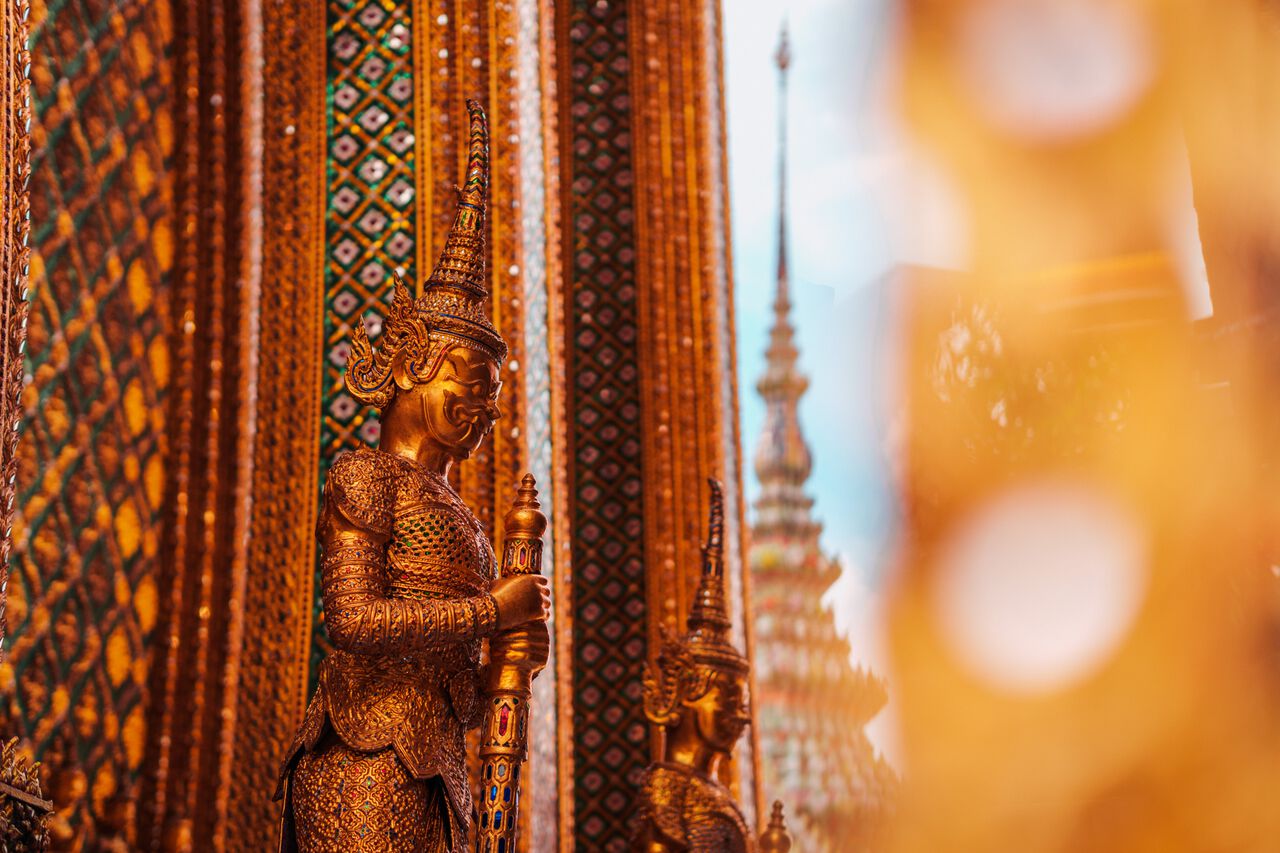
The Grand Palace is a complex of beautiful buildings and has been the official residence of the Kings of Siam since the 80s. The palace consists of stunning pagodas and architecture, all covered in either gold or extremely intricate sculptures and patterns that will make your jaw drop. The place has a very strict dress code though, and you won't be allowed to enter without having your arms and legs covered, so be sure not to wear tank tops and shorts when you visit the palace. This also applies to most temples in Thailand, so be sure to dress properly when you are visiting temples.
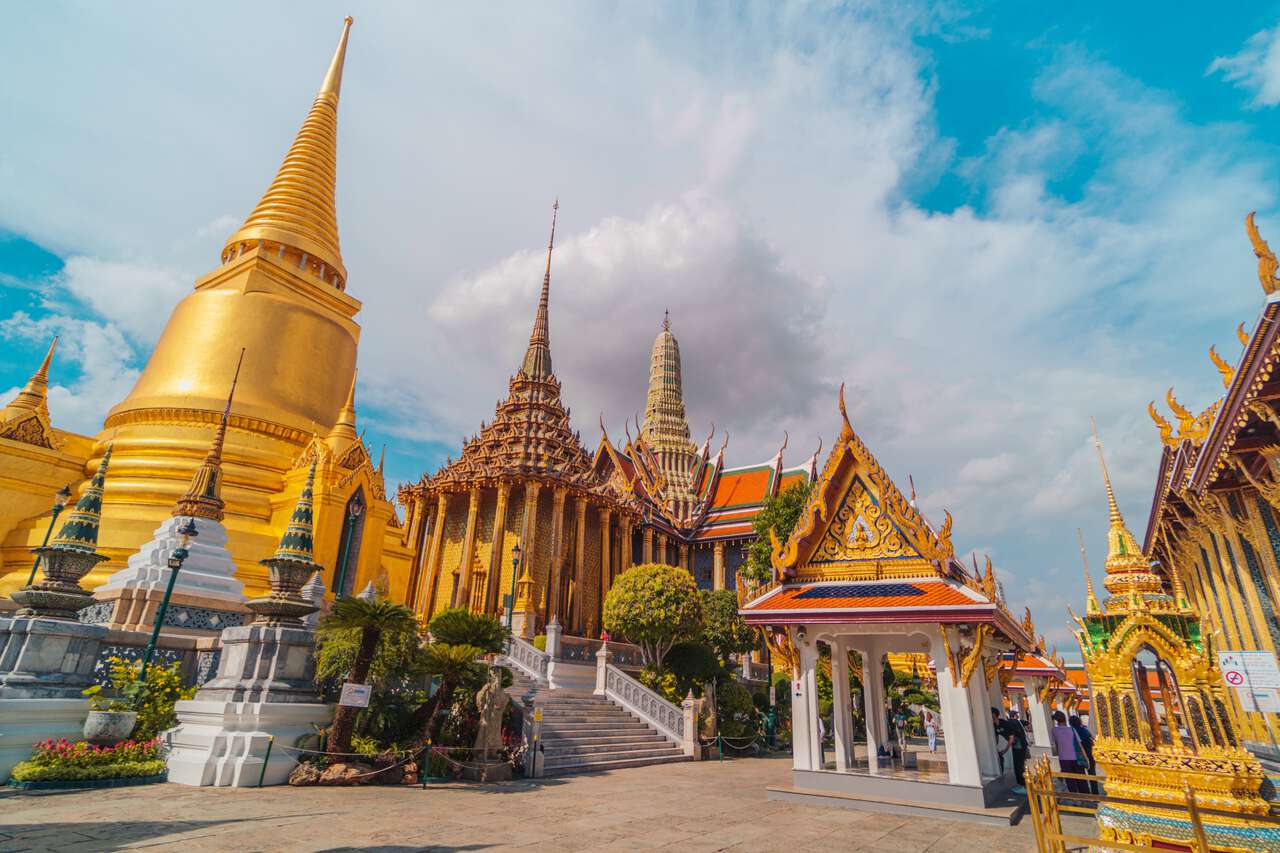
The Grand Palace's admission fee is 500 THB, and the opening hours are between 8:30 AM and 3:30 PM every day. Do not listen to tuk-tuk drivers who claim that the Palace is closed. The place is never closed, even on public holidays unless it's during a renovation.
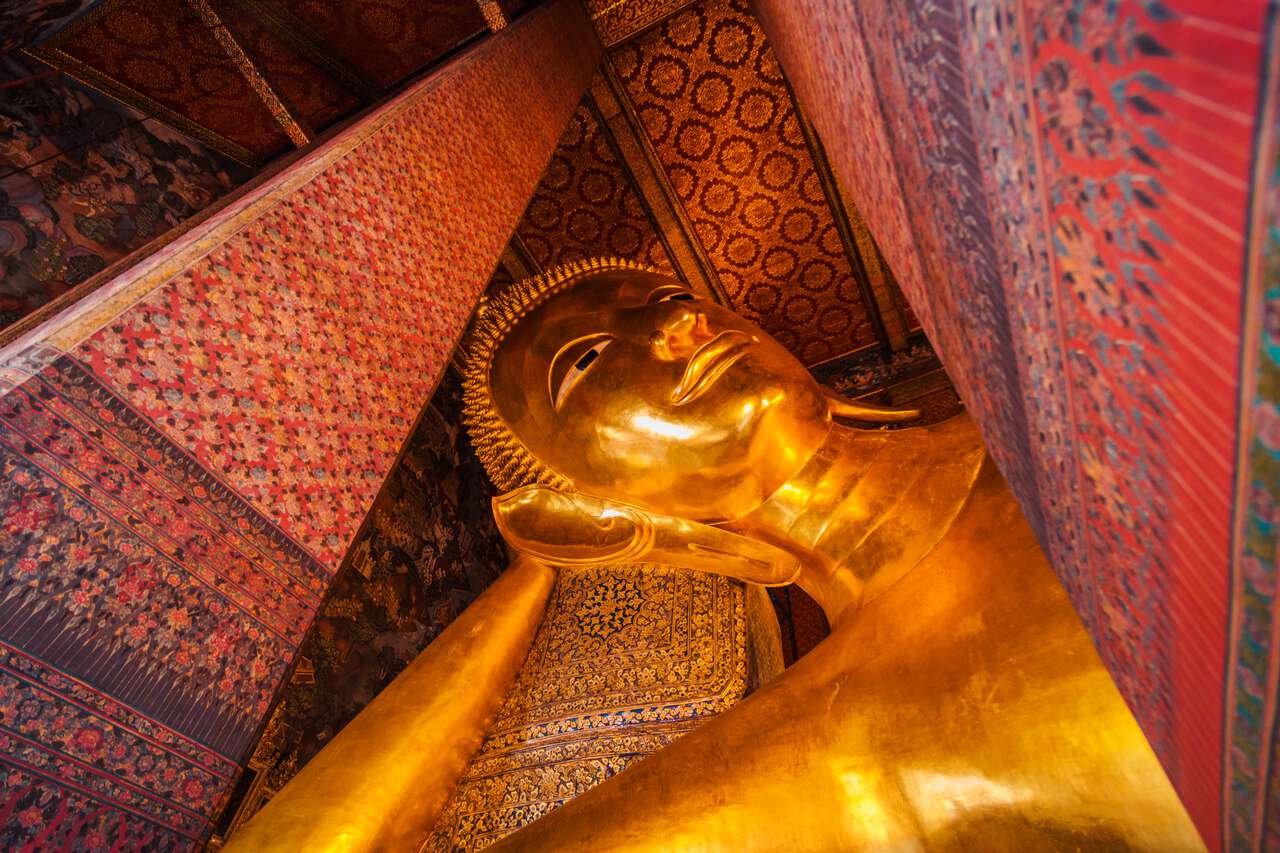
Wat Pho is another great temple you should visit in Bangkok. It is right next to the Grand Palace, and you will be able to see one of the largest reclining Buddha statues in the country here.
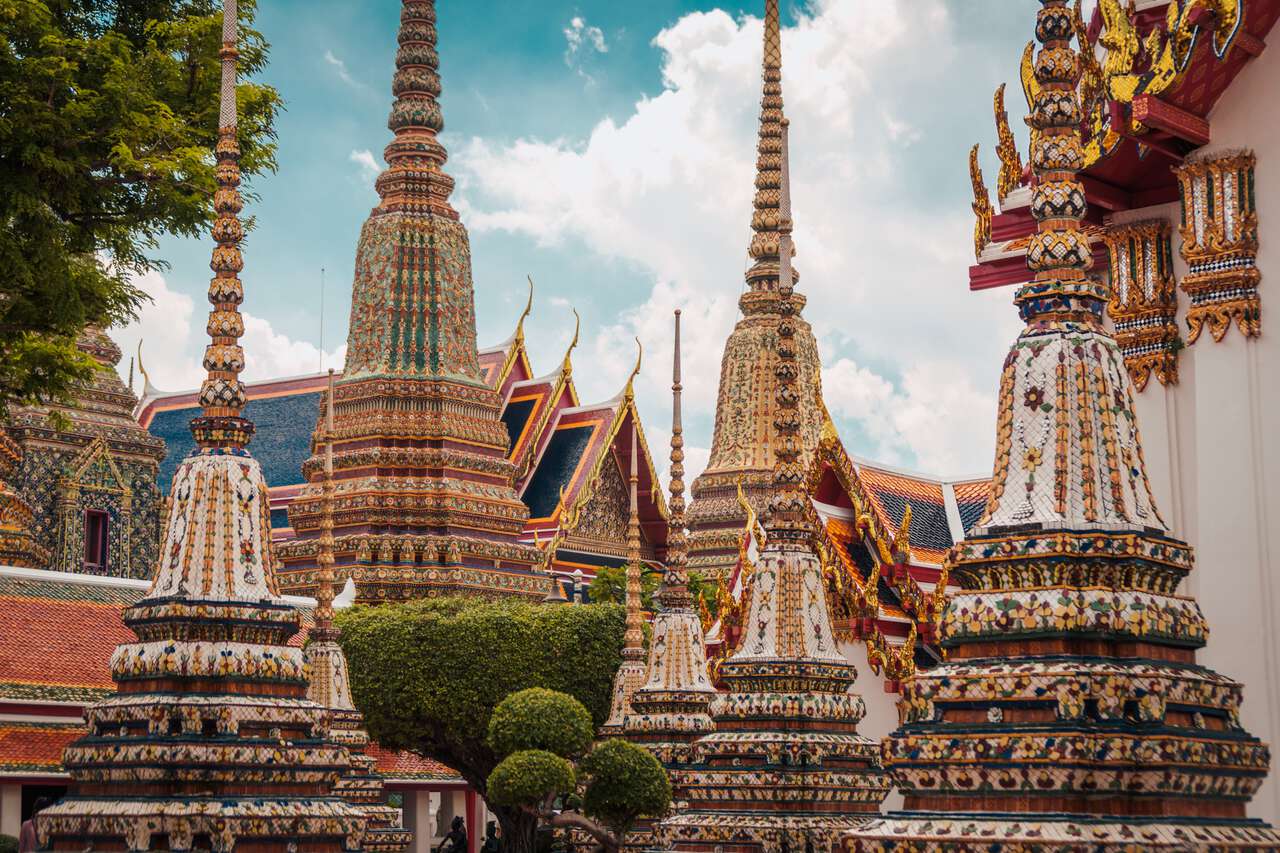
Wat Pho's opening hours are between 8 AM and 6:30 PM, and the entrance fee for foreigners is 200 THB. I prefer this temple more than the Grand Palace because it is way less crowded, and you can actually sit and enjoy the place at your own leisure.
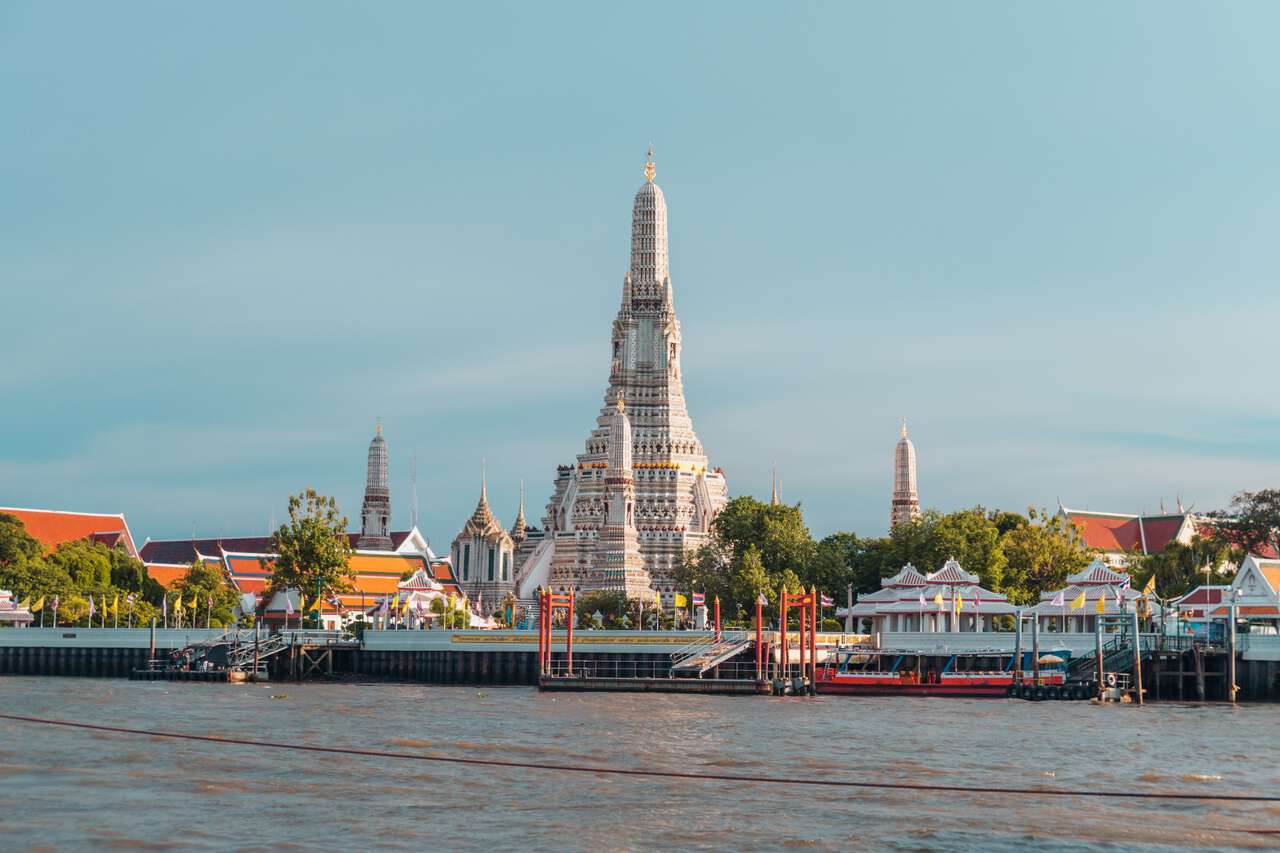
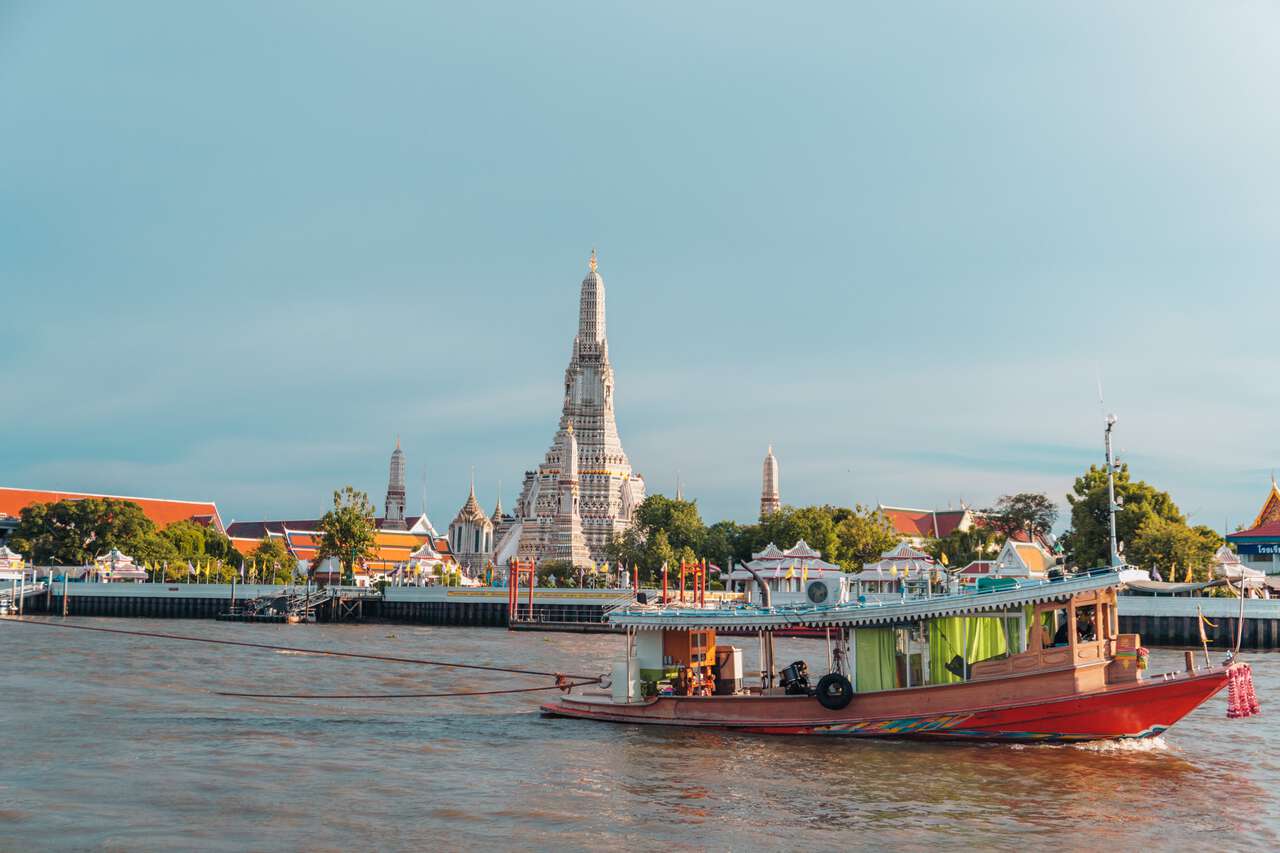
Wat Arun, an old temple featured on the 10 baht coin, is a great temple for you to visit right before sunset. It is located right by the Chao Praya river, and you can take the boat taxi across from Wat Pho. The temple opens from 7:30 AM to 5:30 PM, and the admission fee is 50 THB.
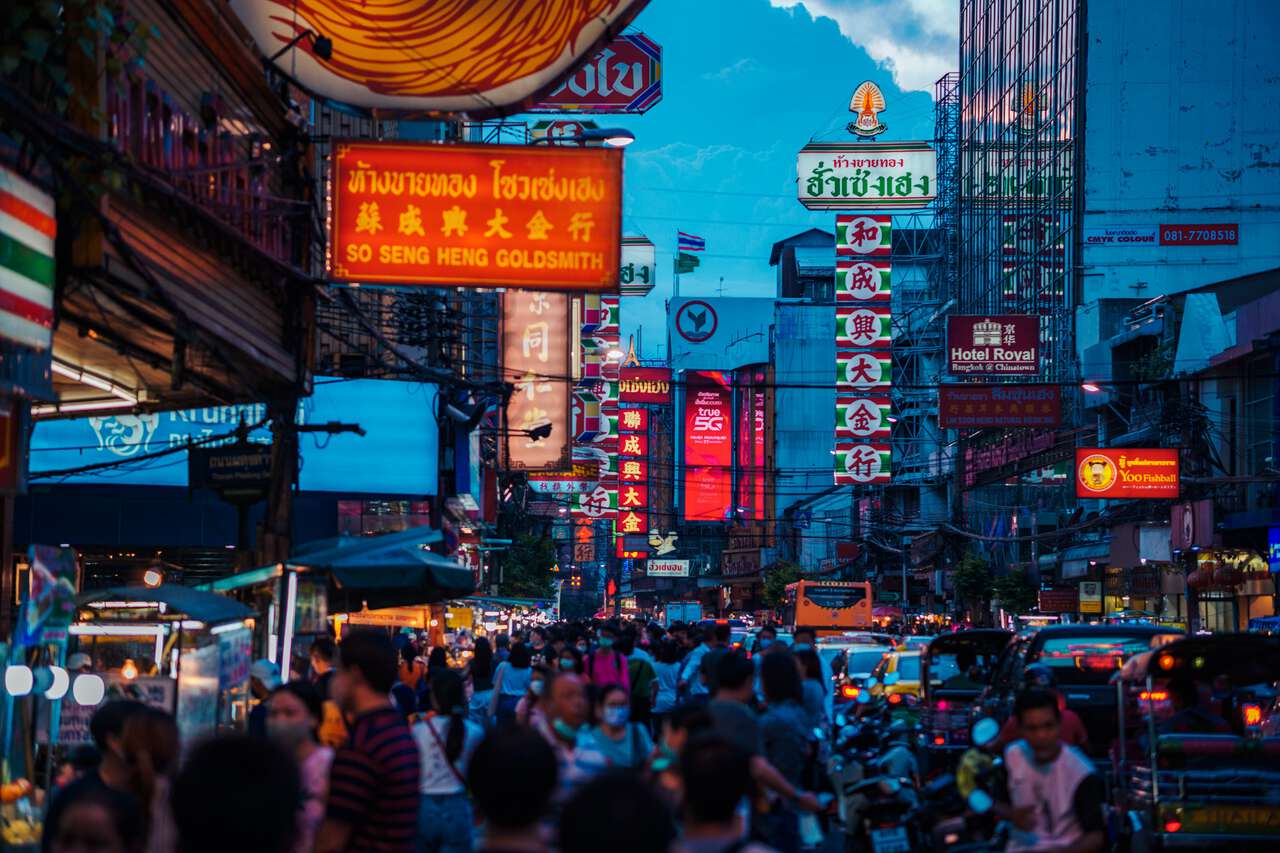
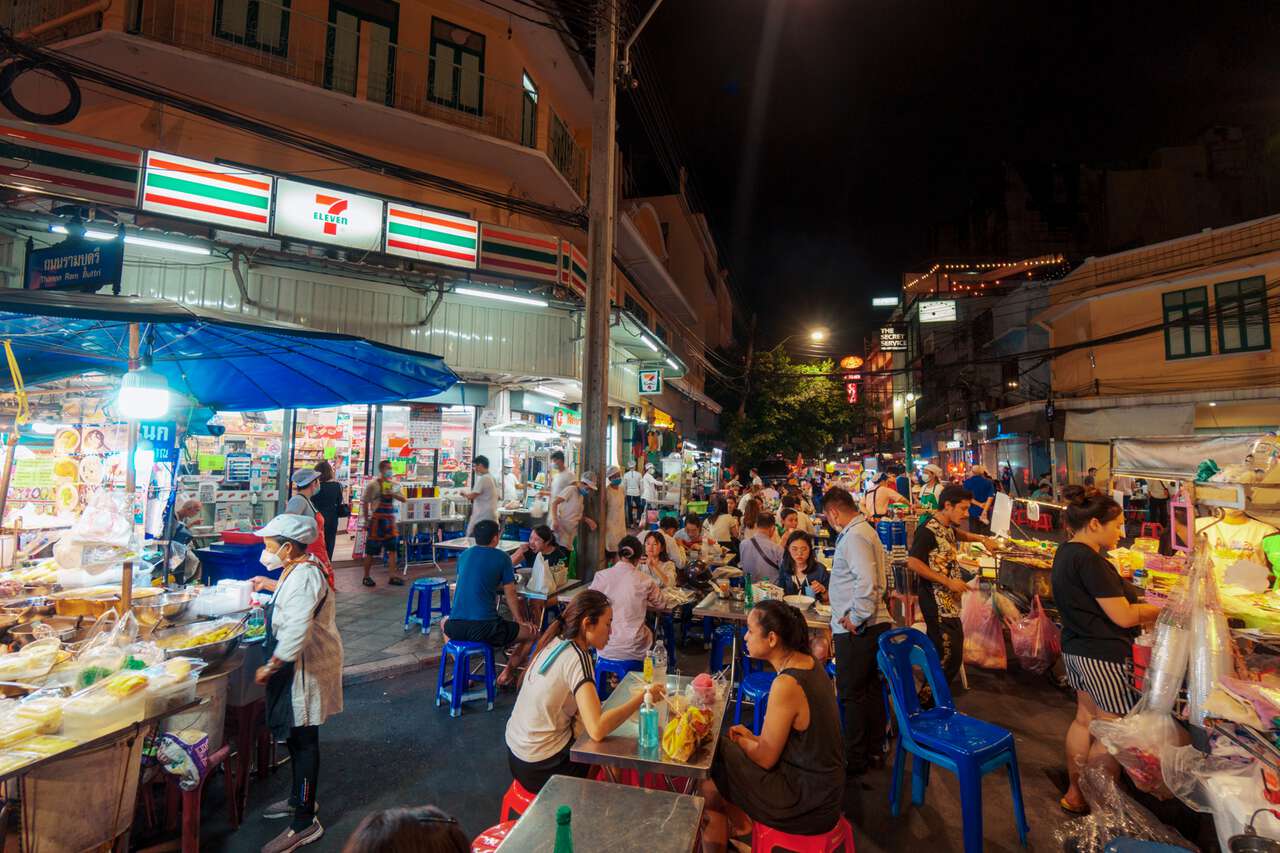
Once the sun is down, you can also have dinner by the Chao Praya River or you can go to Chinatown or Yaowarat and eat your way through this foodie's heaven. Chinatown's opening hours are between 6 PM and 10 PM, and you will find many street food carts where you can indulge yourself.
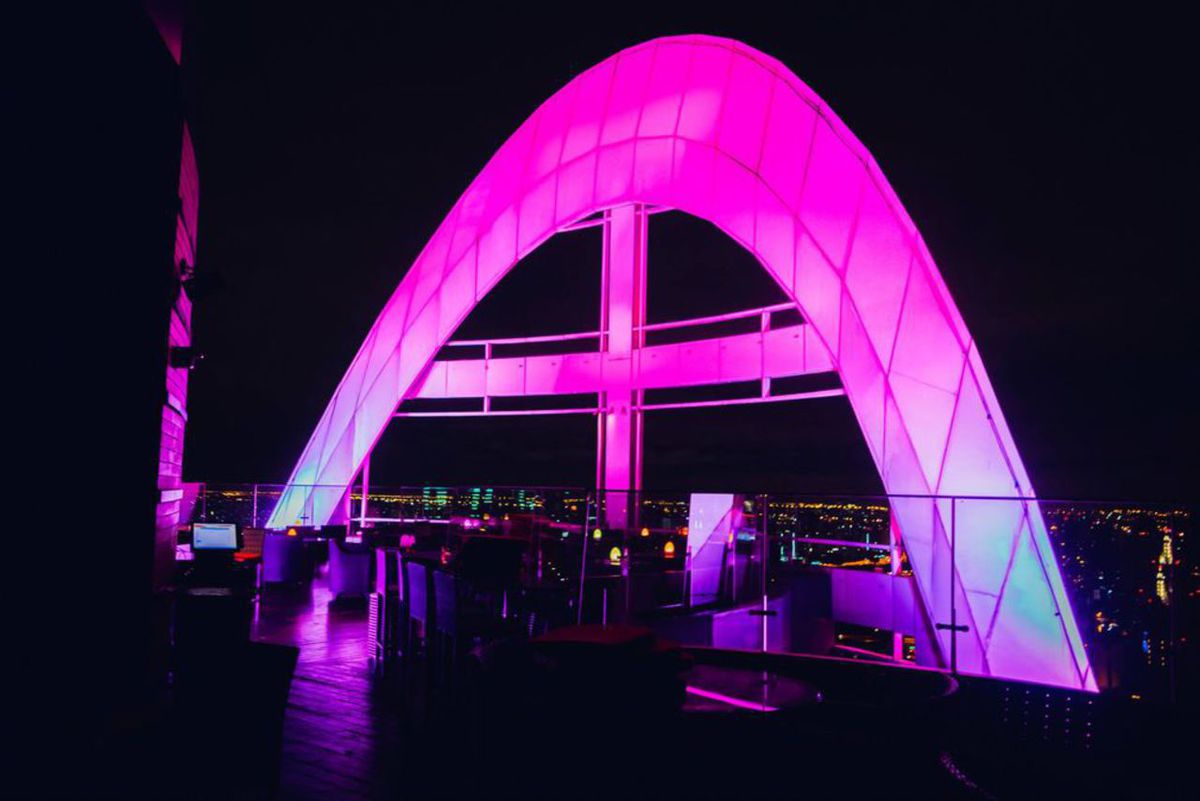
For a night out, you can go up to one of the many rooftop bars in Bangkok for a nice view of the city at night. I highly recommend the Red Sky, which is located right in the heart of Bangkok. However, most rooftop bars do have a strict dress code, so no flip-flops and shorts.


Day 2: Ayutthaya (Day Trip)
- 🕐 Time: Day Trip
- 📖 Full Guide: 12 Best Things to Do in Ayutthaya, Thailand
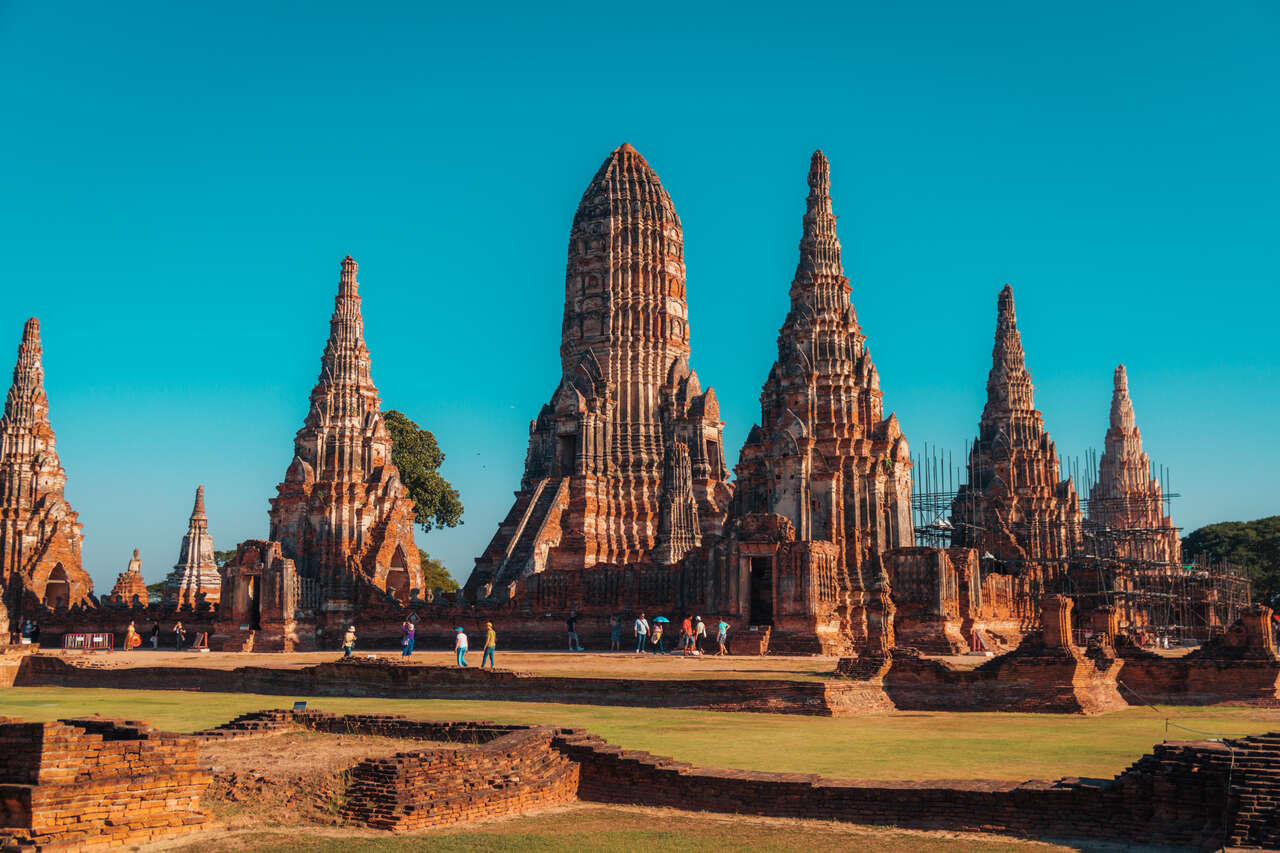
For the next day, I highly recommend you go on a day trip to Ayutthaya, one of the most important ancient cities in Thailand. It was regarded as the place that created the foundation of the Thai modern history we know today, and it is located only an hour away from Bangkok.
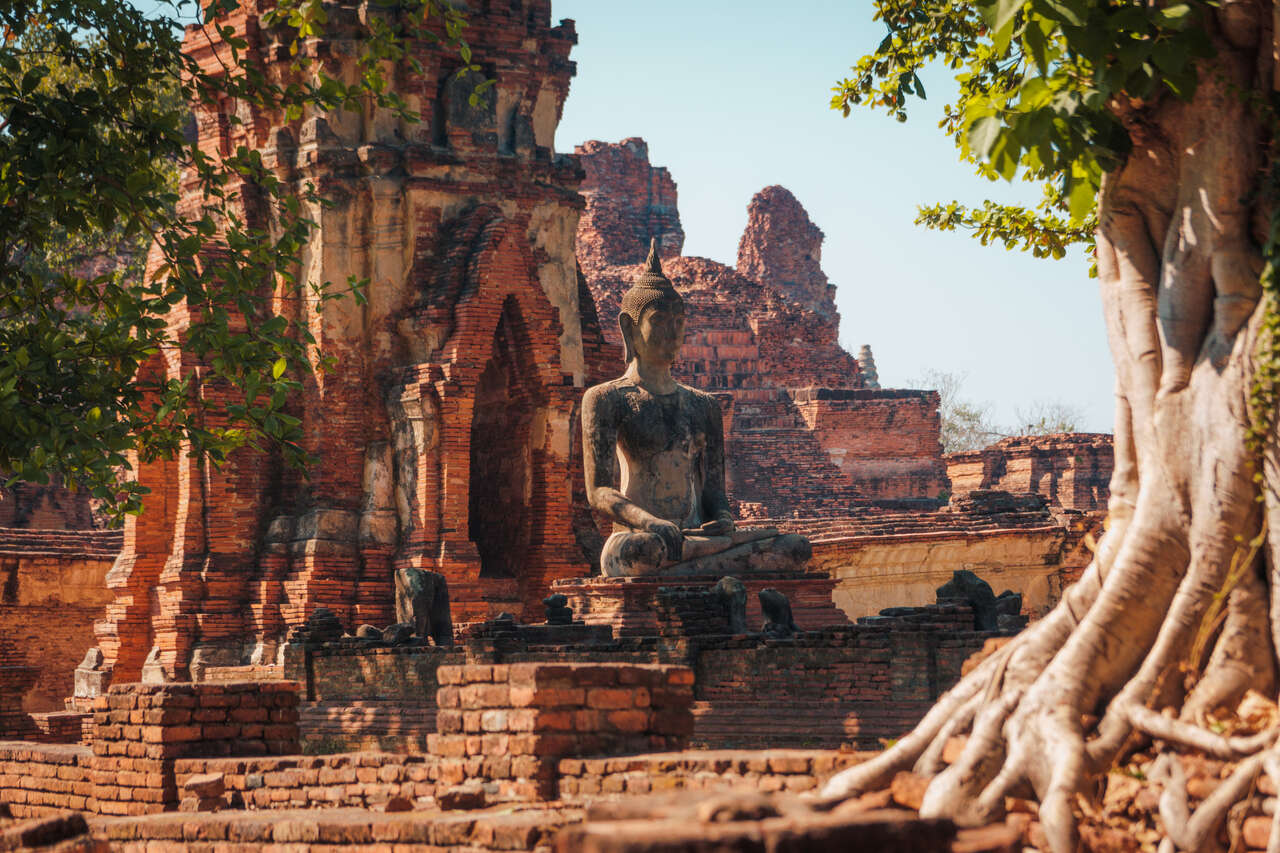
This ancient city, surrounded by moats, was mentioned quite extensively in many of the colonial-era European chronicles, and many called it the Venice of the East due to its strategic location, lively commerce, and beautiful structures that provide a great example of Siam-style architecture before European influences.
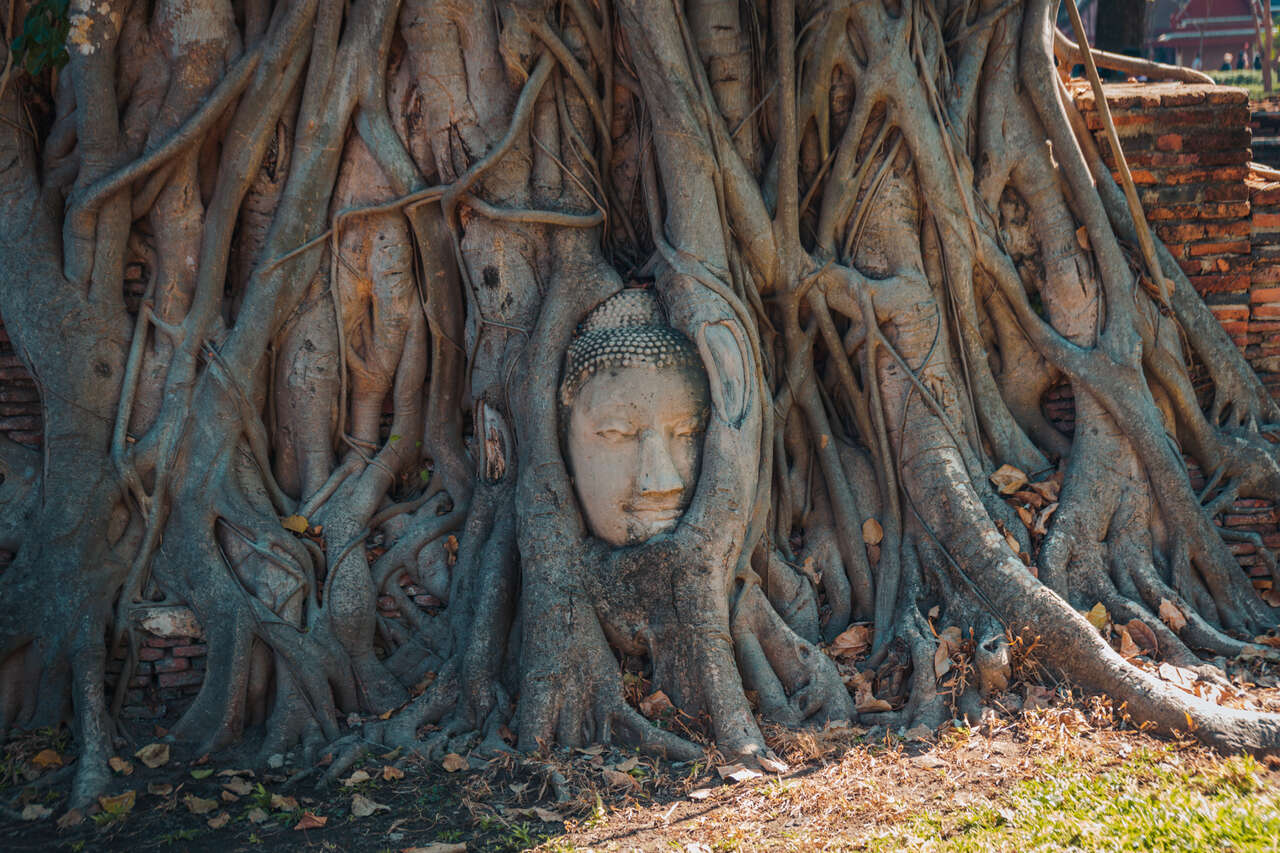
It is an awesome place to visit with many spots to explore, like the giant pagoda of Wat Yai Chaimongkol, the ancient Wat Chai Watthanaram that reminded me of Angkor Wat, the famous Buddha head embedded in a Banyan tree, one of the most photographed places in Ayutthaya, and so much more.

Getting from Bangkok to Kanchanaburi
The easiest way to get from Bangkok to Kanchanaburi without driving yourself is to take a minivan from the Minibus stand across the road from the Morchit Bus Terminal.
At kiosk #8 or #11, you can get a ticket from Bangkok to Kanchanaburi, or you can book one online here. The van leaves every hour from 5 AM to 8 PM every day. The journey will take around 3 hours, and the ticket will cost about 120 THB.
Day 3-4: Kanchanaburi (2 Nights)
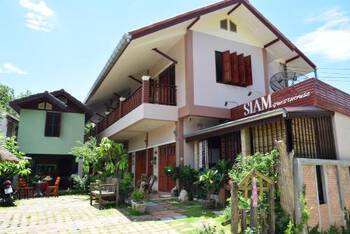
- 📍 Stay: Siam Guesthouse
- 🕐 Time: 2 Nights
- 📖 Full Guide: 17 Best Things to Do in Kanchanaburi, Thailand
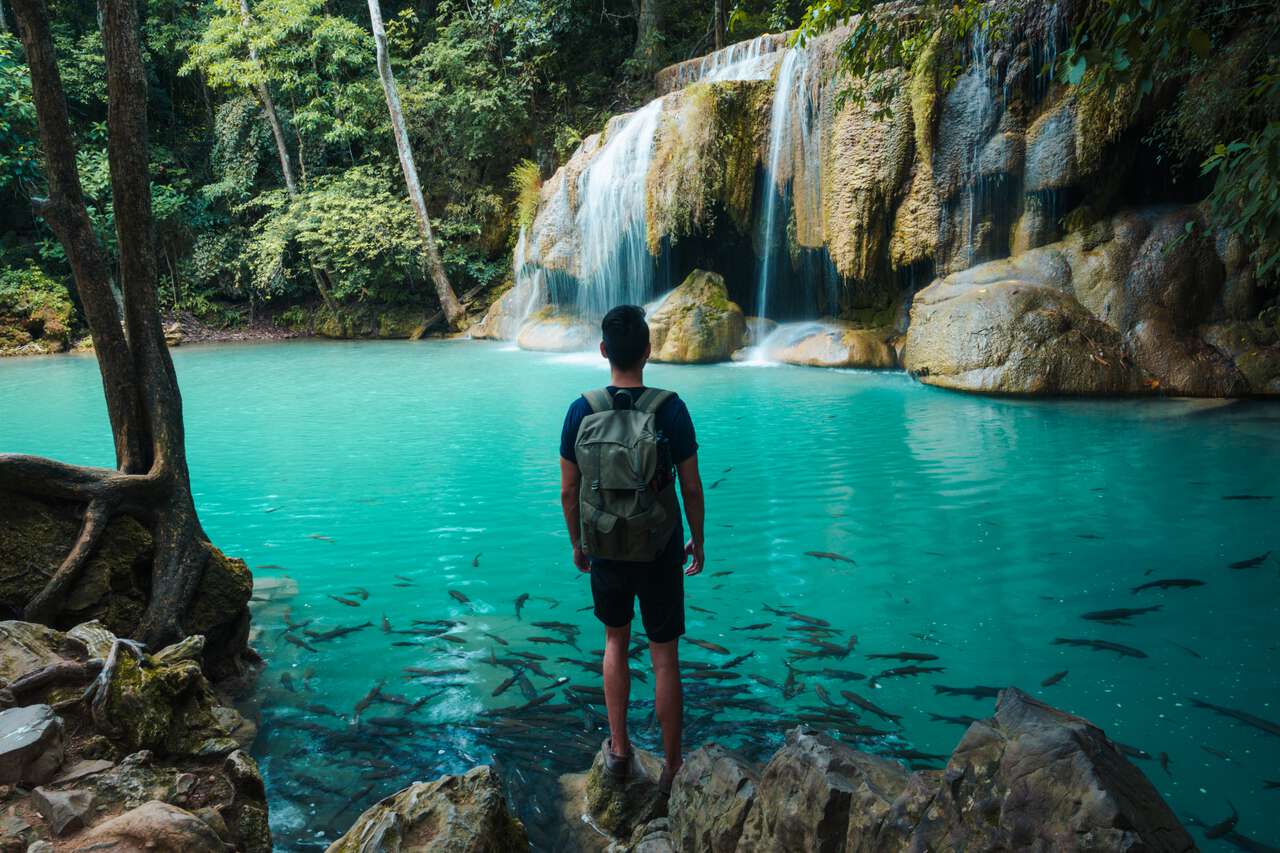
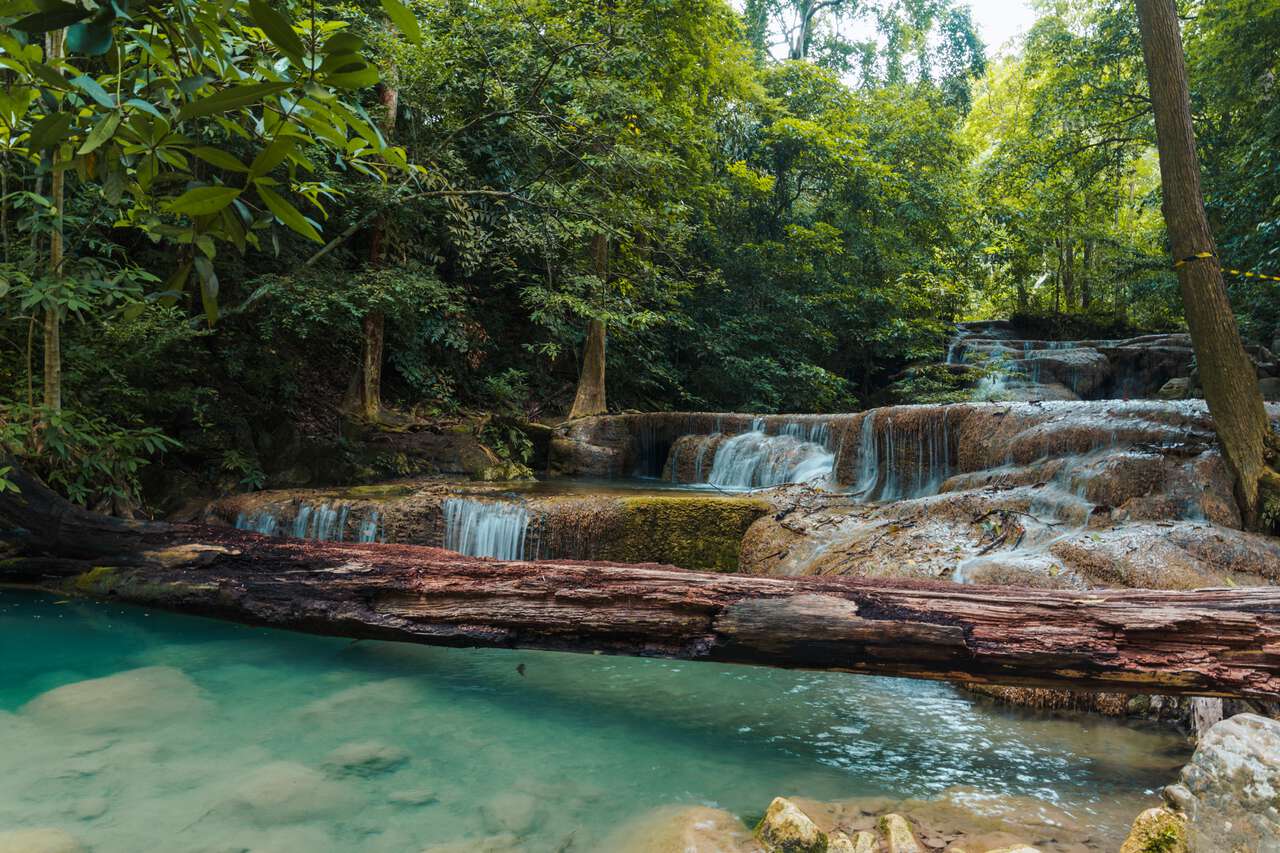
Kanchanaburi is a great place to visit if you are into nature, as it is home to some of the most beautiful waterfalls in the country. These include the famous Erawan Falls and the off-the-beaten-path Huay Maekhamin Waterfalls. It all begins in Kanchanaburi City.
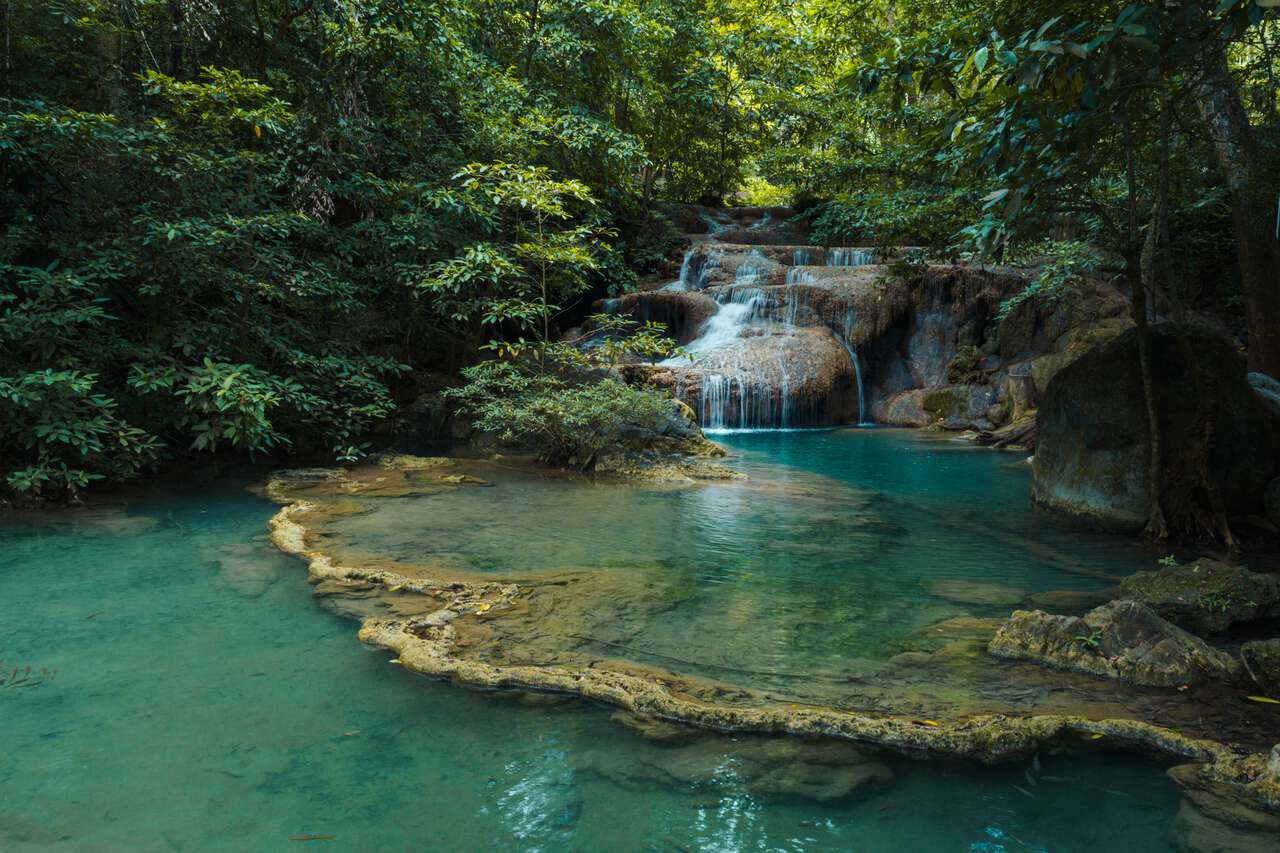
Once you arrive in Kanchanaburi City, settle in for the night, wake up early in the morning, rent a motorbike, and start heading towards Erawan Falls, one of the most magnificent waterfalls in Thailand. Spend the entire day exploring, hiking, and swimming in the waterfalls.
With its stunning layers of cascades, clear blue water, and over 7 levels for us to explore, it is not hard to see why the people considered it as it is.
Since Erawan Falls is 65 km away from Kanchanaburi City, the drive there with a scooter will take you about 1.5 hours, so I recommend you start your day as early as you can. The road there is pretty straightforward, and the majority of the way is on a 4-lane road, which is not difficult to drive.
There are 7 waterfalls and a trail for you to hike to the top. The trail takes about an hour to an hour and a half, and about an hour or less to get down. The opening hours for Erawan Falls are from 8 AM to 4:30 PM, so prepare accordingly if you plan to hike the whole stretch. The entrance fee is 300 THB (100 THB for Thais), plus 20 THB if you are there with a scooter.

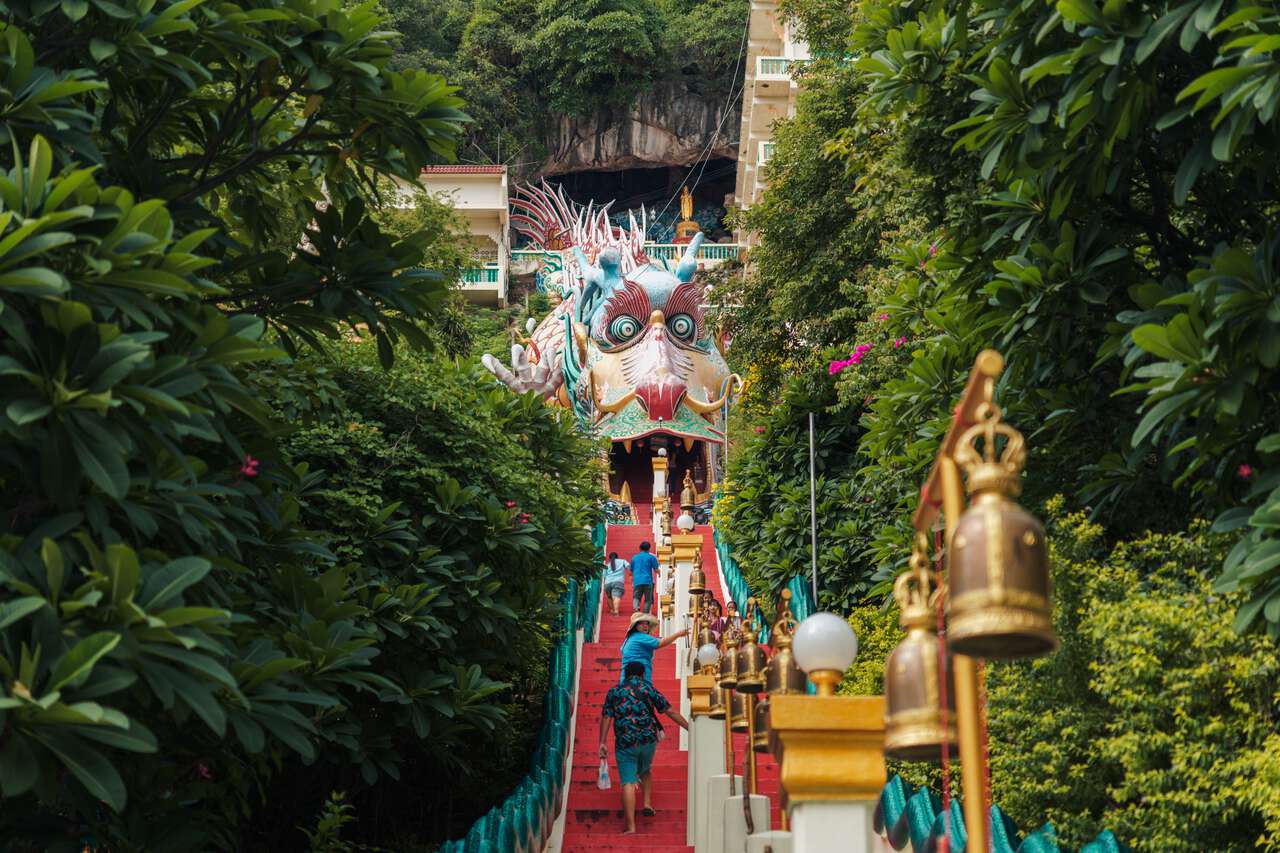
After you are done at Erawan Falls, you can drive back to Kanchanaburi city and begin your exploration, starting with Wat Baan Tham, a beautiful cave temple with an excellent viewpoint.
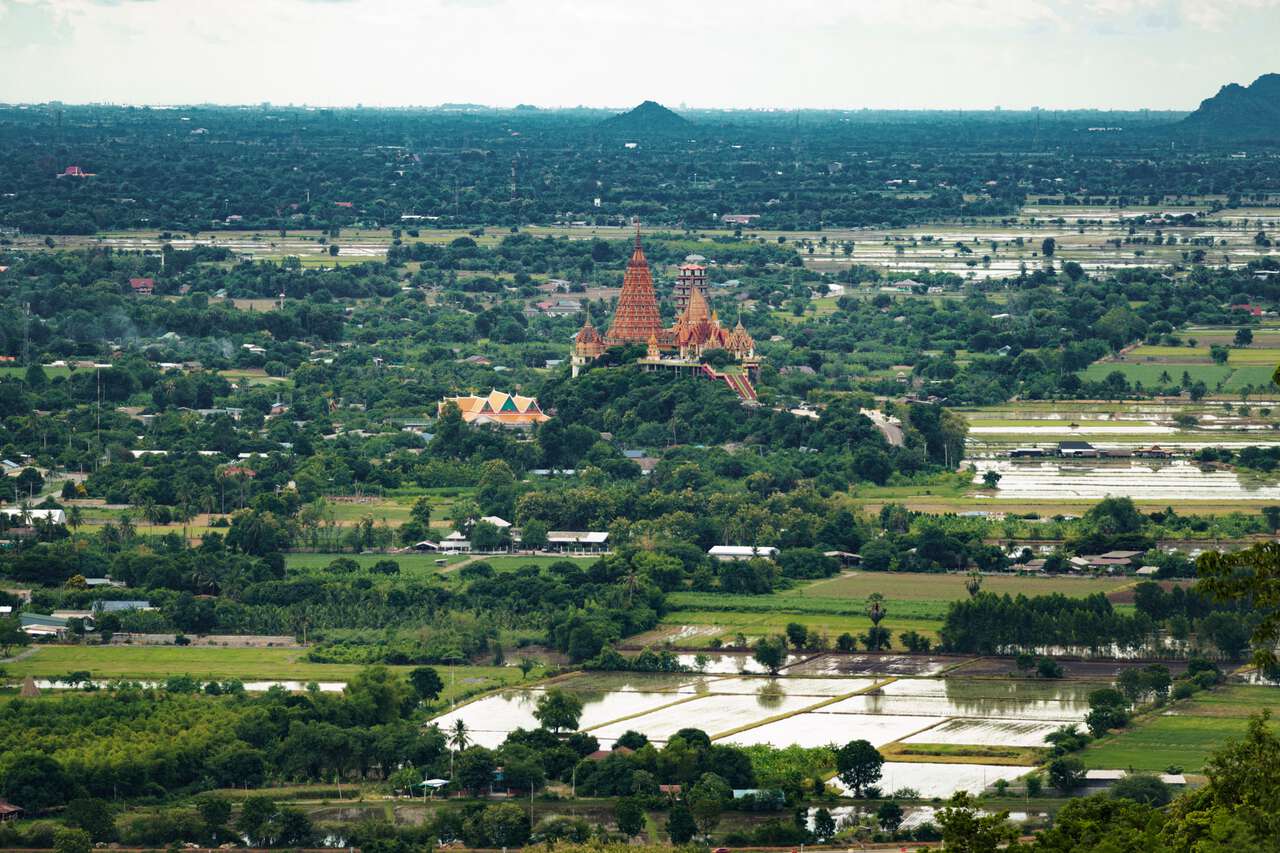
At Wat Baan Tham, there is a staircase that will lead you up to the top of a mountain where you can then see the beautiful landscape of Kanchanaburi, as well as our next destination, Wat Tham Sua.
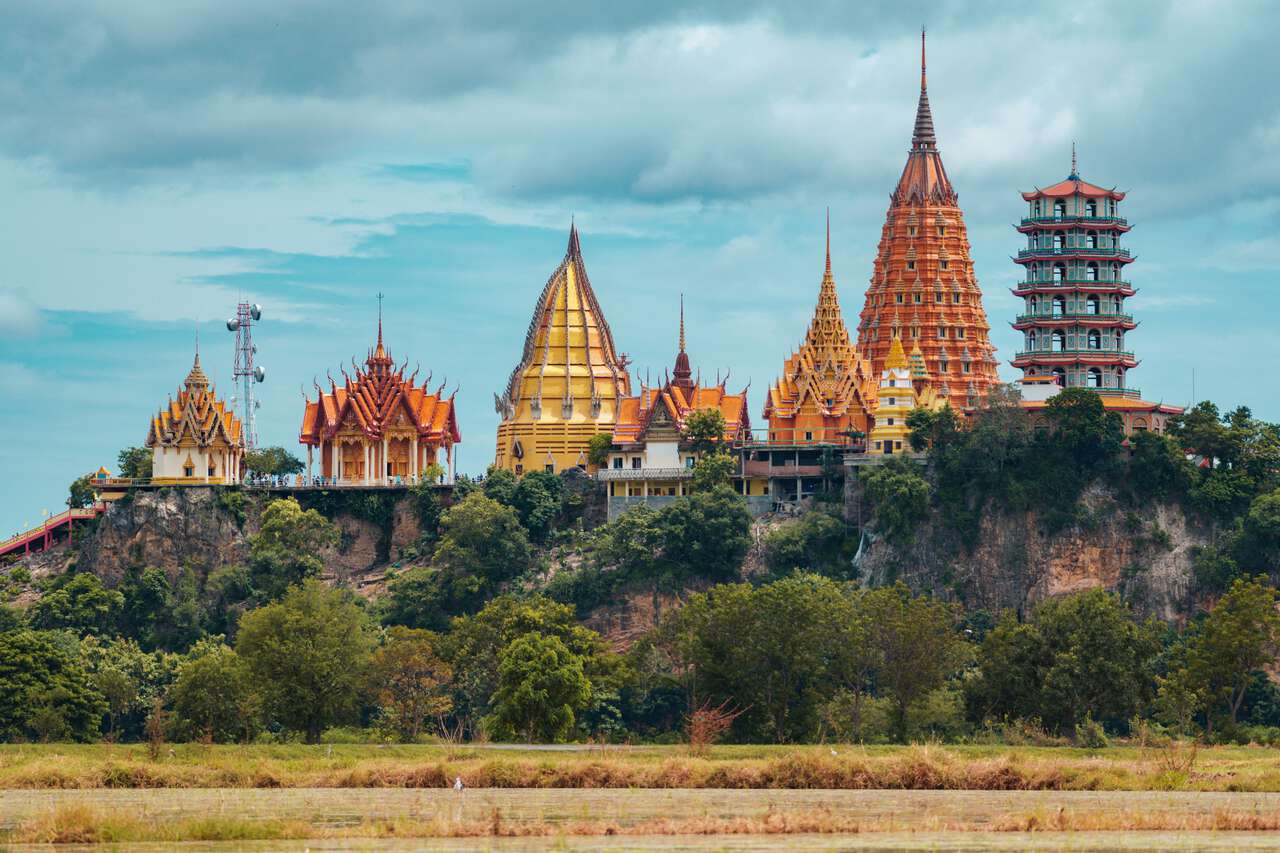
From Wat Baan Tham, it is only a few kilometers until you arrive at Wat Tham Suea, a stunning temple complex consisting of multiple architectural wonders, including several towers and pagodas of various architectural styles, as well as an 18-meter-tall giant Buddha image that dominates the Kanchanaburi landscape.
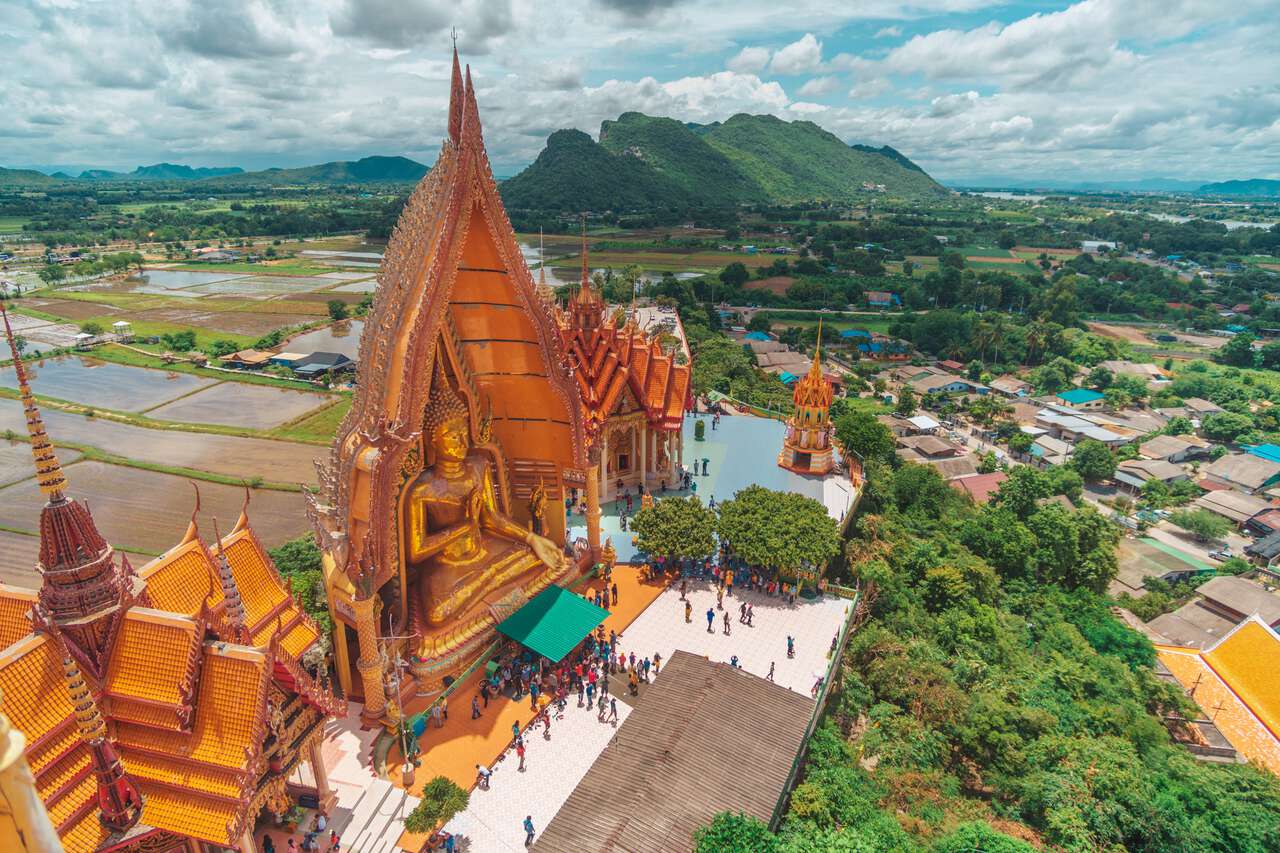
If you are looking for the best viewpoint of Wat Tham Sua and the giant Buddha Image from above without a drone, I highly recommend climbing up to the 6th floor of the orange pagoda where you will find a few tiny windows that you can look out from. There, you can witness the true scale of Wat Tham Sua from above.
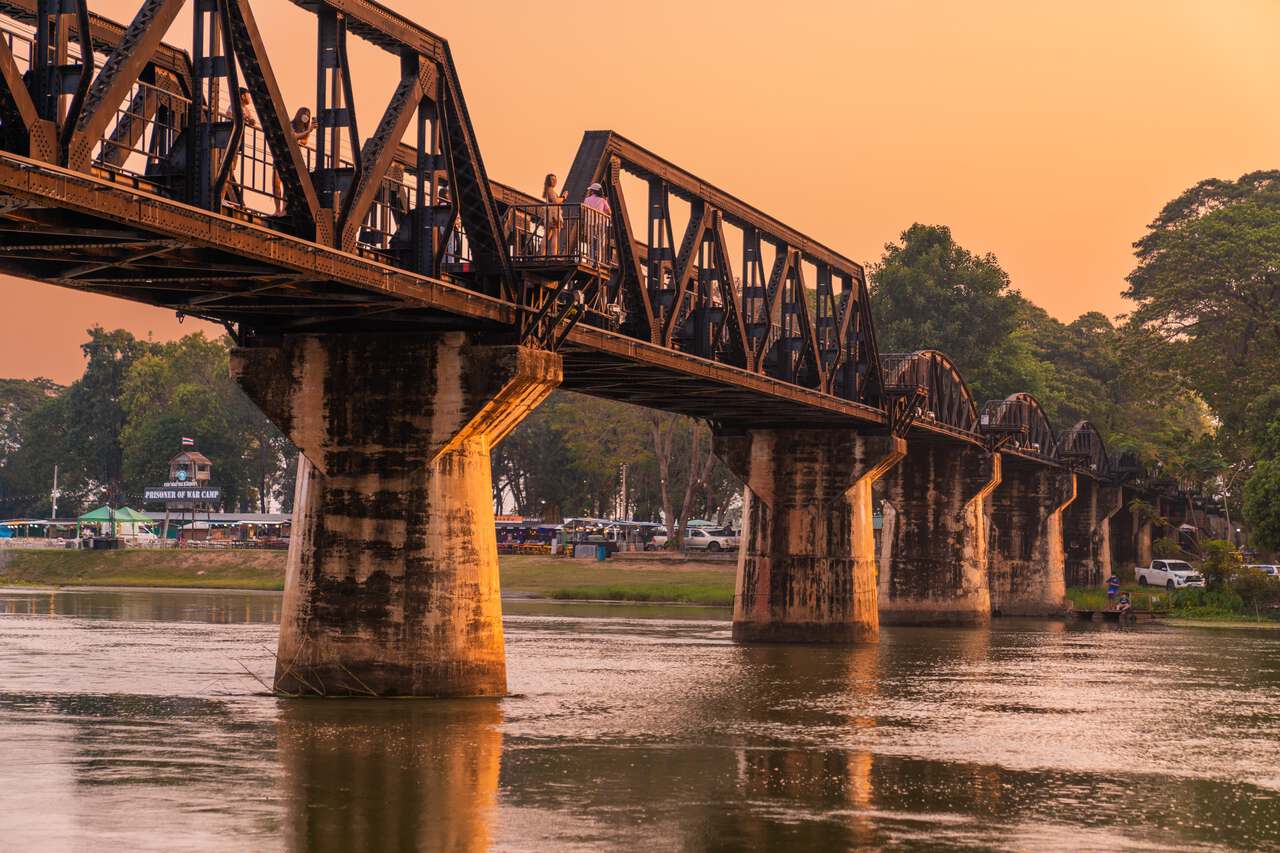
After visiting these two temples, you can spend the rest of the day exploring the tourist attractions within Kanchanaburi City, such as the famous River Kwai Bridge and Wat Thaworn Wararam, a beautiful Chinese temple located on the bank of the River Kwai.
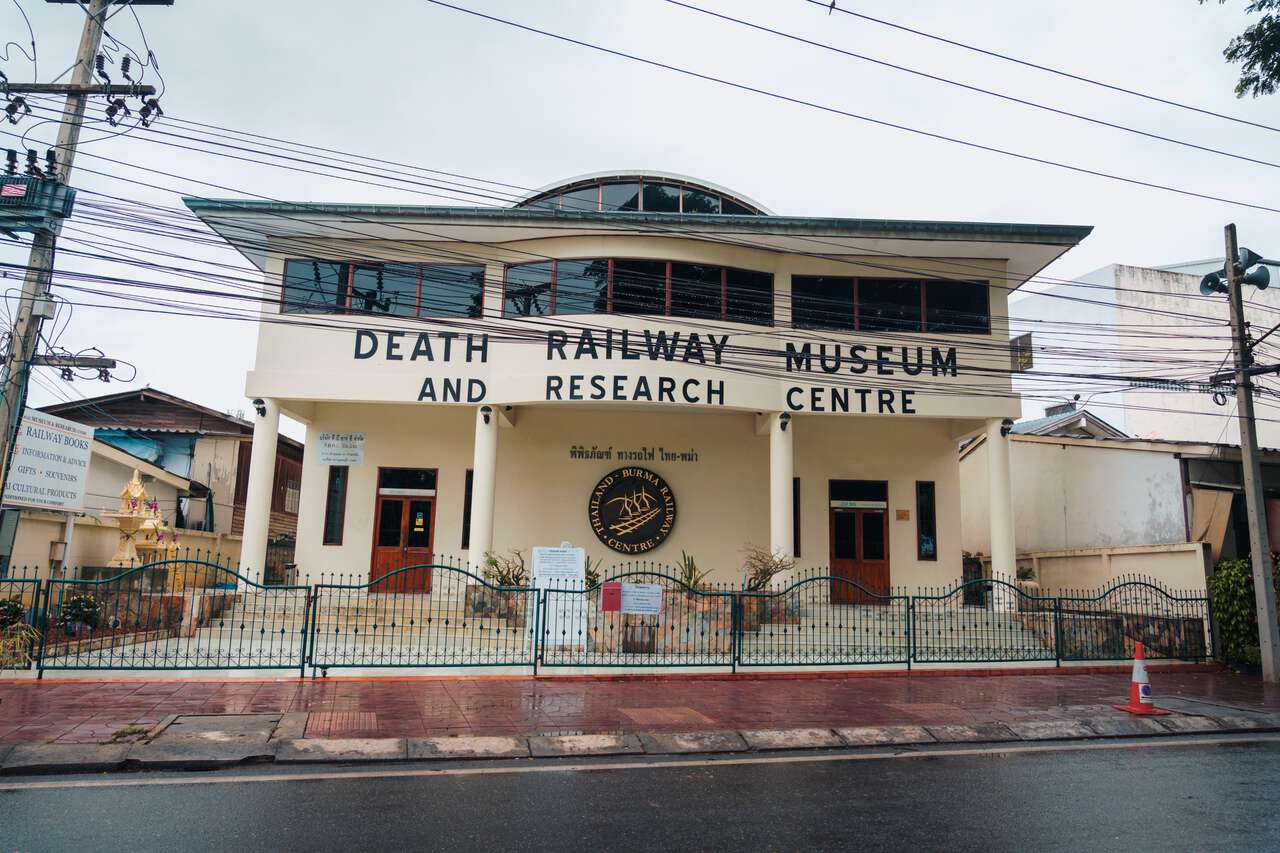
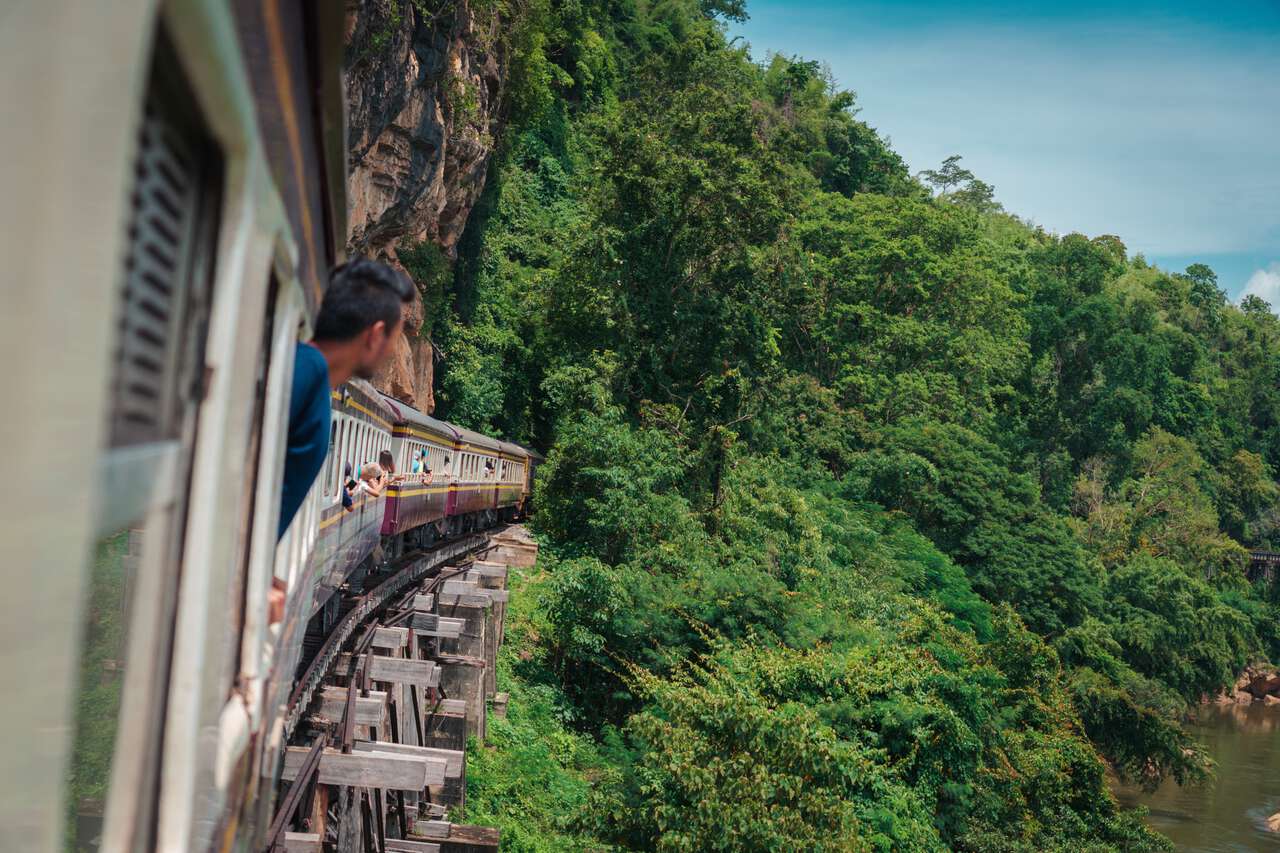
If you want to learn more about the gruesome history of the Death Railway and Kanchanaburi City during World War 2, you can visit the JEATH War Museum for a brief history of the influence the Japanese had in the region during WW2, or the Death Railway Museum to learn more about the Death Railway itself.

Getting From Kanchanaburi to Chiang Mai
To get from Kanchanaburi to Chiang Mai, you will have to make your way back to Bangkok and catch the next flight out to Chiang Mai. You can catch the bus from Kanchanaburi Bus Station and you will be back at Morchit Bus Terminal in about 2.5 hours.
Once you arrive in Bangkok, you will need to take a taxi to Don Muang International Airport, where most domestic flights depart from (except VietJet Airlines). Afterward, you can catch the next flight to Chiang Mai. Since the entire process can take about 3-4 hours, I highly recommend booking a late afternoon flight so you don't miss it.
Day 5-7: Chiang Mai (3 Nights)
- 📍 Stay: The Wing Boutique Hotel
- 🕐 Time: 3 Nights
- 📖 Full Guide: 7 Best Day Trips From Chiang Mai
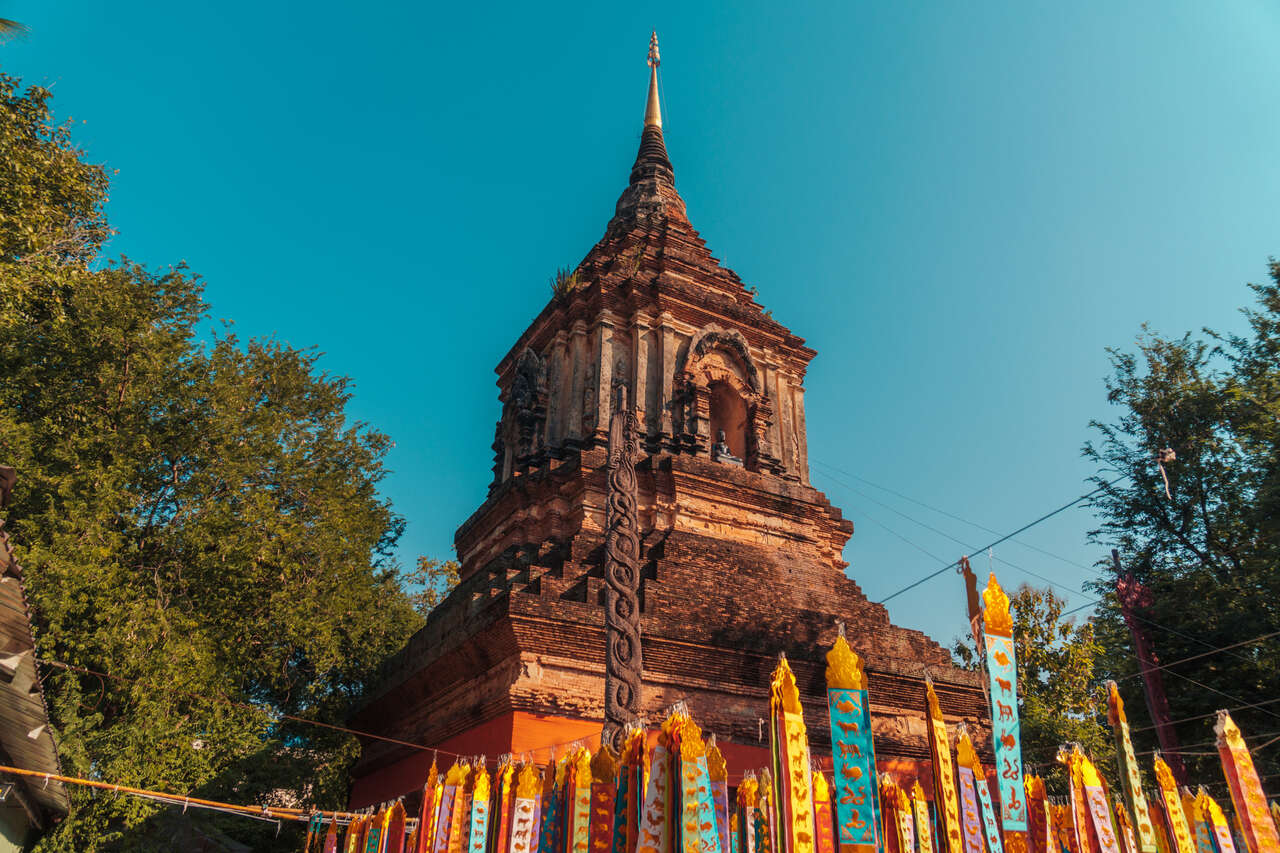
There are so many things to do in Chiang Mai City, and in order to make the best out of it, I highly recommend you rent a motorbike and start exploring as early as you can with a visit to Wat Lok Moli, one of the oldest standing temples in the city built in the 14th century. The temple is located just outside the city's wall to the north.

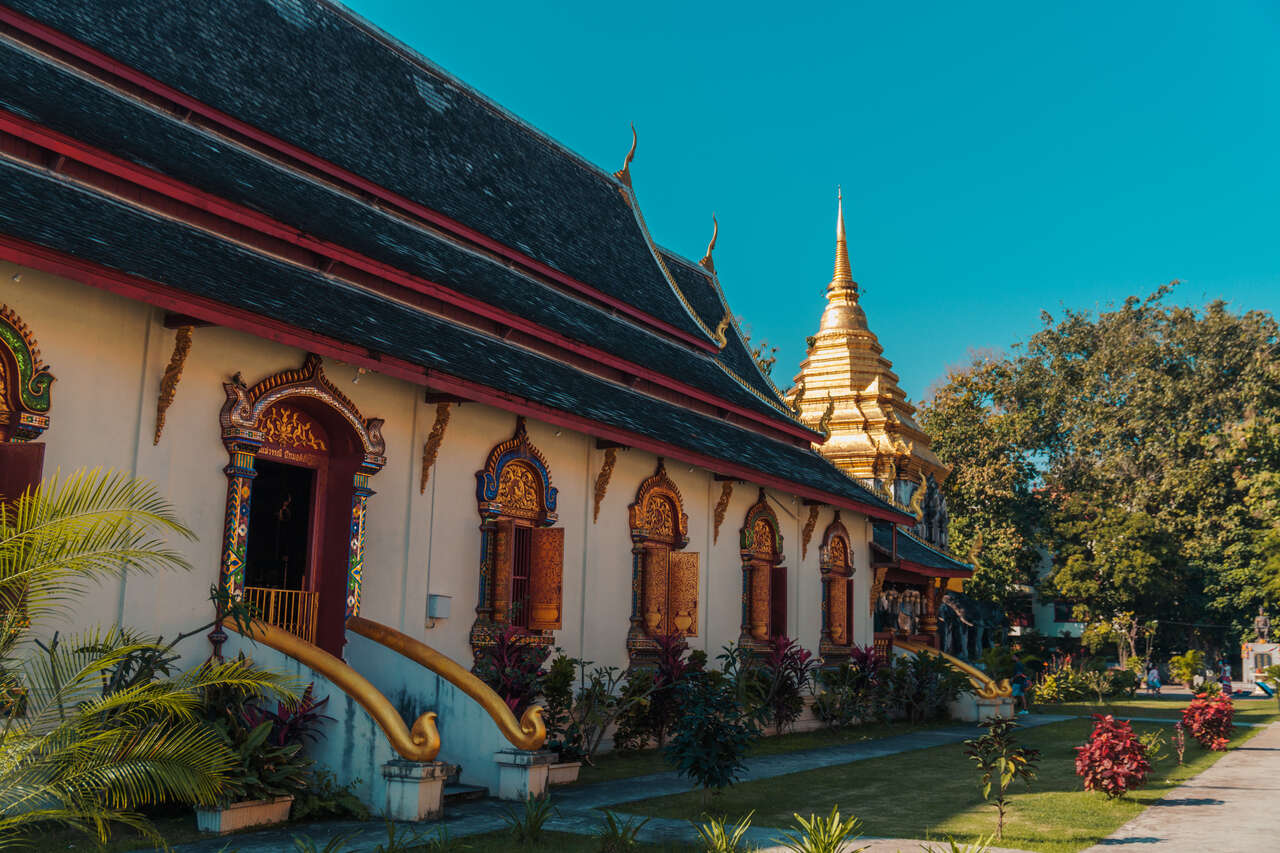
Located not too far from Wat Lok Moli, within the city's walls of Chiang Mai, you will find another impressive temple called Wat Chiang Man, the oldest temple in Chiang Mai, dating all the way back to 1296, the time of the city's founding.
Within the temple, you will find "Chang Lom Chedi" or "elephants surrounding the Chedi", which is built in a beautiful mixture of Lanna-style and the Singhalese style originating from Sri Lanka, which can be seen in the design of the bottom part of the Chedi.
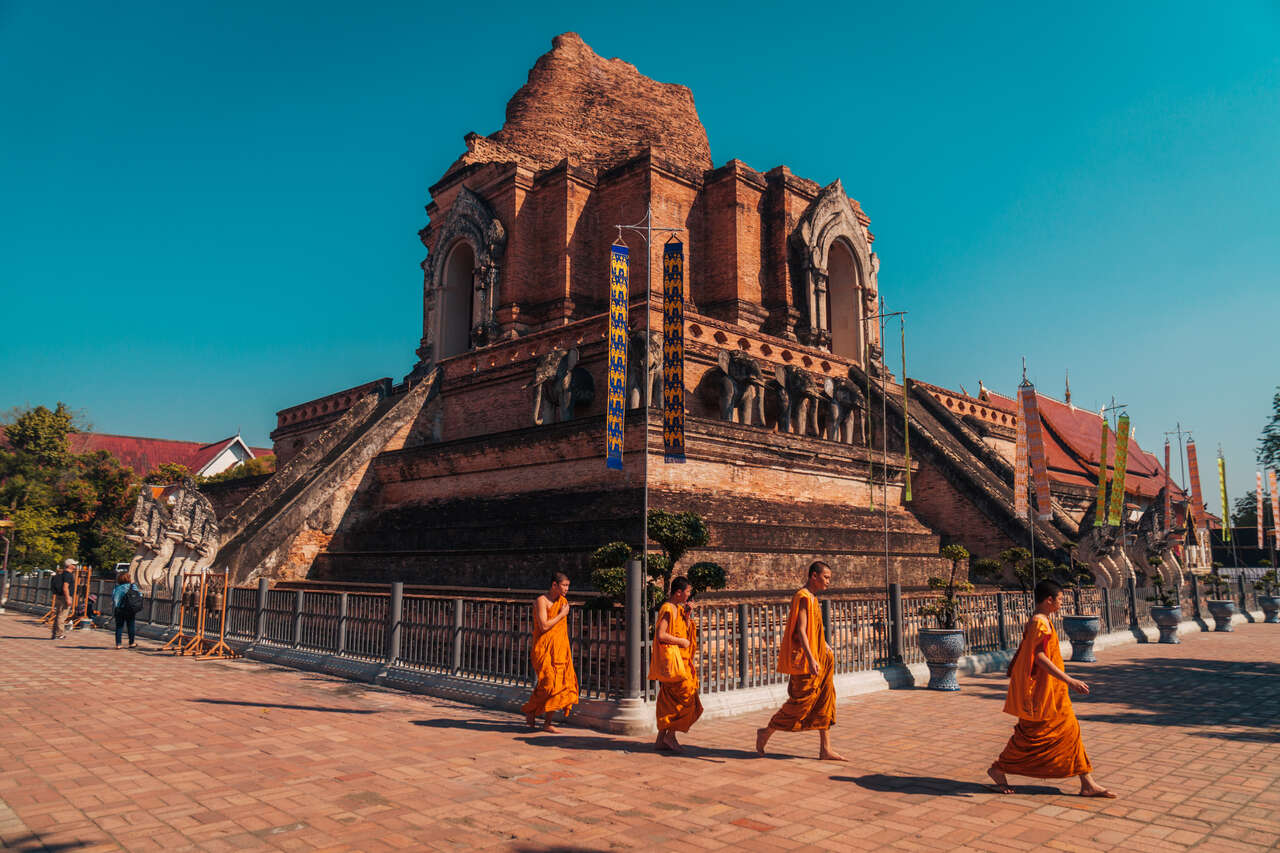
Just a little north of Wat Chiang Man, you will find one of the most iconic landmarks of Chiang Mai: the massive remaining chedi of Wat Chedi Luang, or as it is known, the "temple of the great stupa."
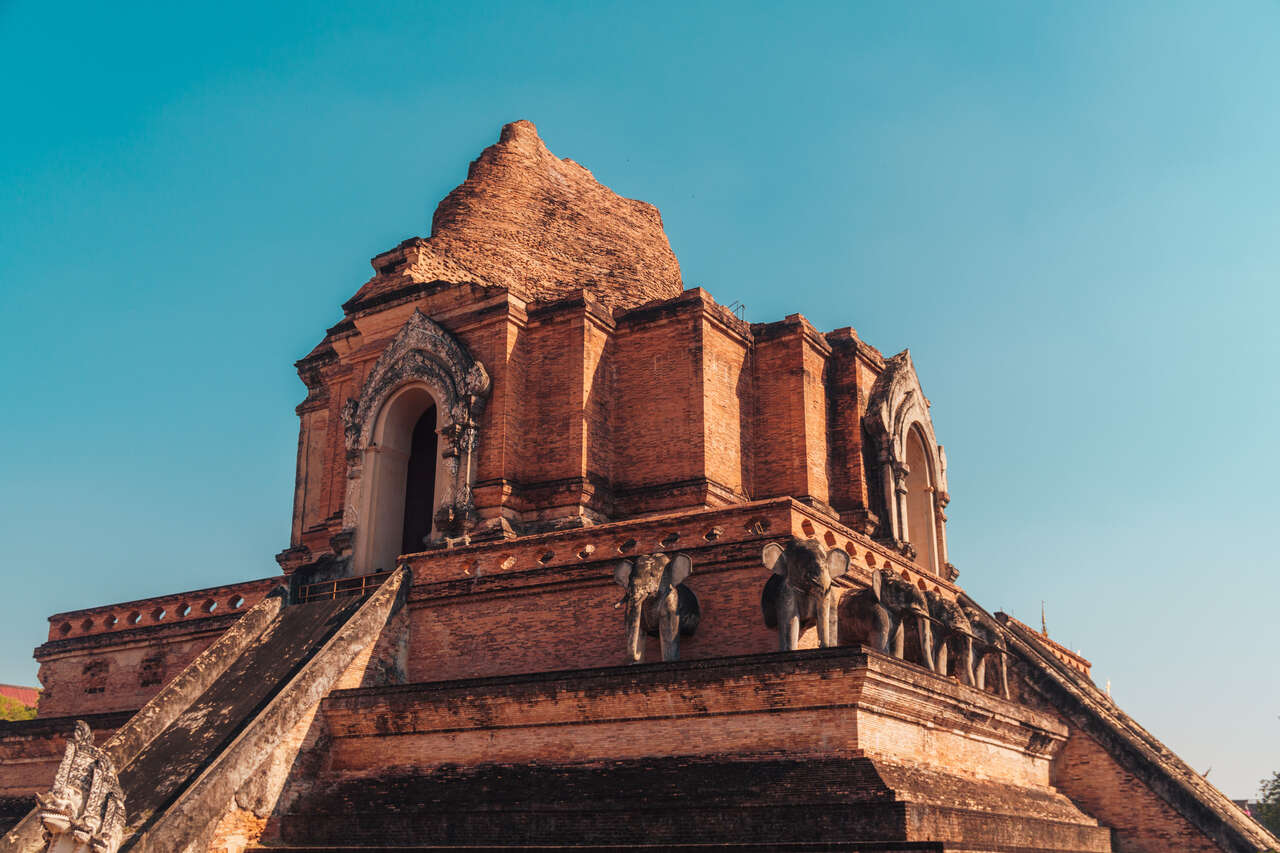
It took almost a decade to complete this chedi. The construction started in 1391 and was completed in 1475, taking almost 85 years to finish. When it was intact, it is said that the chedi reached up to 85 meters in height and 44 meters in width, making it the largest ancient structure in the entire city.
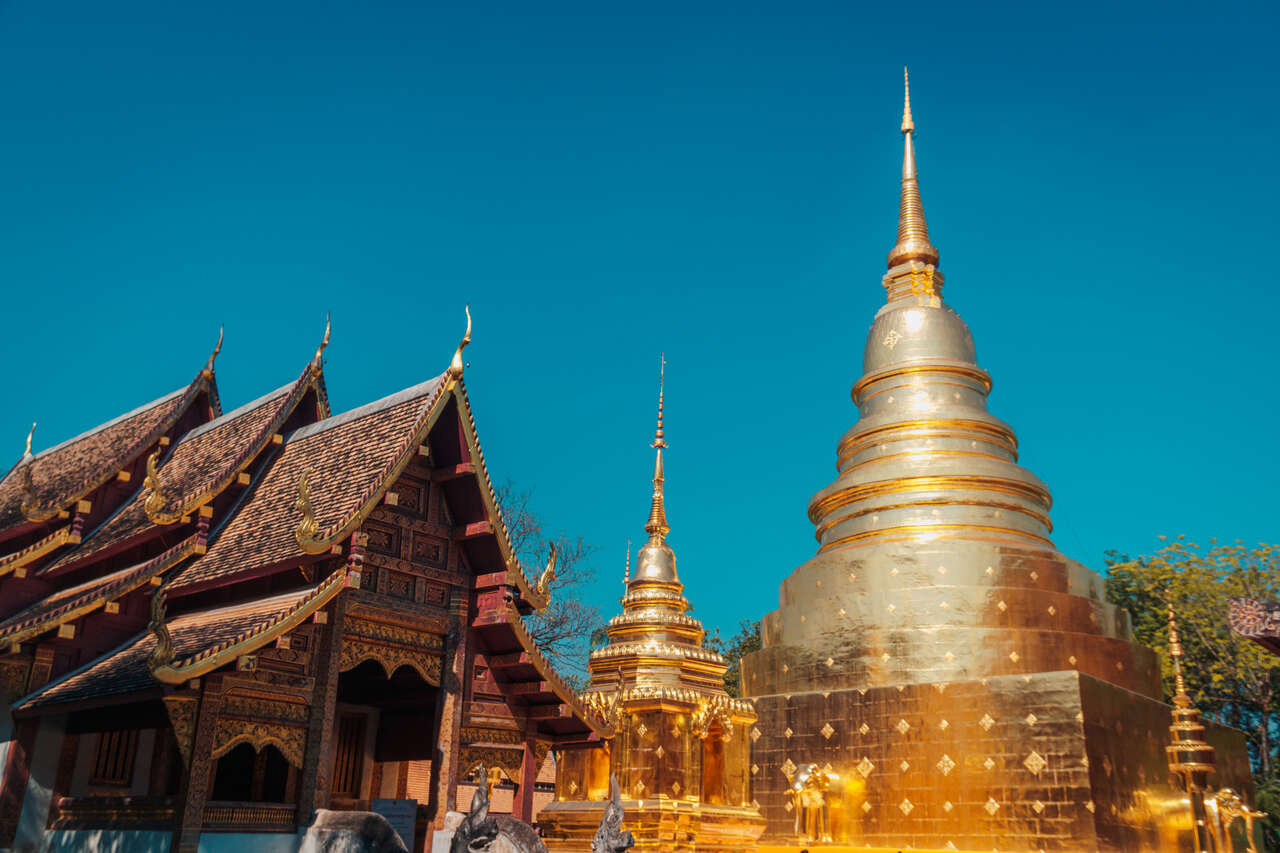
The last temple you will visit within the vicinity of the old ancient wall of Chiang Mai is Wat Phra Singh, a temple built in the 14th Century that proudly displays the stunning classic Lanna architectural style with its blindingly gold chedi and several teak wood temples, all within the temple's courtyard.
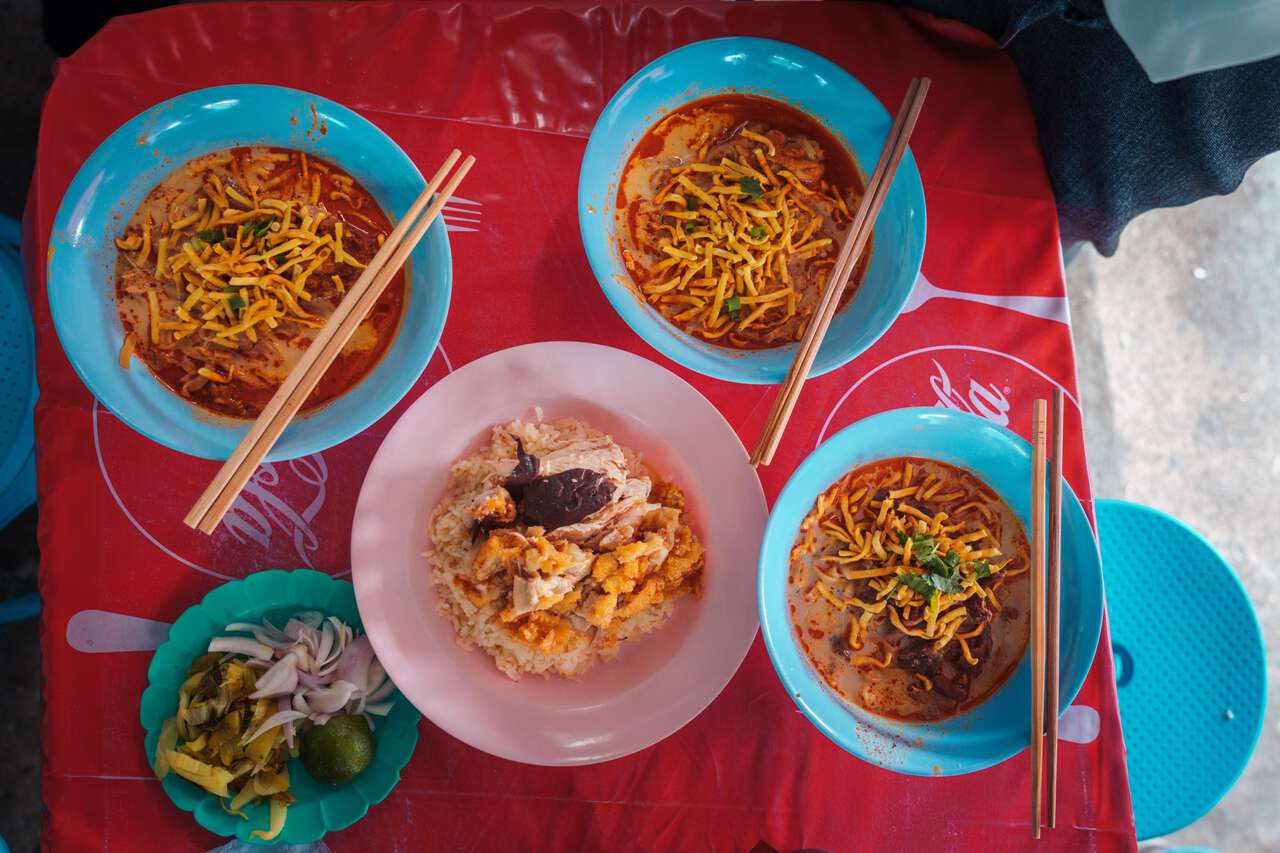
By this point, it should be around lunchtime, and if you want to taste the very best Khao Soi in Chiang Mai (recommended to me by a local), you should definitely check out Khao Soi Lung Prakit and try their delicious beef khao soi. It makes me drool every time I think about it.
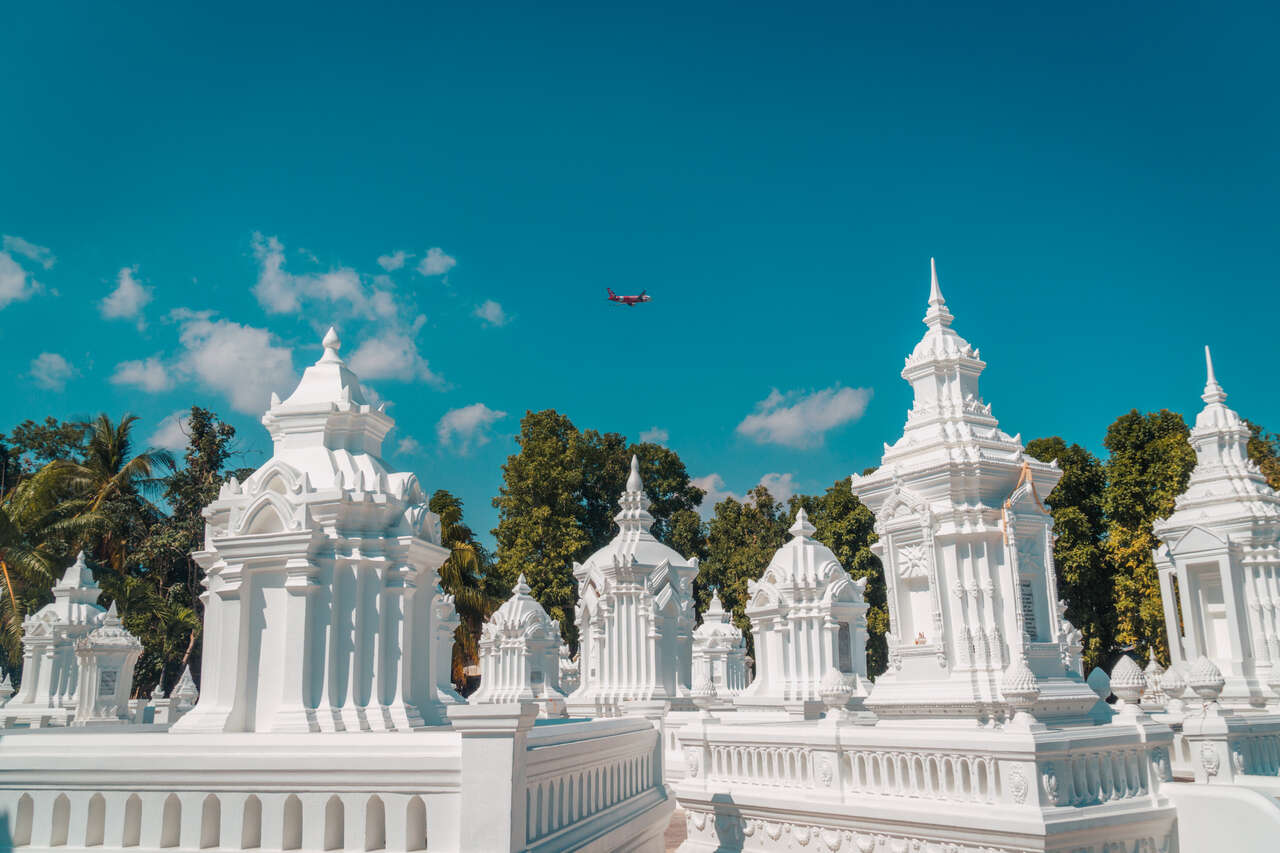
After spending the first half of the day exploring the temples inside the old city wall, it's time to take your scooter and explore the outside with a visit to Wat Suan Dok, a 14th-century temple known for its numerous beautiful white pagodas scattered throughout the temple grounds.

After Wat Suan Dok, continue west along the road and visit Wat Umong or the Tunnel temple, which is - you guessed it - a temple built inside a system of tunnels deep within a forest on the foothills of Doi Suthep, the looming mountain that you can see towering over Chiang Mai.
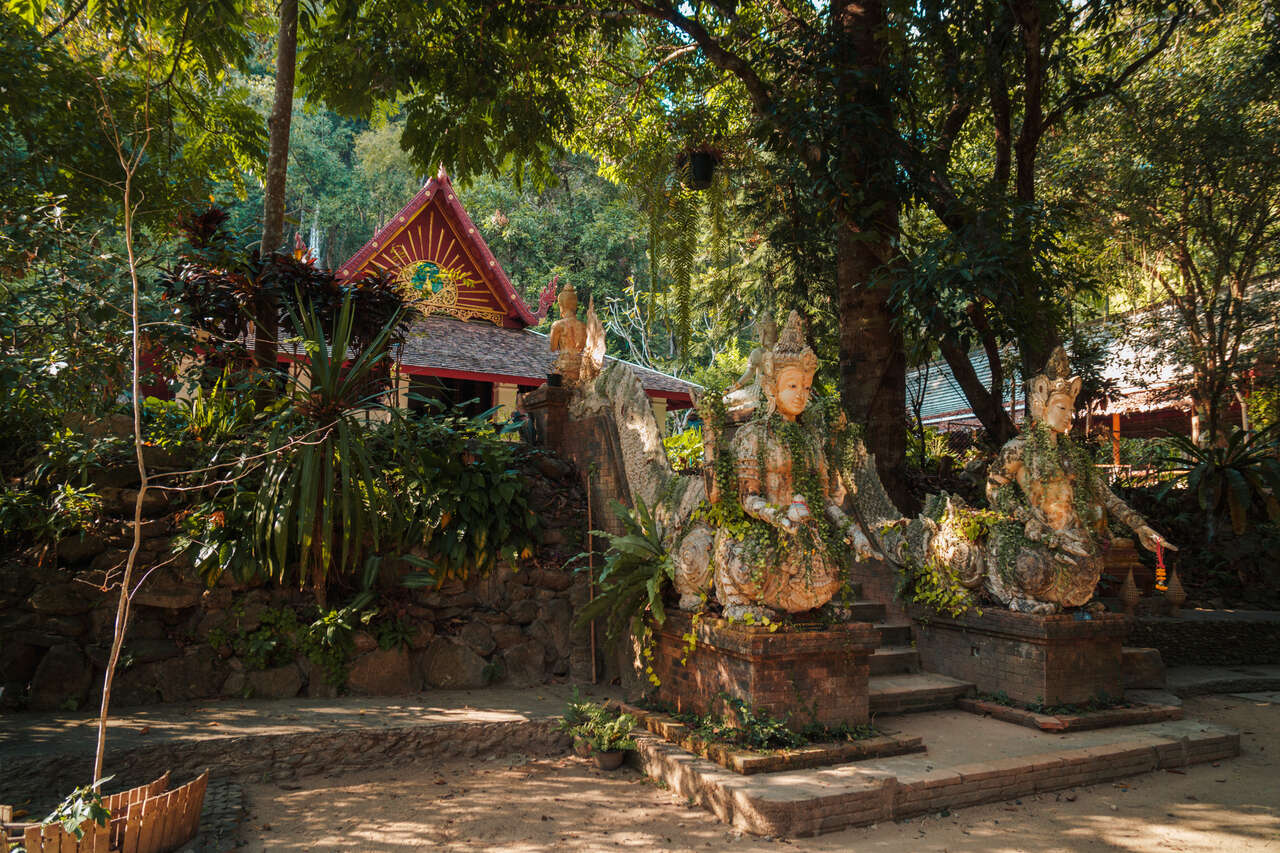
After visiting Wat Umong, it is time to head up Doi Suthep for a nice sunset. But before that, there is one forest temple that you should visit. Wat Pha Rat is a lesser-known temple located along the way from the base of Doi Suthep to Wat Pra That Doi Suthep temple.
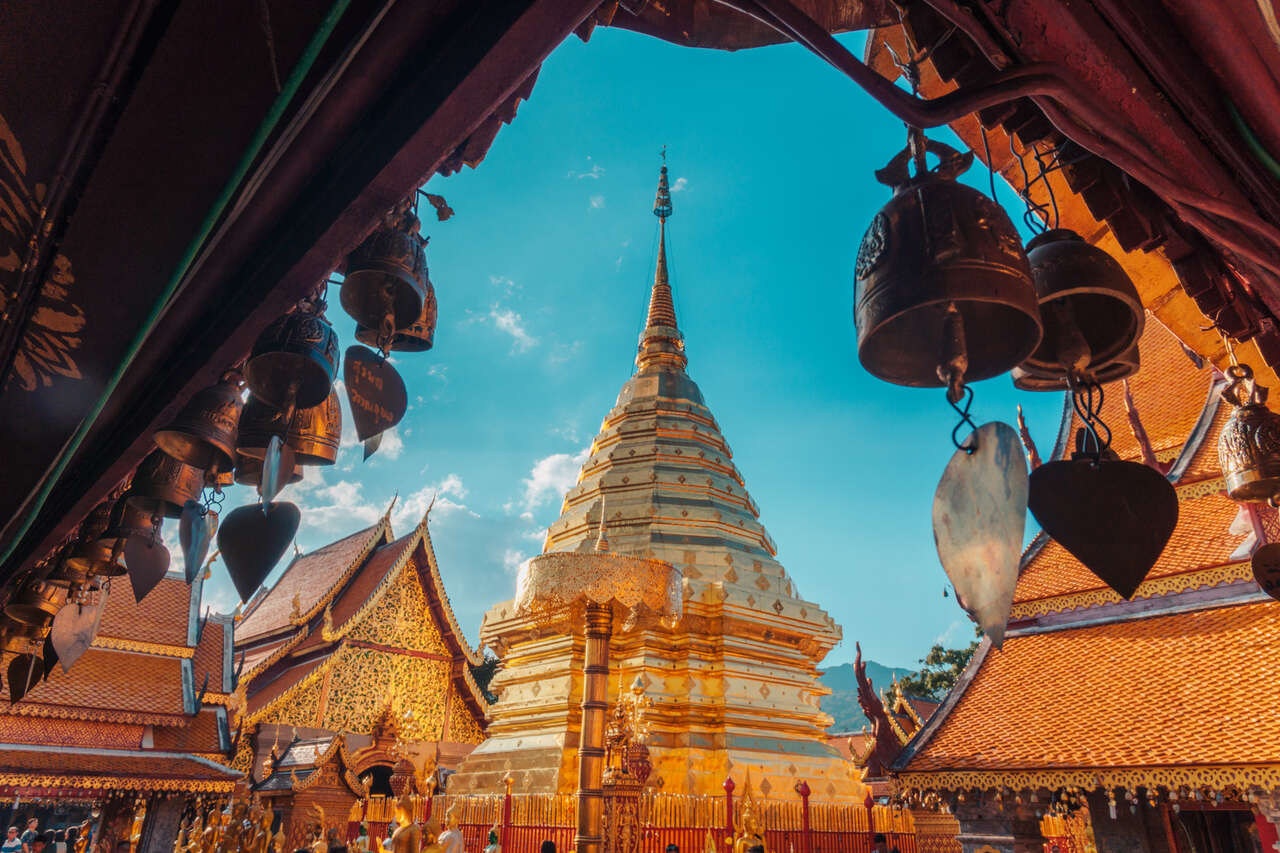
After spending your time at Pha Lat Temple, continue along the winding road up to the top of Doi Suthep mountain, and you will find Wat Phra That Doi Suthep, one of the most important temples in Northern Thailand, waiting for you.
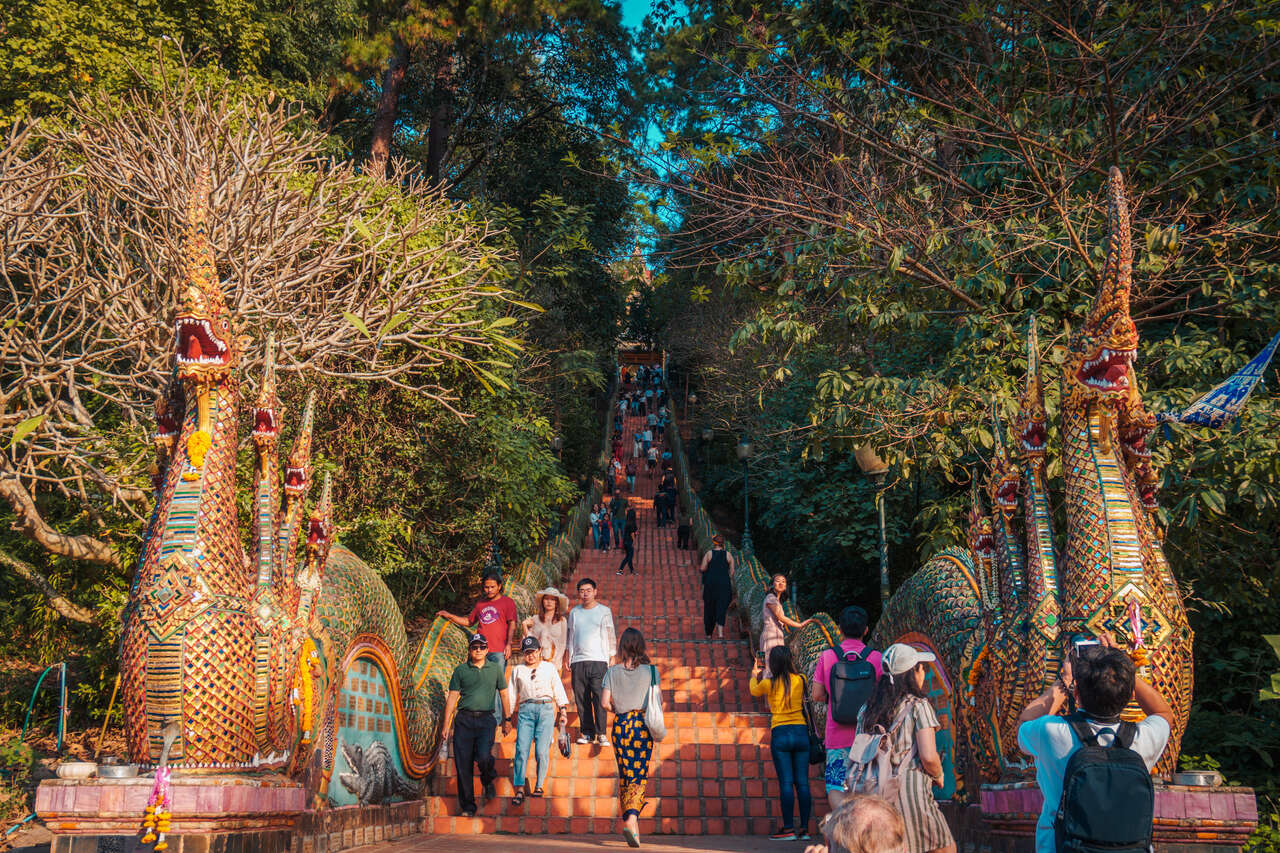
Before you reach the temple, you will first have to ascend the 300+ steep steps that lead up to the temple. Once you reach the top, you will find a stunning golden chedi surrounded by three halls that house several Buddha images. Enjoy a peaceful evening there before you drive down to the city for dinner.
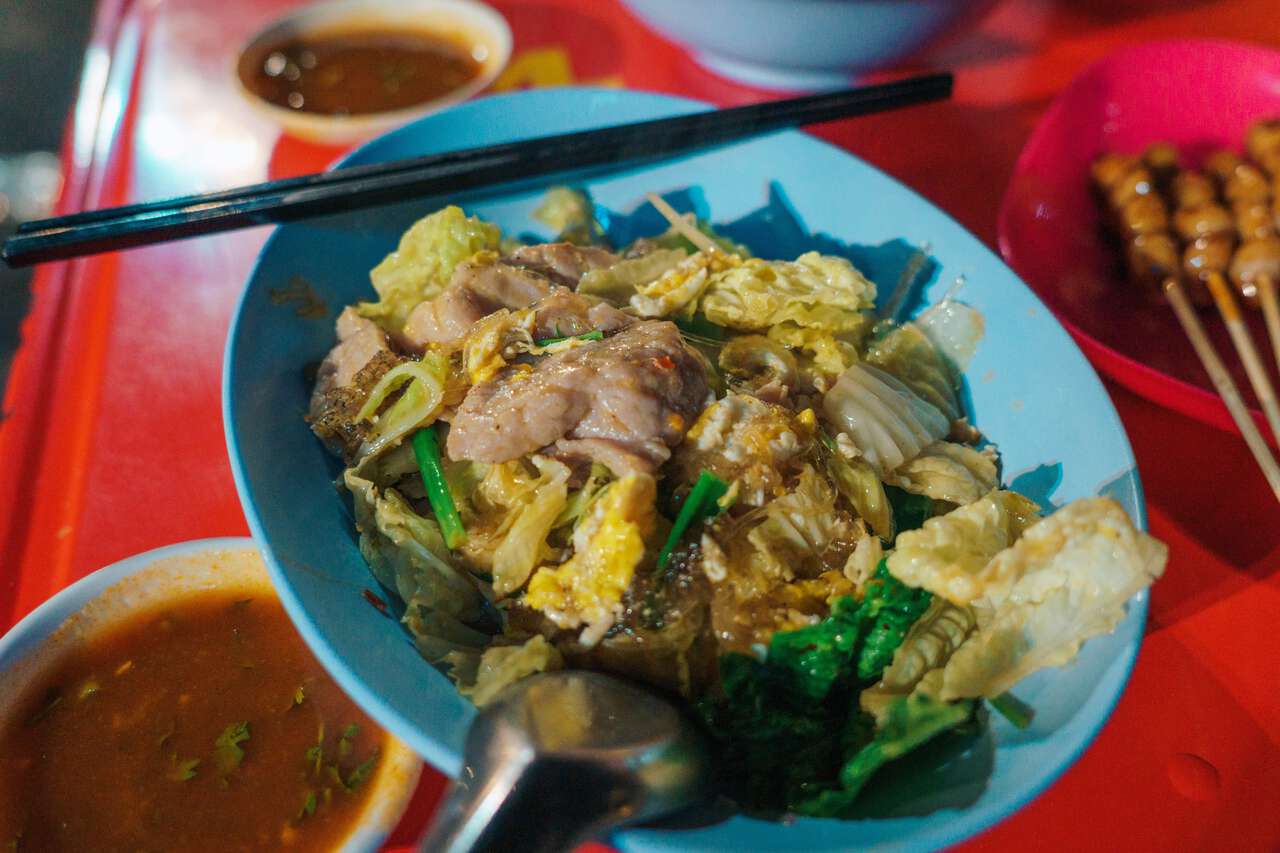
For dinner, if you are looking for great street food to try, I can recommend Chang Phueak Suki, located near the road that goes up to Doi Suthep.
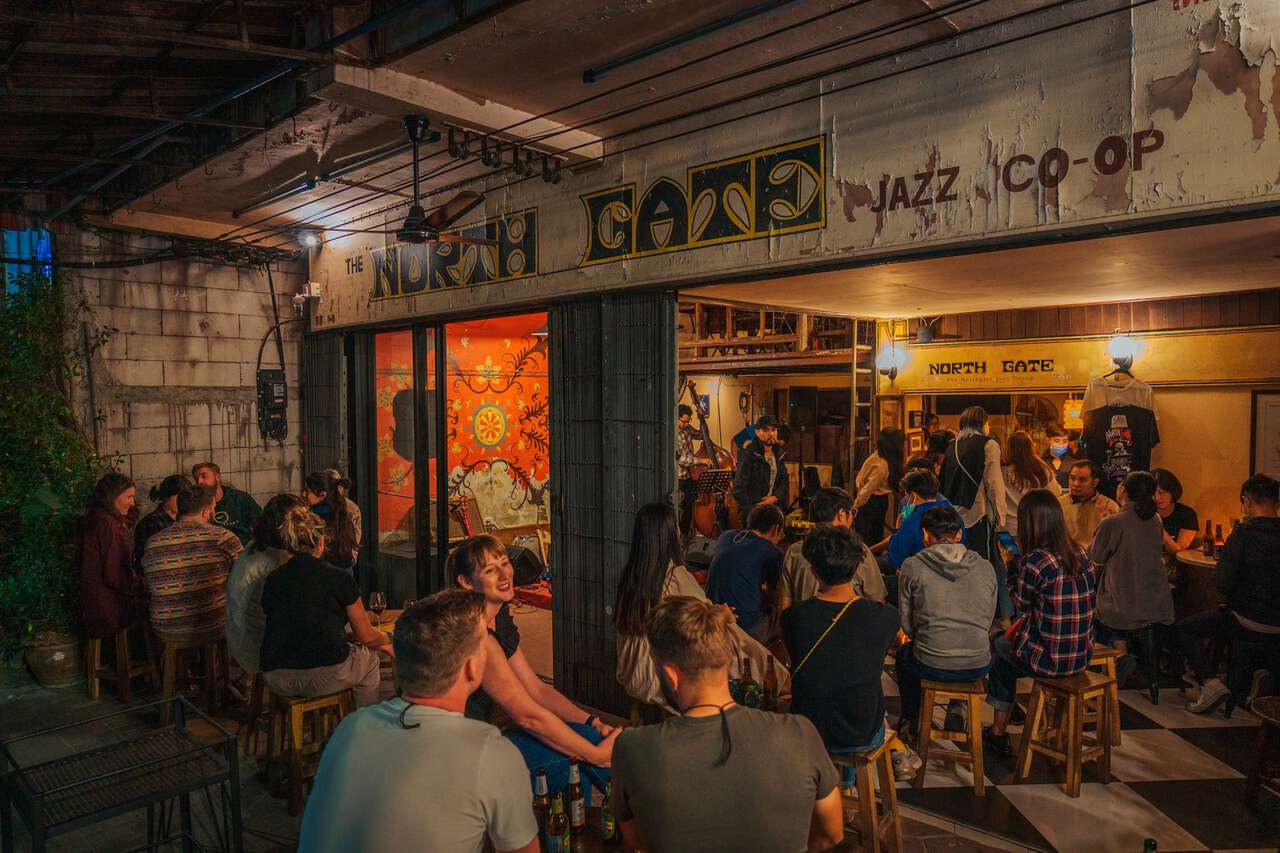
For a nice night out, if you enjoy jazz, I highly recommend visiting The North Gate Jazz Co-Op to enjoy some local jazz bands. If you are looking for a place to sit and talk, Ae Te South Gate is also a great option. For dancing the night away, Warm-Up and Zoe are the best places to be.

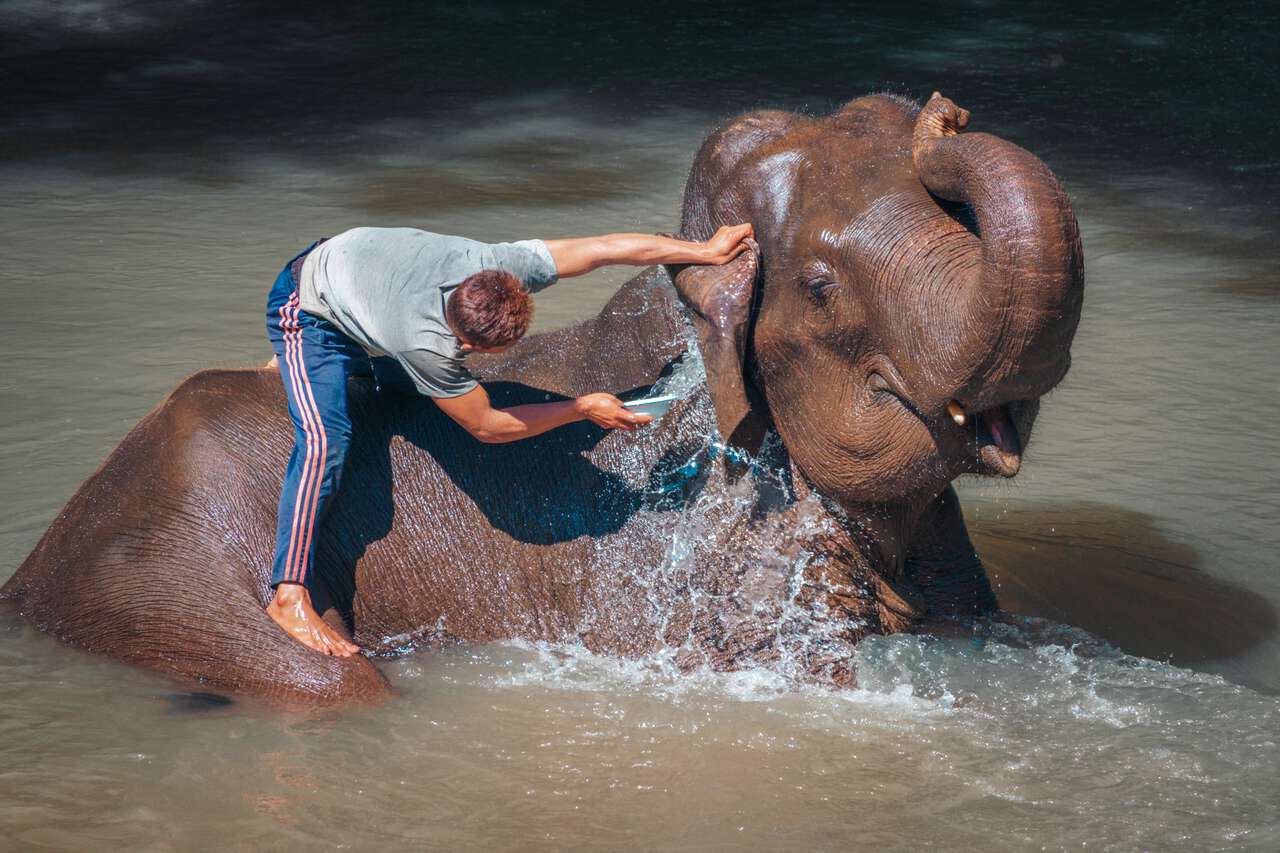
For the next day, you can go on one of the many day trips you can make from Chiang Mai, such as visiting the Elephant Sanctuary, spend a day in Lamphun, or just take it slow, relax, and enjoy Chiang Mai's beautiful old town, before retreating for the day and prepare our journey to Krabi.


Getting From Chiang Mai to Krabi
After visiting Chiang Mai, you can take a flight to Krabi where you will likely have to transit in Bangkok. The flight should cost around 2000 THB and take about 2.5 hours, excluding the transit time. You can book a flight from Chiang Mai to Krabi here.
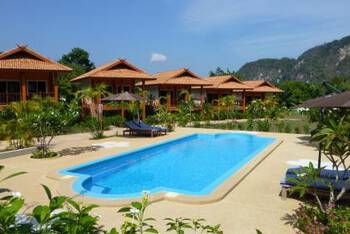
Day 8-10: Krabi (3 Nights)
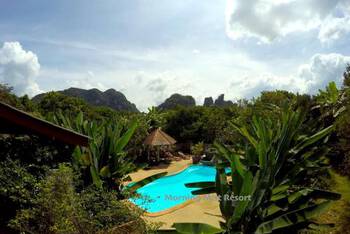
- 📍 Stay: Khao Sok Morning Mist Resort
- 🕐 Time: 3 Nights
- 📖 Full Guide: 8 Best Things to Do in Krabi Town
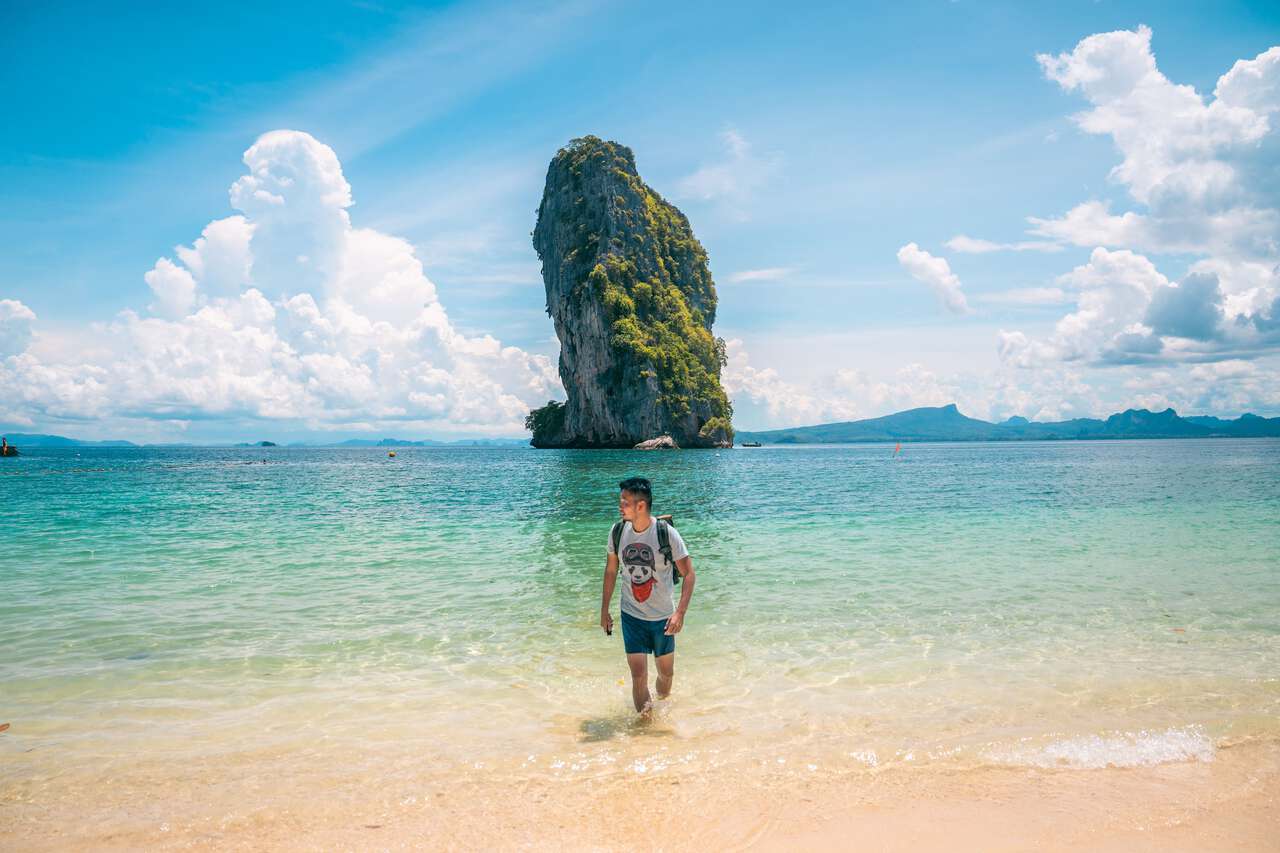
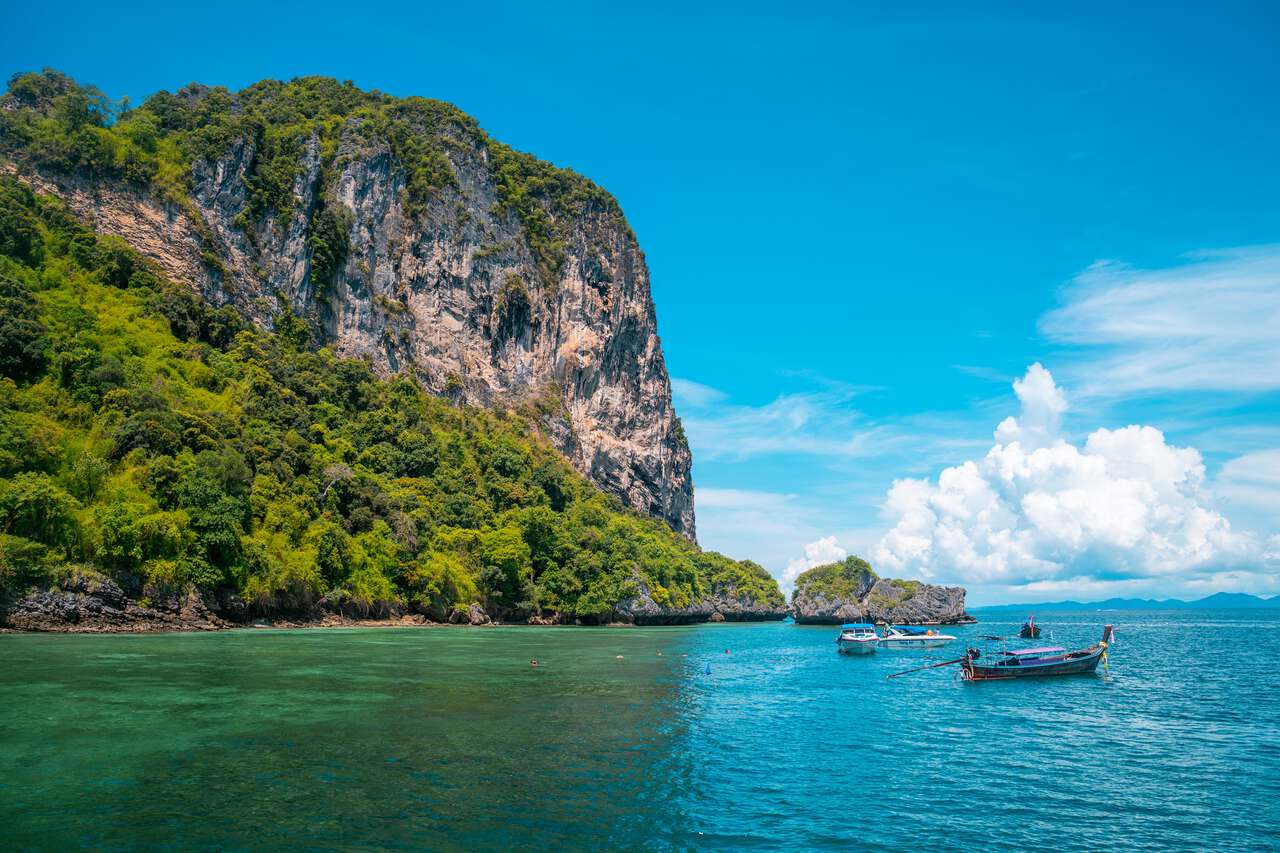
On your first day in Krabi, we are going to go on an organized tour to explore the islands of Krabi, which is one of the most popular things to do here. Be sure to book the 4 islands day trip beforehand so that they can reserve you a spot and arrange a pickup time. The trip will take an entire day from 9 AM to 3-4 PM, and be sure to pack swimsuits!
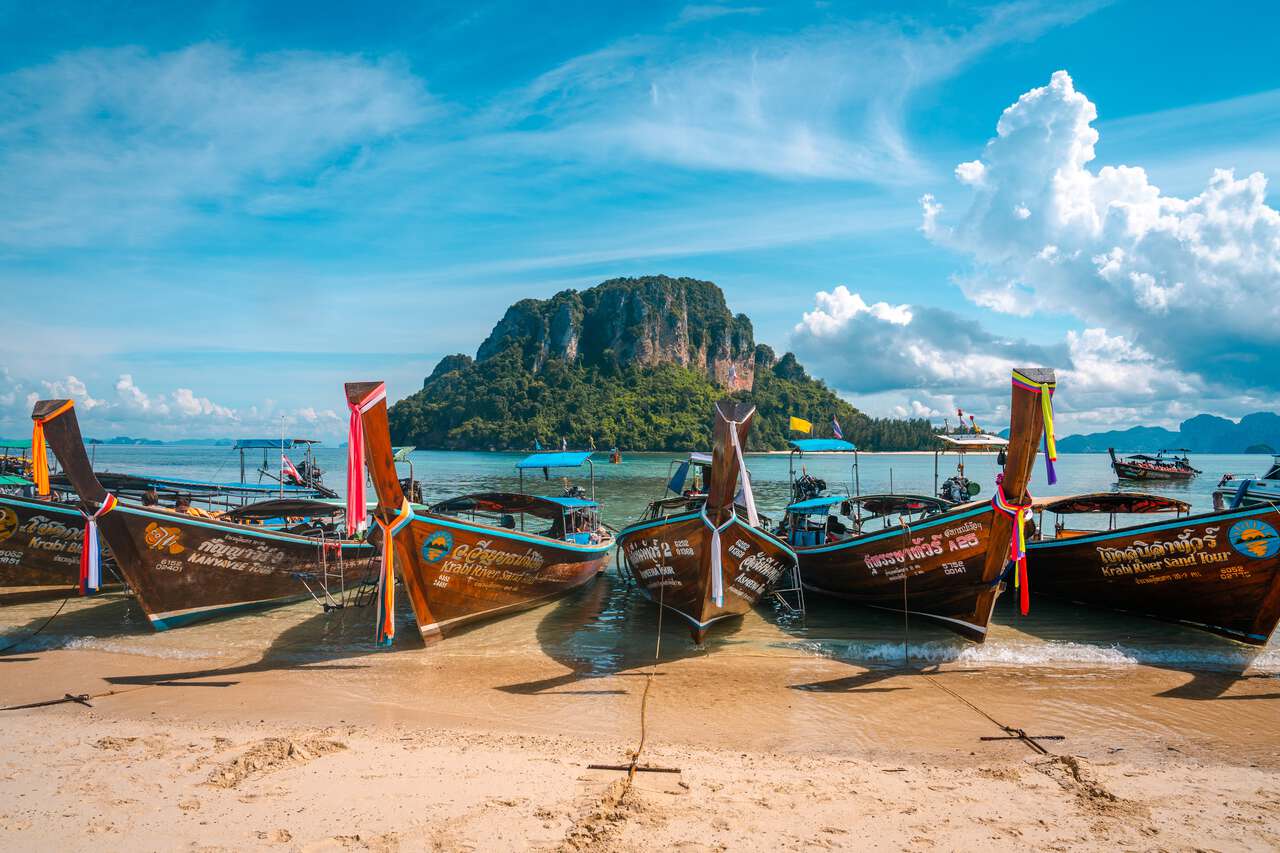
The 4 islands tour will take you to Poda Island, Tup Island, Chicken Island, and Railay with 2 modes of transportation: the classic long-tail boat and a speed boat, with the former being a little cheaper and taking a bit longer than the latter.
With the tours, you will be spending at least 6-8 hours hopping between these four islands, and depending on the tide level that day, the order of the islands you visit may shuffle around a bit to allow you to get the best out of your visit.
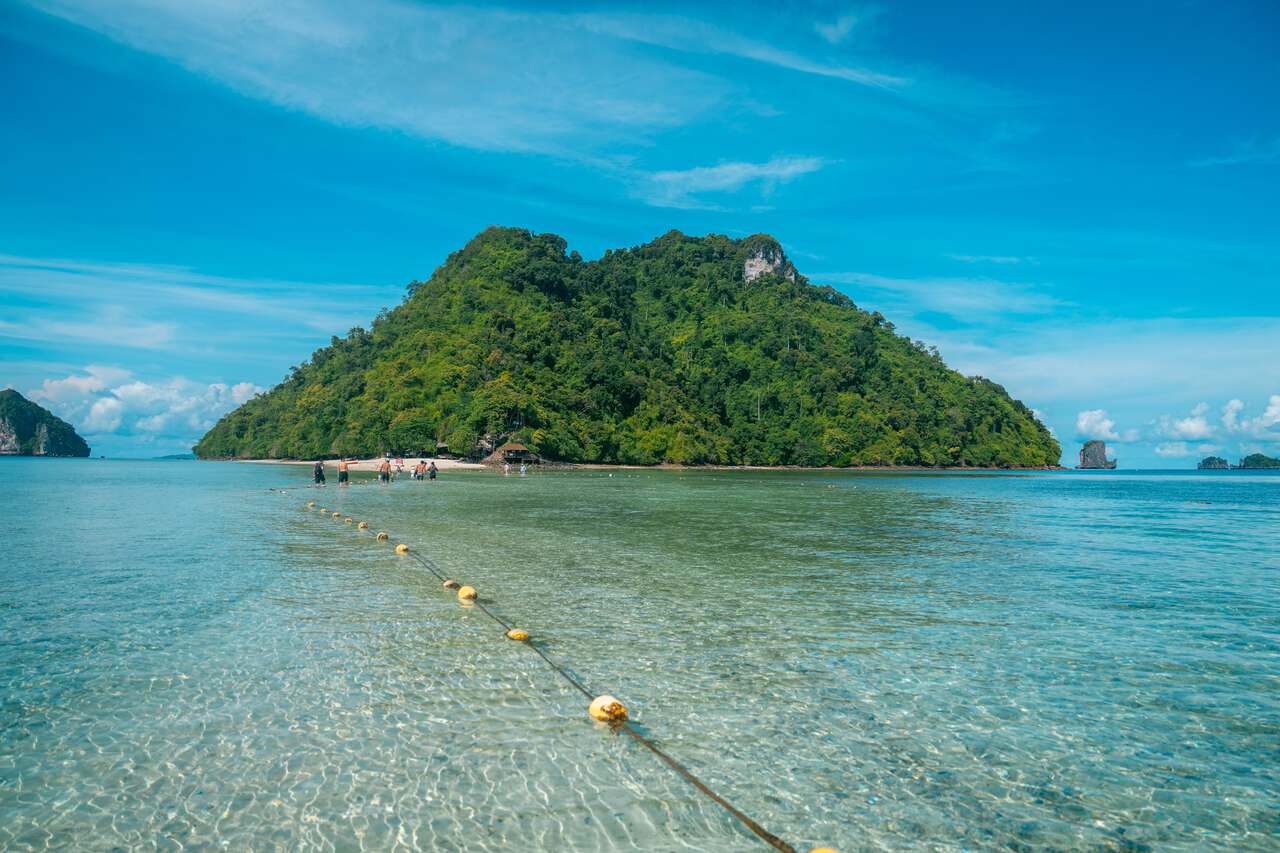
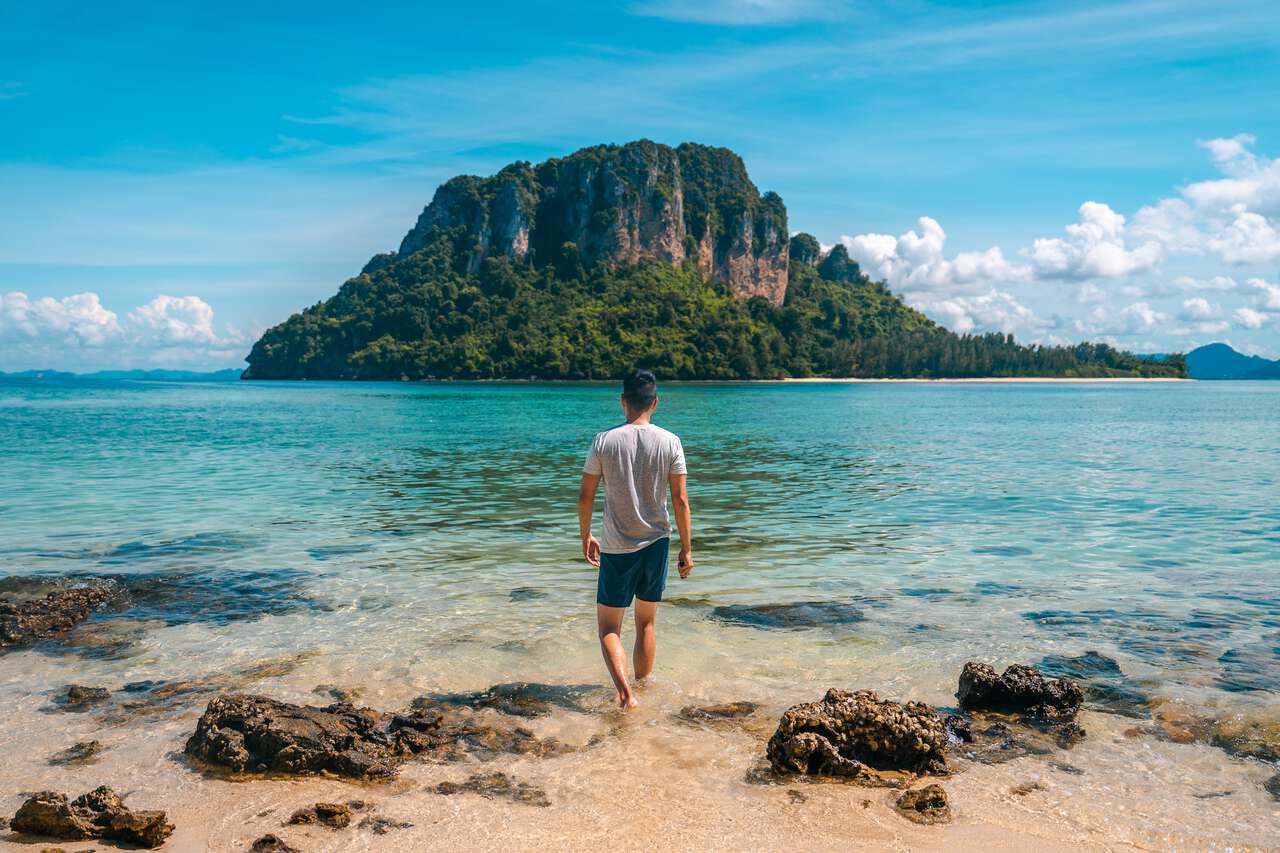
Tup Island is especially beautiful at low tide, as you will be able to see the Thale Waek phenomenon (the separated sea) and walk across the island on a shallow strip of sand. If the tide is low in the morning, you will likely be heading to this island first.
Poda Island is the highlight of this trip for me, as you will finally have time to snorkel and witness all the beautiful coral reefs and marine life of Krabi. The coral reef isn't as colorful as some of the snorkeling spots further south, like Ko Lipe, but there are plenty of beautiful fish to be seen here.
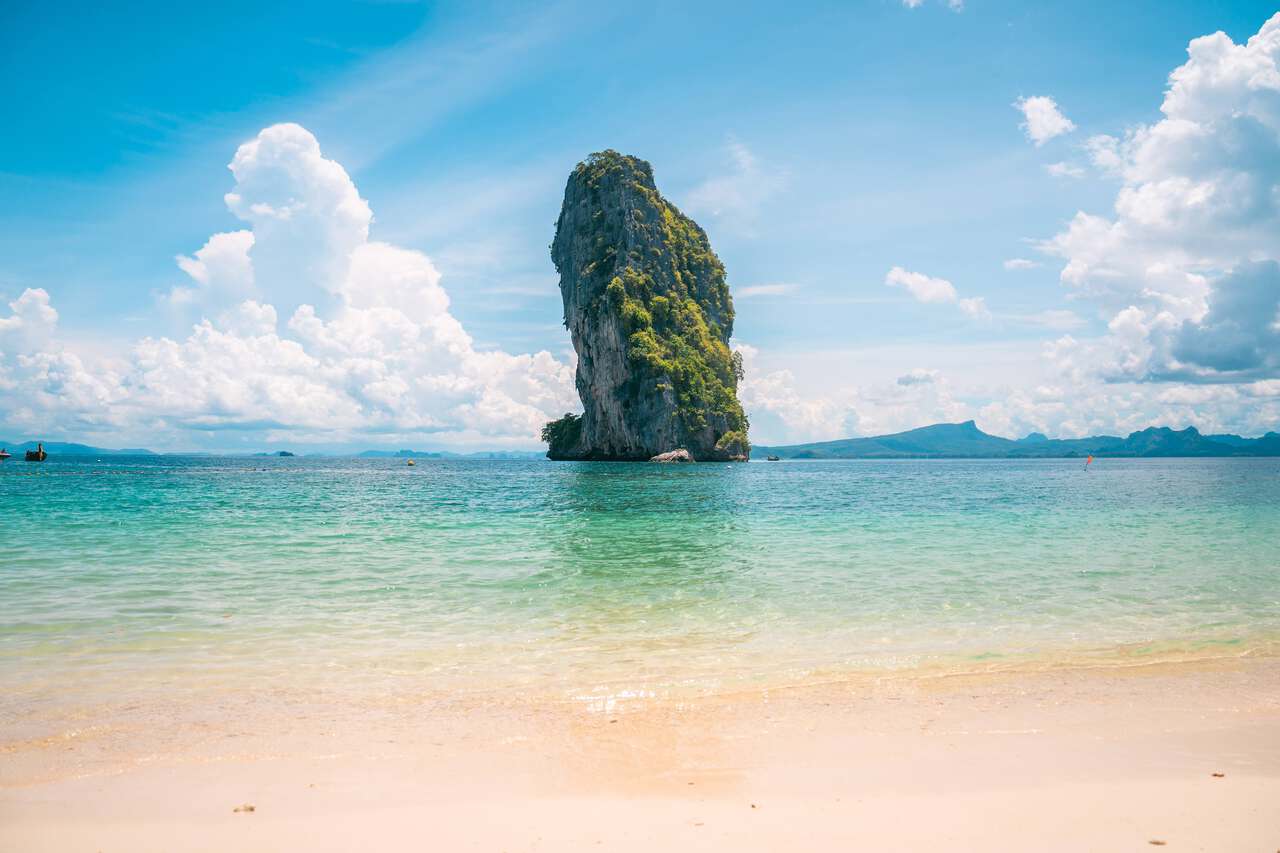
After snorkeling, the boat will anchor at Poda Island beach where you will have either a packed lunchbox or a buffet (depending on the number of people on the boat). You will also have time to chill on the beach for another hour. Be sure to take a photo of the iconic cliff rock that Poda is known for before leaving.
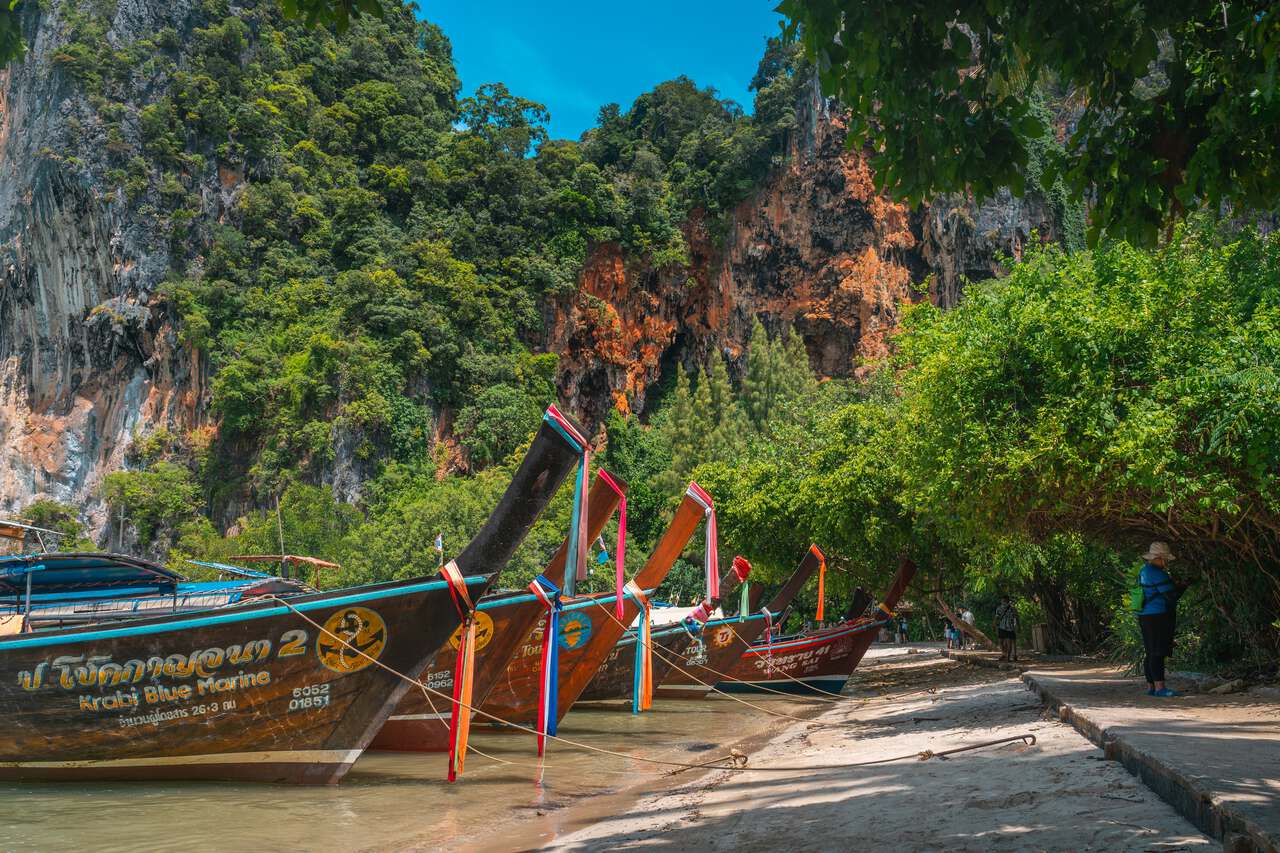
Last but not least, you will be visiting Railay Beach, which technically isn't an island as it is part of the Krabi mainland. However, due to the inaccessible vertical limestone mountain that cuts the area off, the only way you can get there is by boat, which makes it feel more like an island than just a beach on Krabi's mainland.
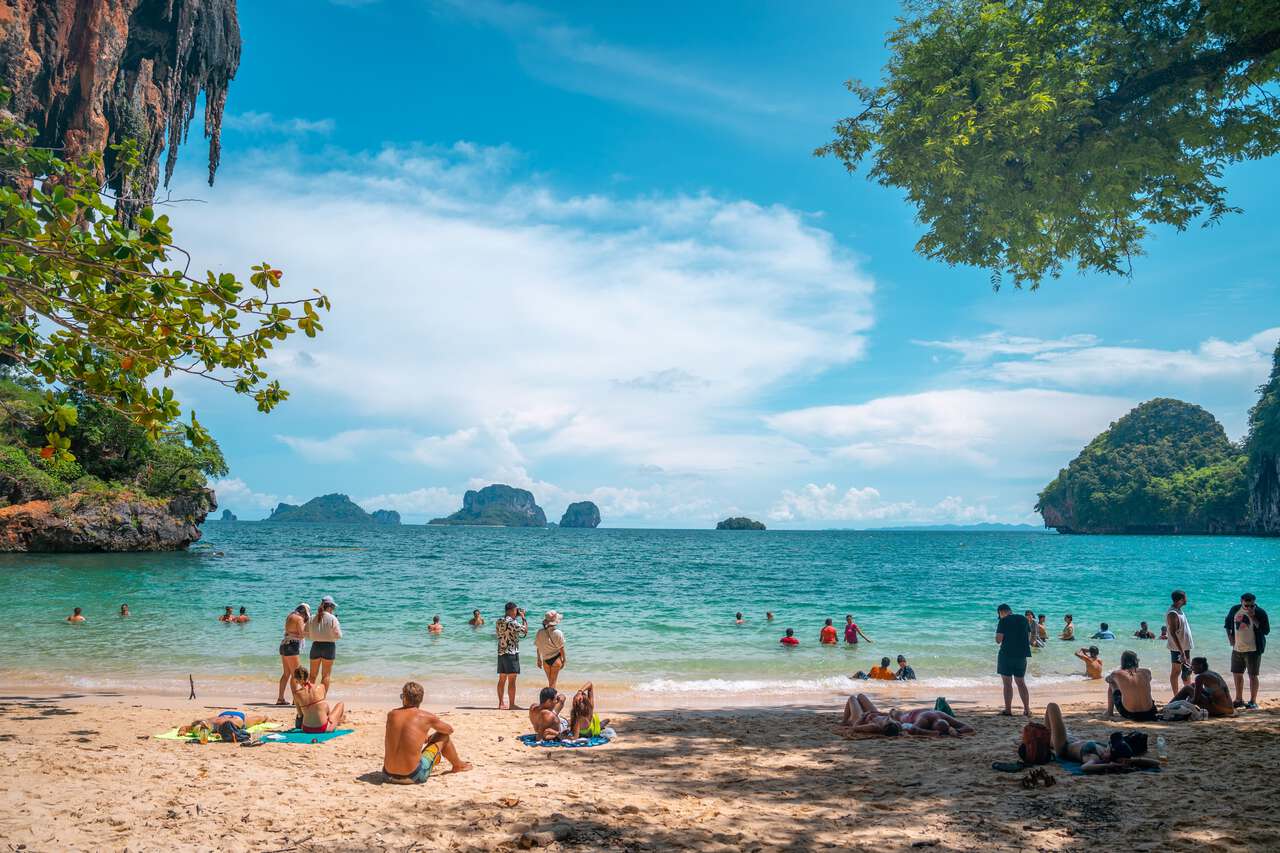
After Railay, you will be ushered back to Ao Nang and transferred back to your hotel by 3 - 4 PM, concluding your 4-island day trip. Spend the rest of the day relaxing at your accommodation or strolling along the beach and resting up for the next day, as you will be going on another adventure-filled day.


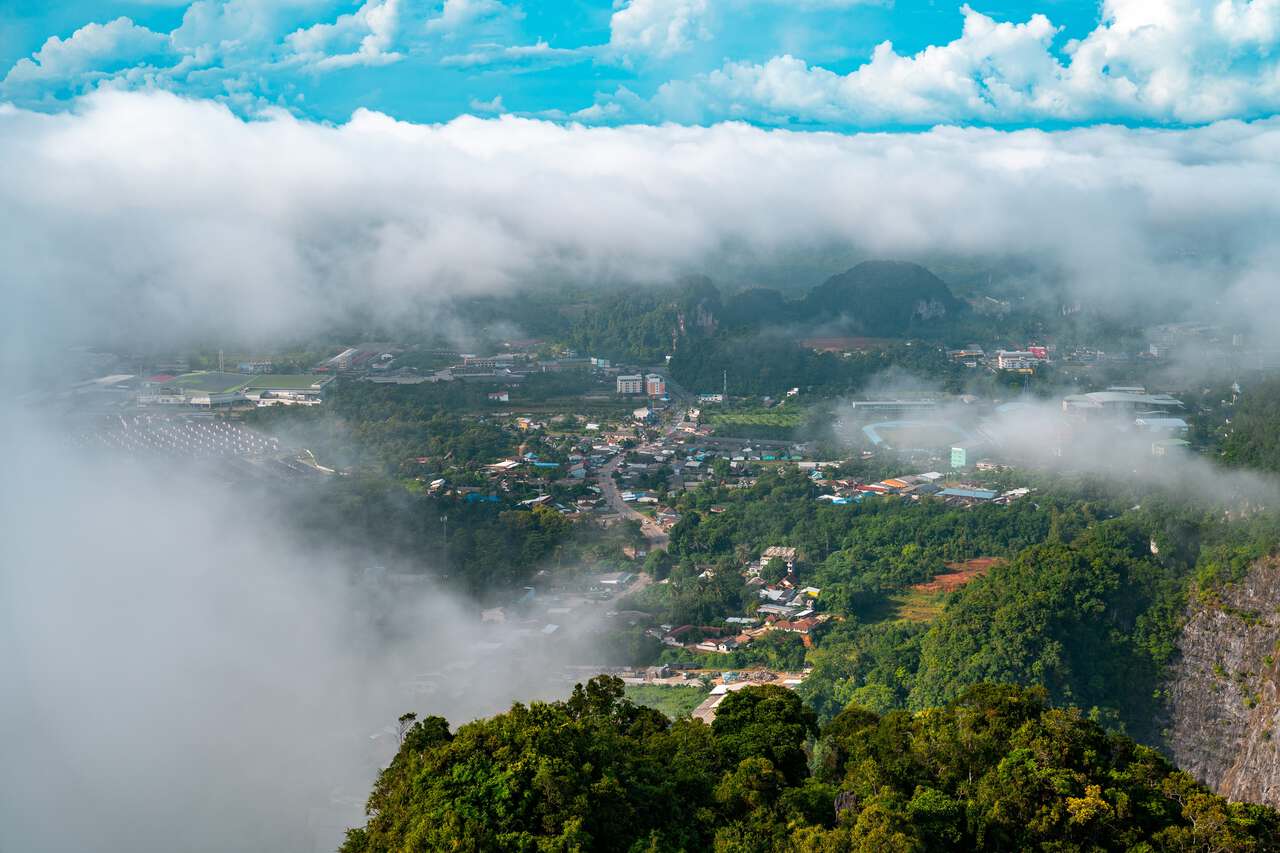
On your second day, I highly recommend that you get up as early as 6 AM and drive to Wat Tham Suea to hike up to the viewpoint. If you are lucky, as I was, you might be able to witness the sea of clouds, which is pretty rare in Krabi.
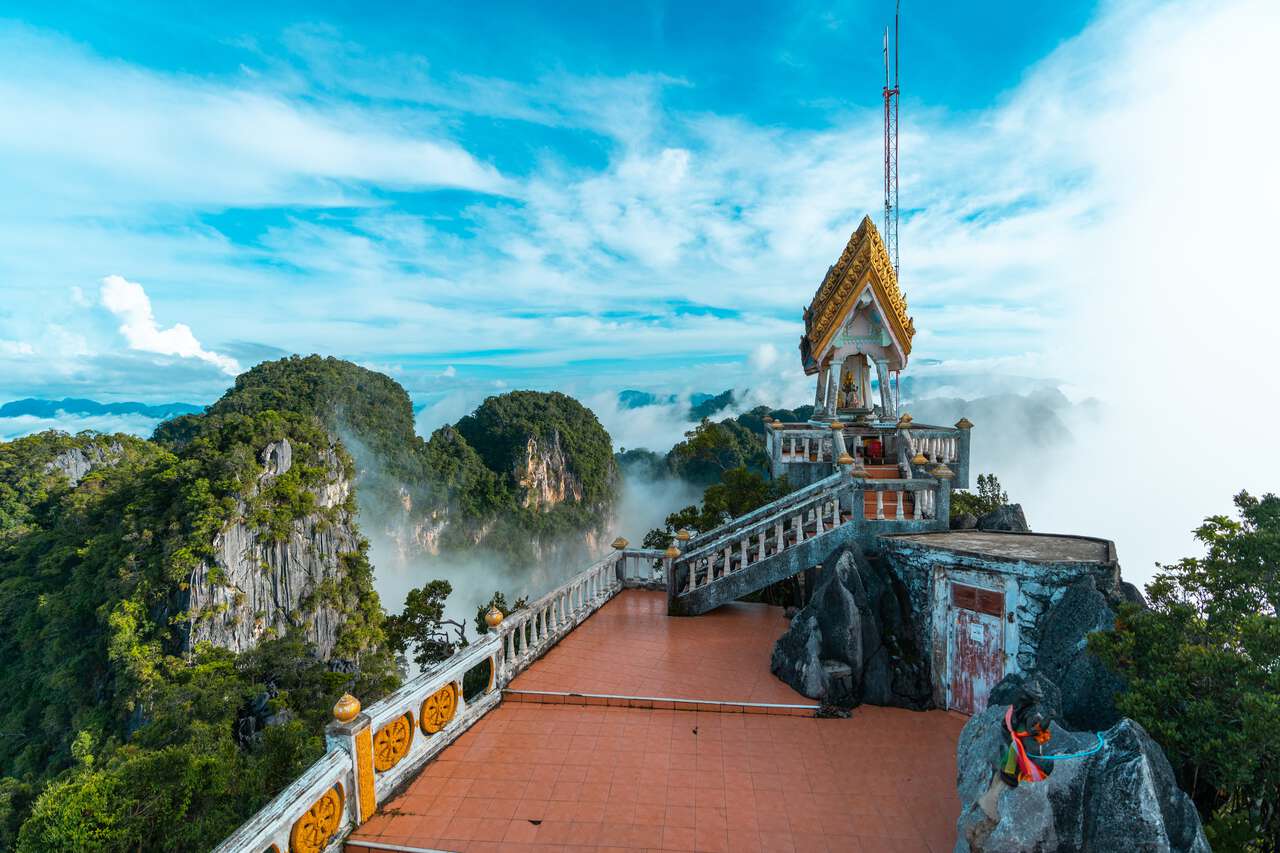
Wat Tham Suea is a mountain temple known for its cave, where a tiger once resided, as well as the epic pilgrimage trail that will take you to the top of a limestone mountain. From there, you will be able to see an unobstructed panoramic view of Krabi town and all its surroundings.
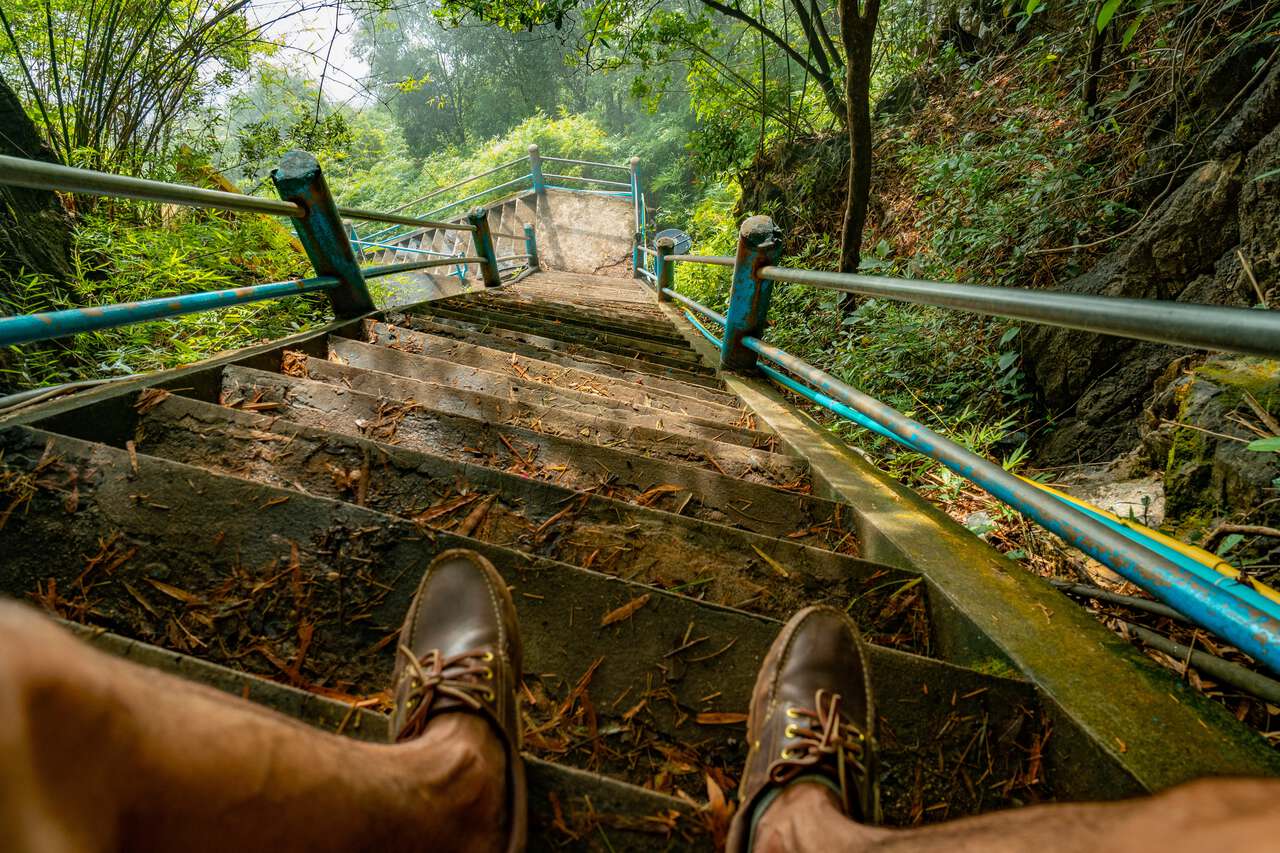
The pilgrimage trail at Wat Tham Suea consists of around 1200 steps, and it can take you about 30 minutes to an hour to hike to the top. Some of these 1200 steps are not your regular human steps, but more like steps for giants, as they are crazy steep at times. Be sure you are in good shape before tackling the trail.
Once you are done, start making your way down slowly and feel free to explore the temple grounds, as there are quite a few caves and interesting structures to visit in the temple. If you do not want to ride a motorbike yourself, you can visit Wat Tham Suea as part of an organized tour as well, which should include Wat Tham Suea among other places in Krabi Town.
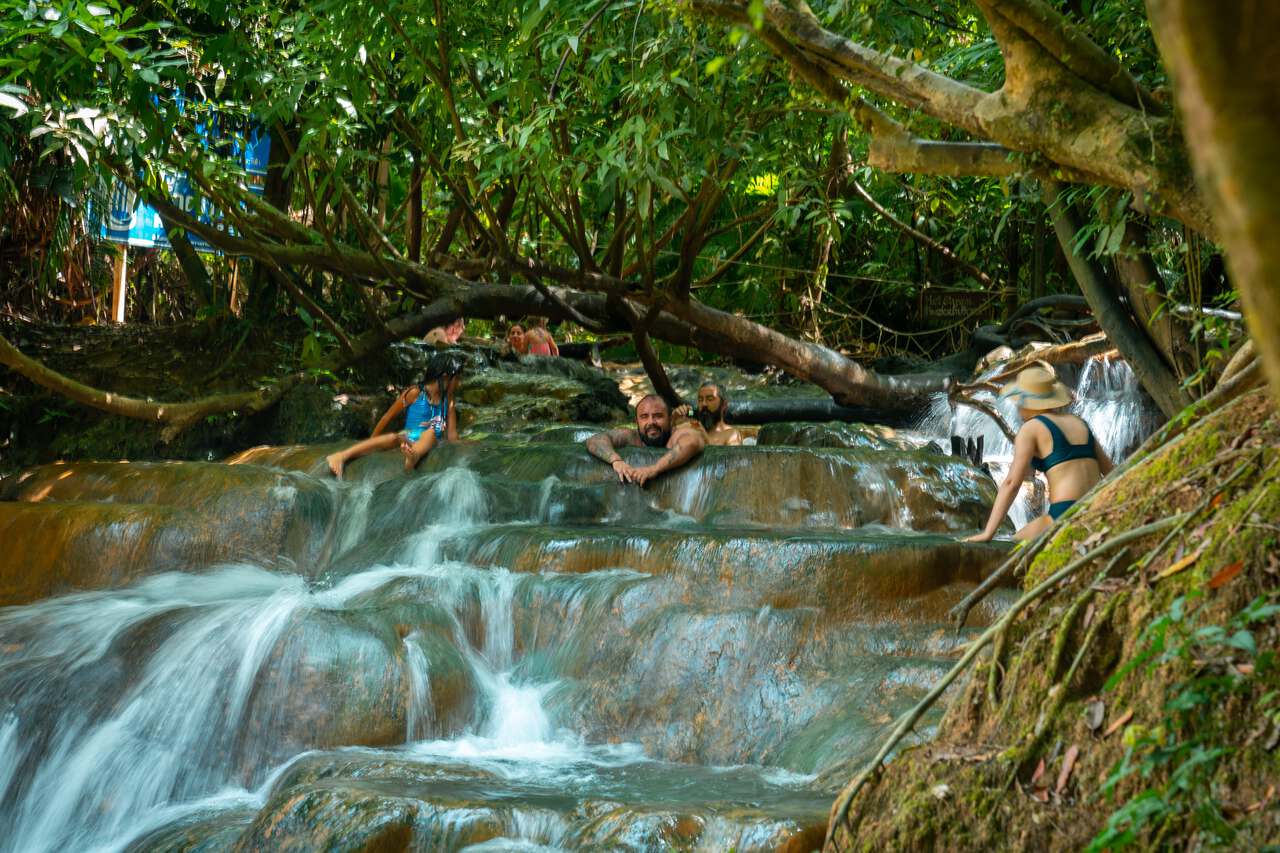
After Wat Tham Suea, we continue to our next destination, the Hot Springs Waterfall, another cool place to visit in Krabi, and the perfect place to freshen up after hiking Wat Tham Suea.
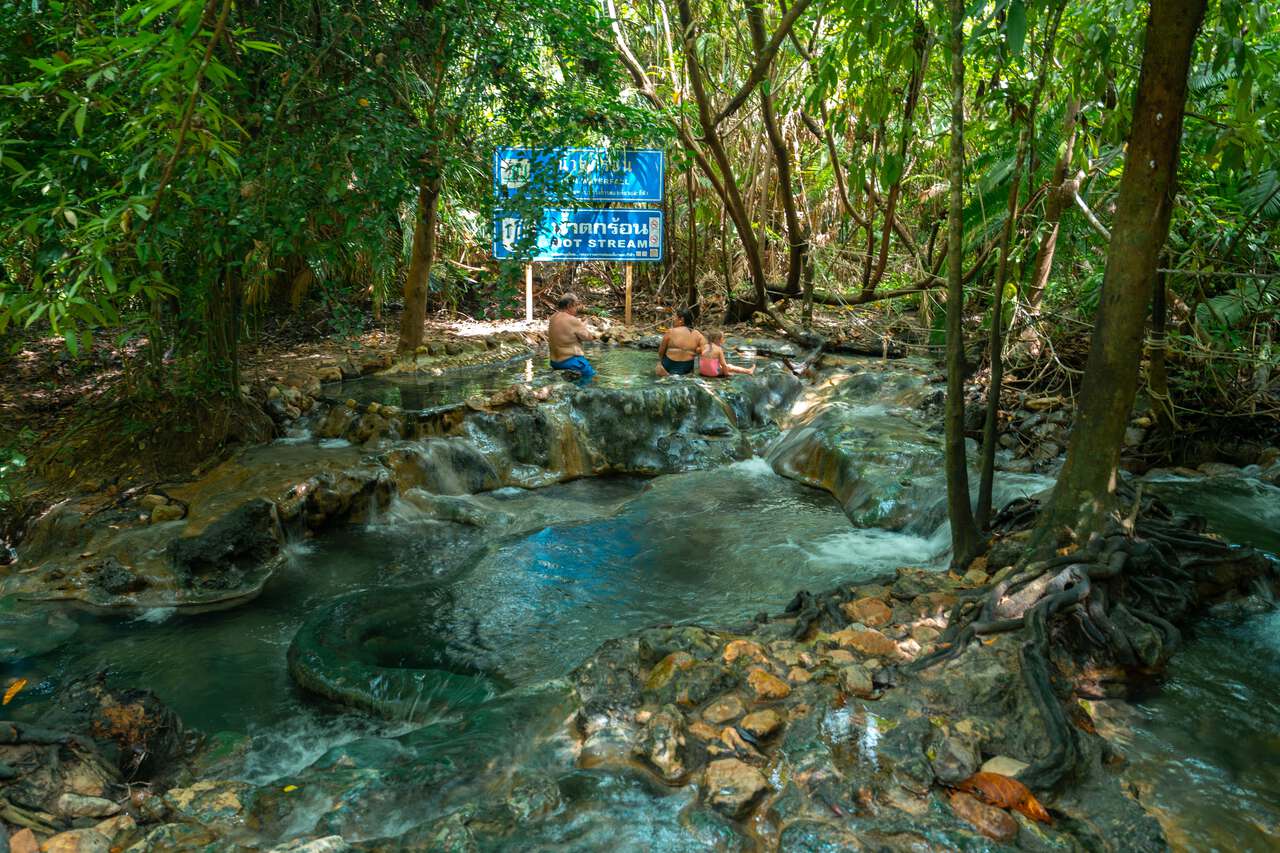
The place is known for its bubbling thermal pools, right above small cascades, surrounded by tropical forests where one can freshen up and enjoy the tranquility and relaxing time in nature.
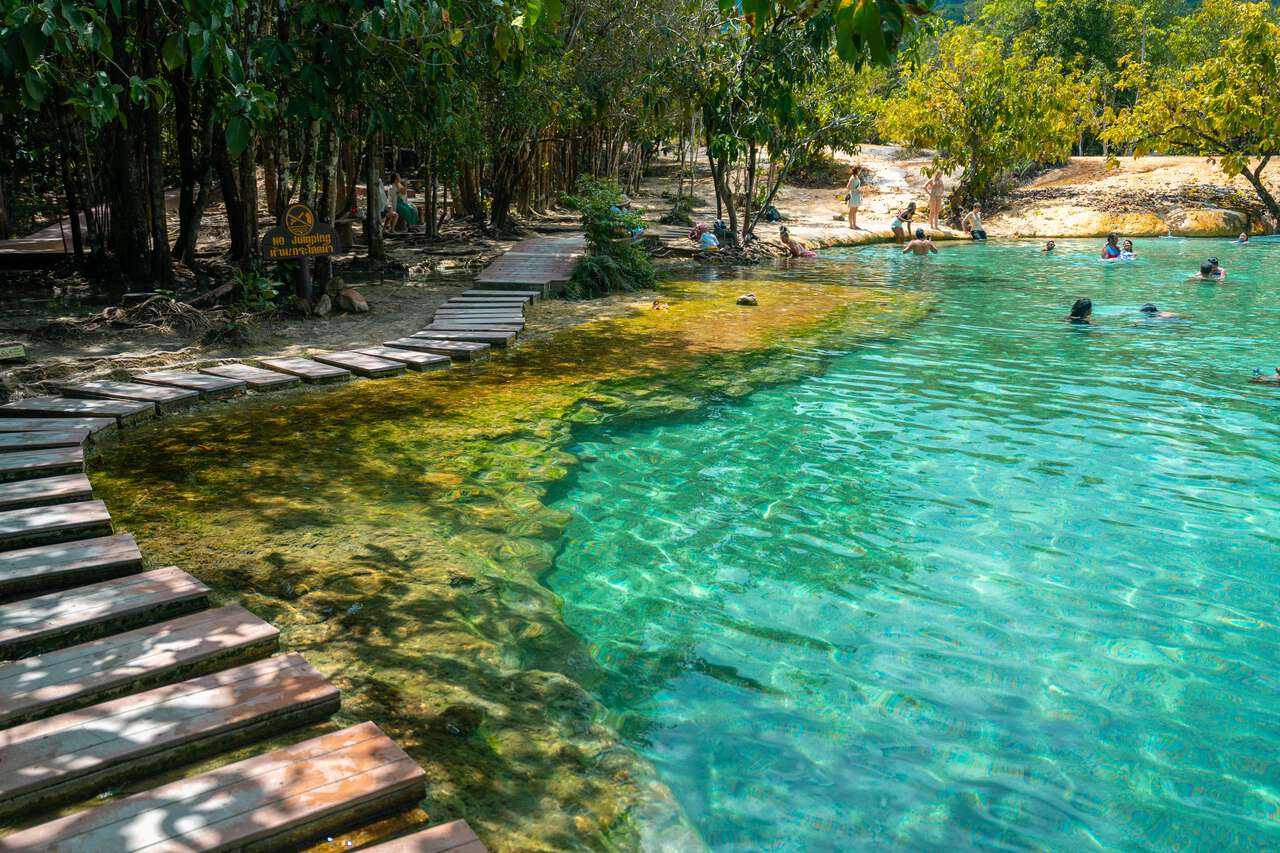
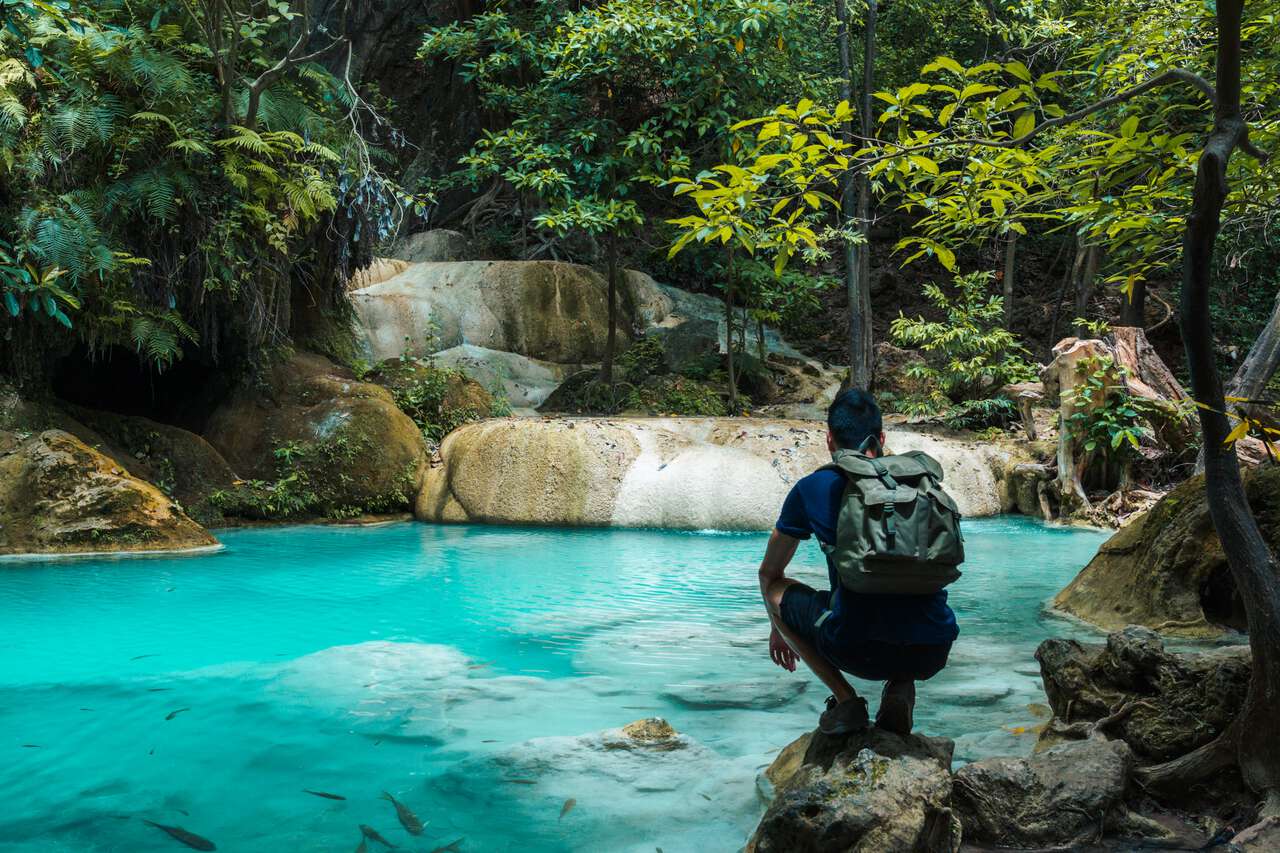
As you continue on, you'll come across the Emerald Pool, arguably one of the most picturesque places in Krabi. It definitely justifies the entire journey with its remote location, remarkably clear water, and the glistening emerald color that comes to life when kissed by the sun. It's quite a sight to behold.
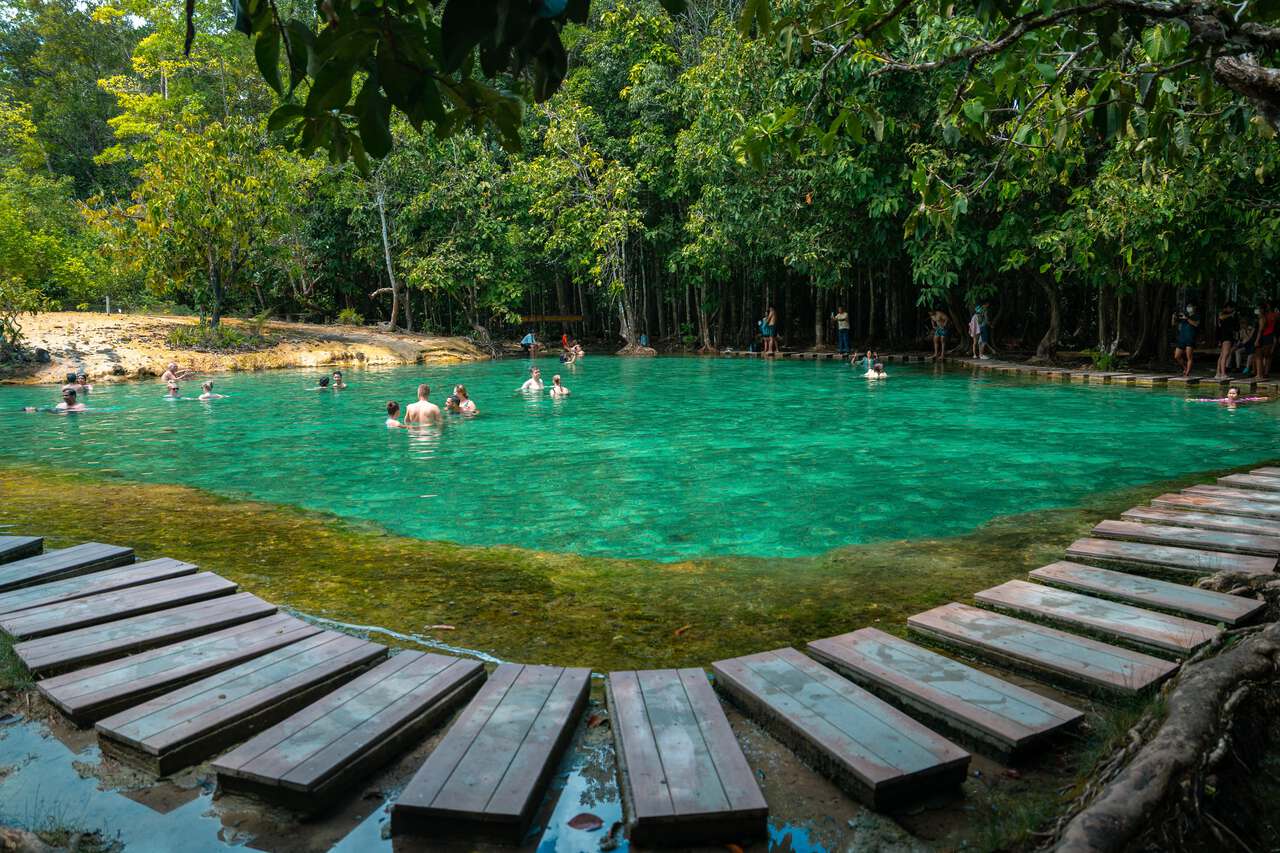
Once you arrive, you will enter an opening where you will be able to finally swim in the glistening Emerald Pool. There are wooden decks you can walk on, as well as other small trails you can explore. If you want to swim, there are bathrooms where you can wash yourself, and plenty of space for you to enjoy the refreshing water. Just be careful around wet rocks as they can be extremely slippery at times.
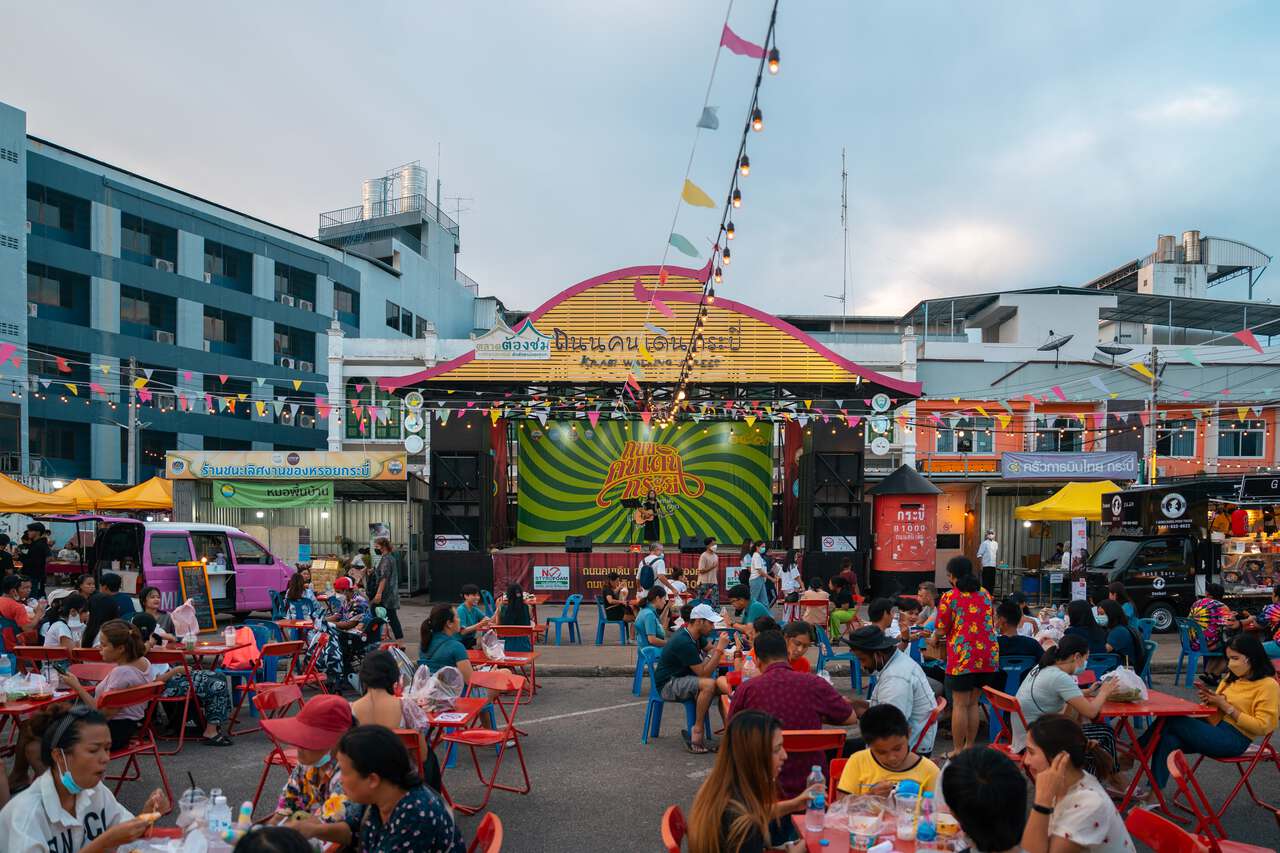
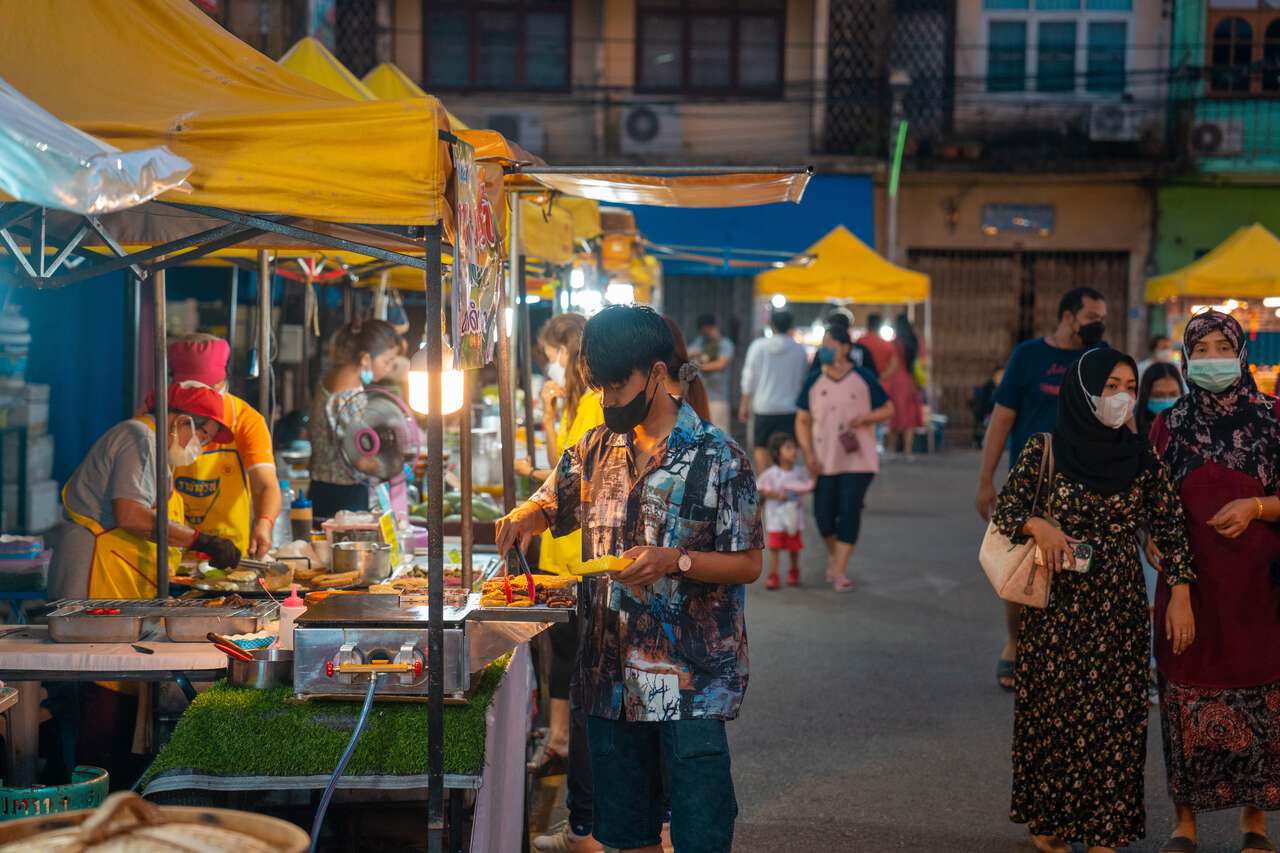
Visiting these three places should occupy your entire day. If you are there on Fridays, Saturdays, or Sundays, be sure to drop by Krabi Night Market and indulge yourself in all the delicious street food there.
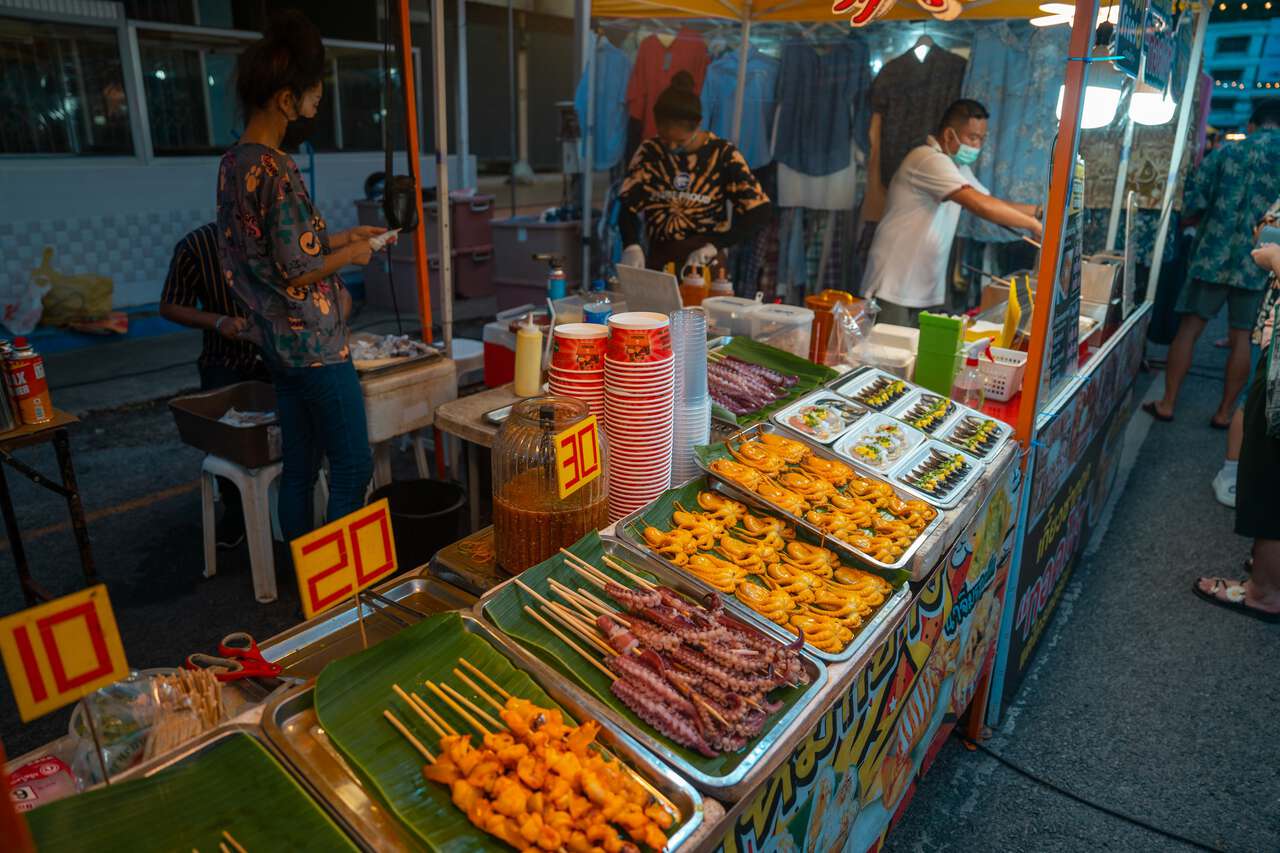
You will find plenty of street food stalls selling all kinds of food, from seafood on sticks to drinks, and even a mobile cocktail bar. There is also a stage where local performers often come to entertain visitors.
After the night market, you can drive back to Ao Nang, retreat to your hotel, and call it a night. Tomorrow, we are going to visit Khao Sok, which is arguably one of my favorite places in Thailand.

Getting from Krabi to Khao Sok Lake
To get from Krabi to Khao Sok Lake, you can take one of the many tourist vans from Ao Nang or Krabi City at 10 - 11 AM, and they will take you to Khao Sok Lake in 4.5 hours for 400 THB per person. You can book this van with the link here: Book a Bus from Krabi to Khao Sok Lake.
Day 11-13: Khao Sok Lake (2 Nights)
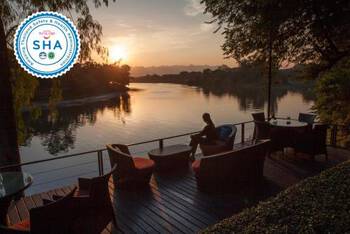
- 📍 Stay: Sea Seeker Krabi Resort - SHA Plus
- 🕐 Time: 2 Nights
- 📖 Full Guide: A Complete Travel Guide to Khao Sok Lake
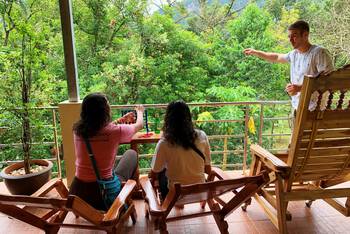
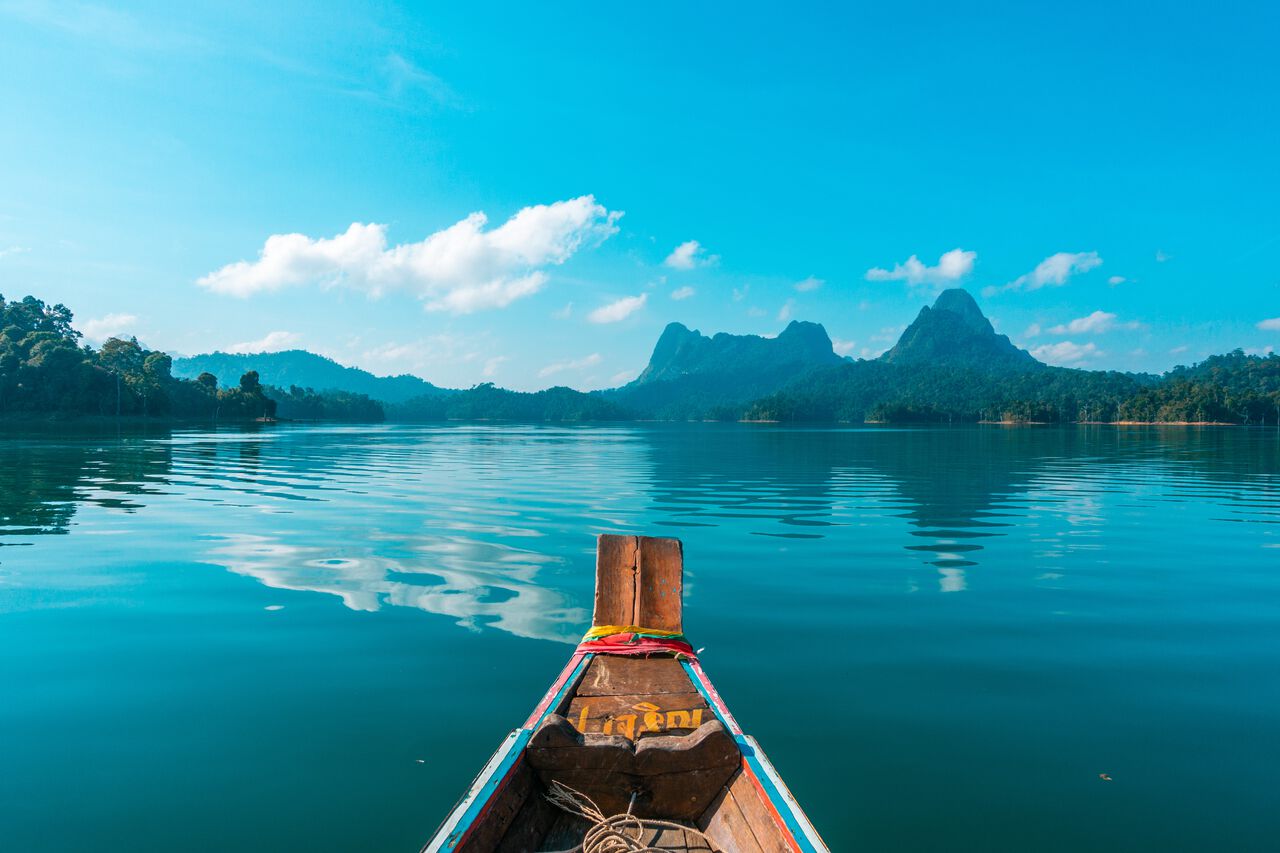
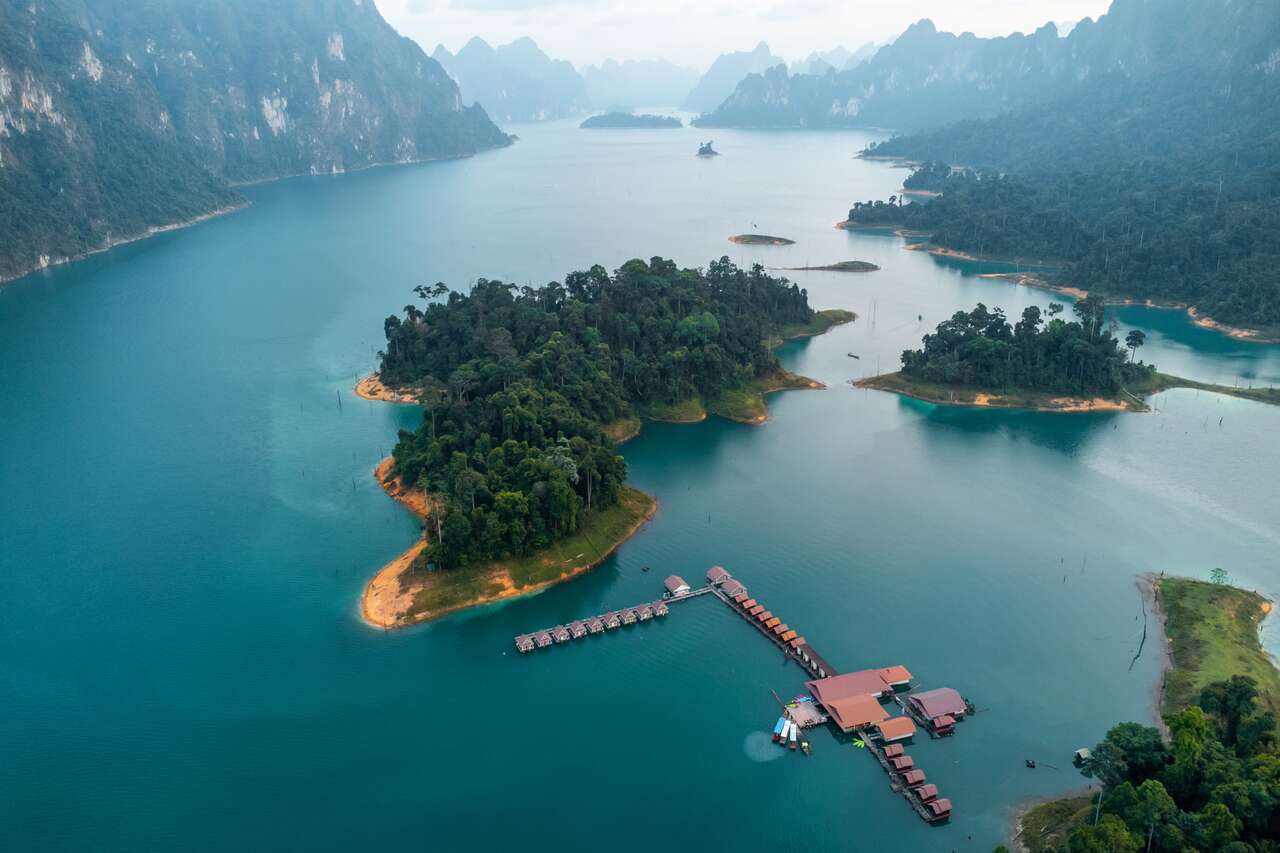
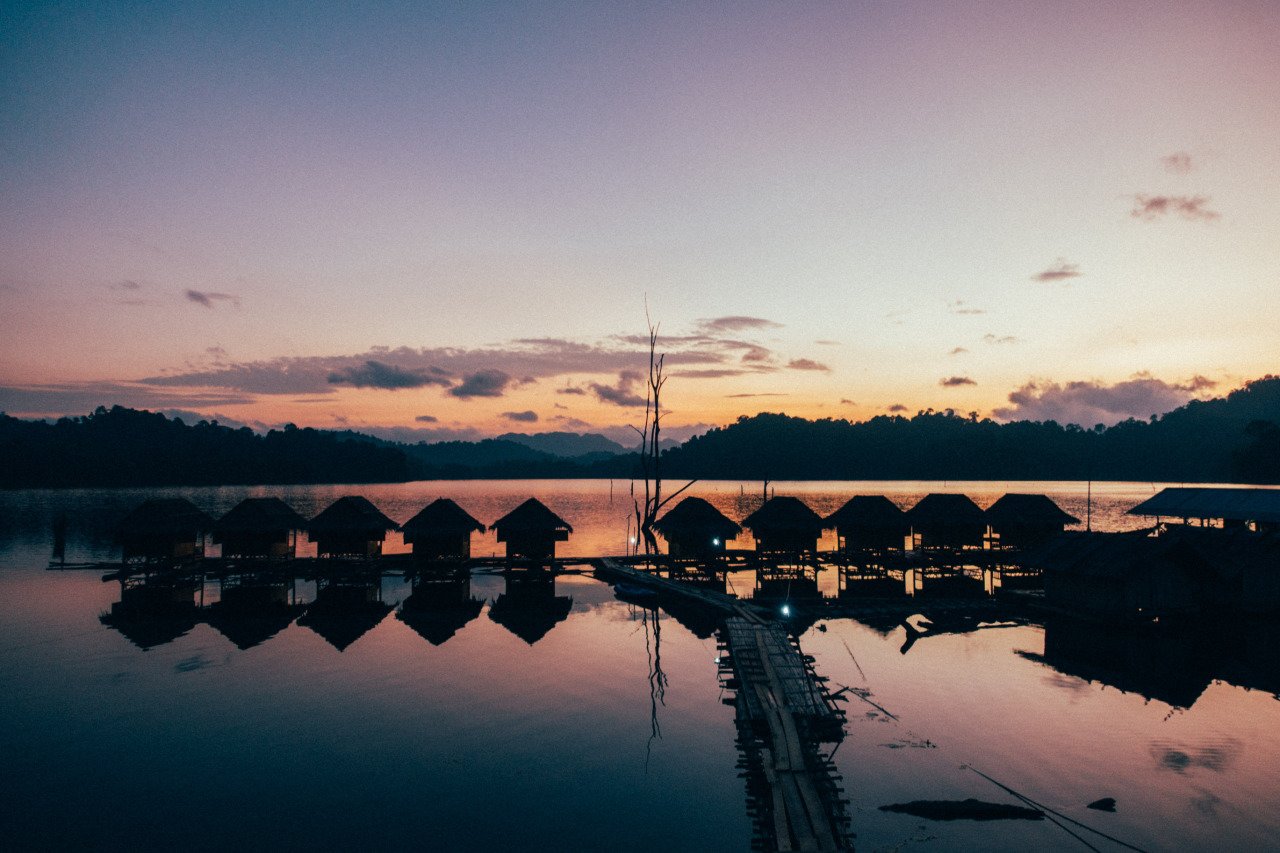
Khao Sok Lake has to be one of my favorite places in Thailand. Located deep within the Ratchaprapha Dam in Surat Thani, Khao Sok Lake offers you a chance to be as close to nature as one can get.
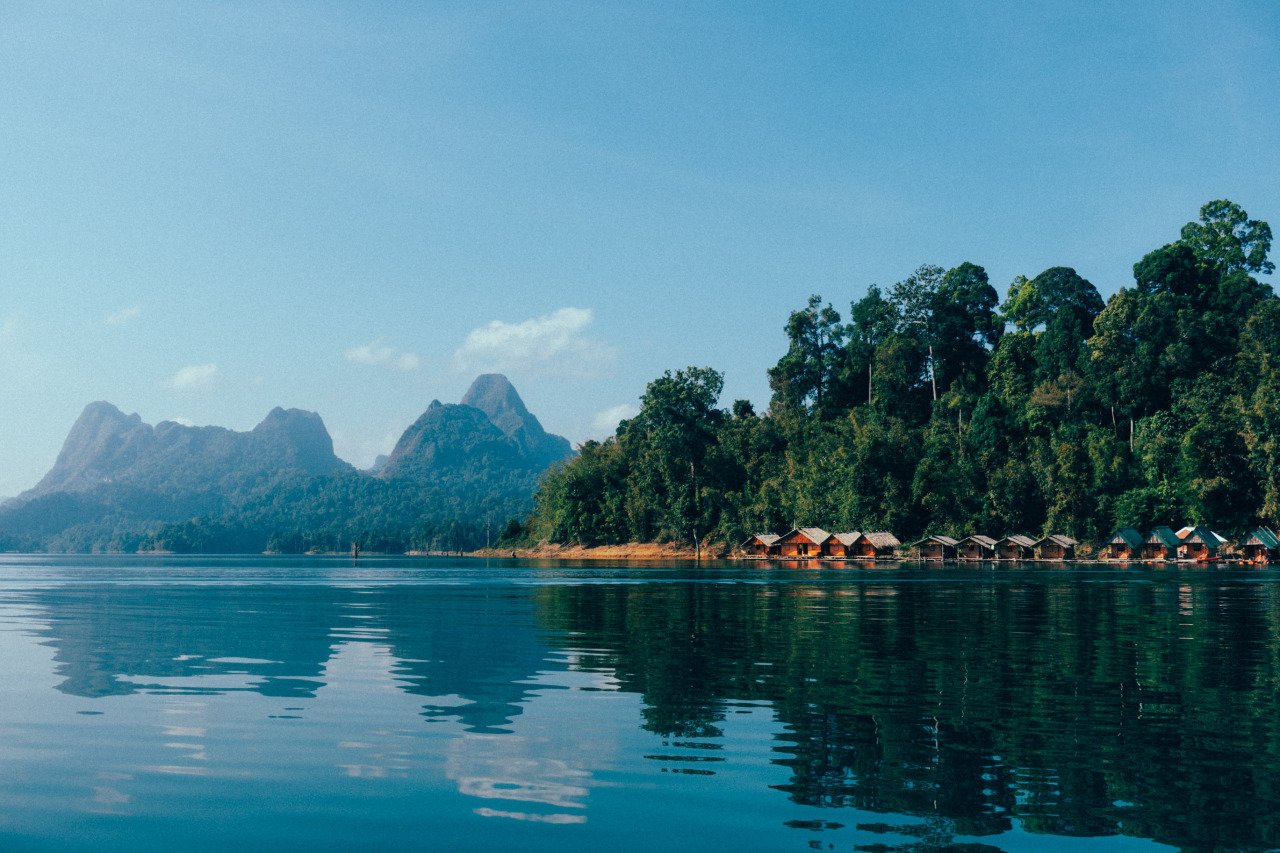
Once you arrive in Khao Sok Village, you will need to book a tour to enter Khao Sok Lake. They will then take you on a long-tail boat to access the dam and spend the night in a floating bungalow right on the lake.
On your first day exploring Khao Sok Lake, you will be visiting several attractions around the lake, from the waterfall cave, where you will have to walk through gushing water in a dark cave, to observing wildlife around the lake.
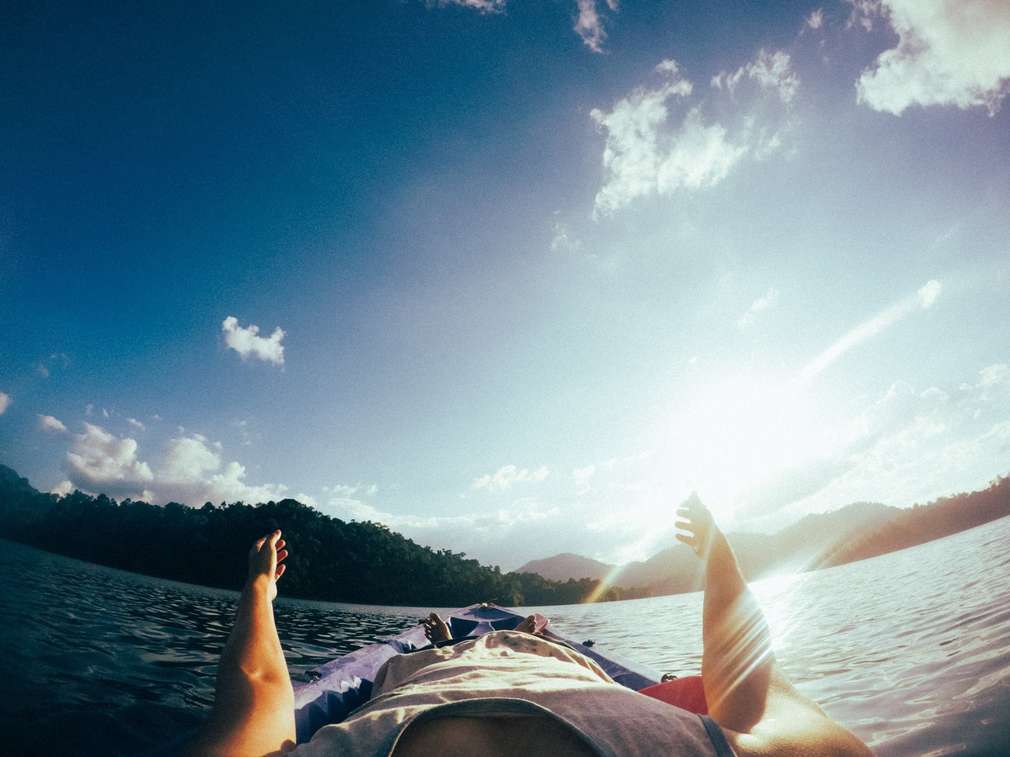
In the evening, you will have free time to relax by your bungalow, go kayaking, and watch the sunset before they serve you a fresh dinner, and you retreat for the day.
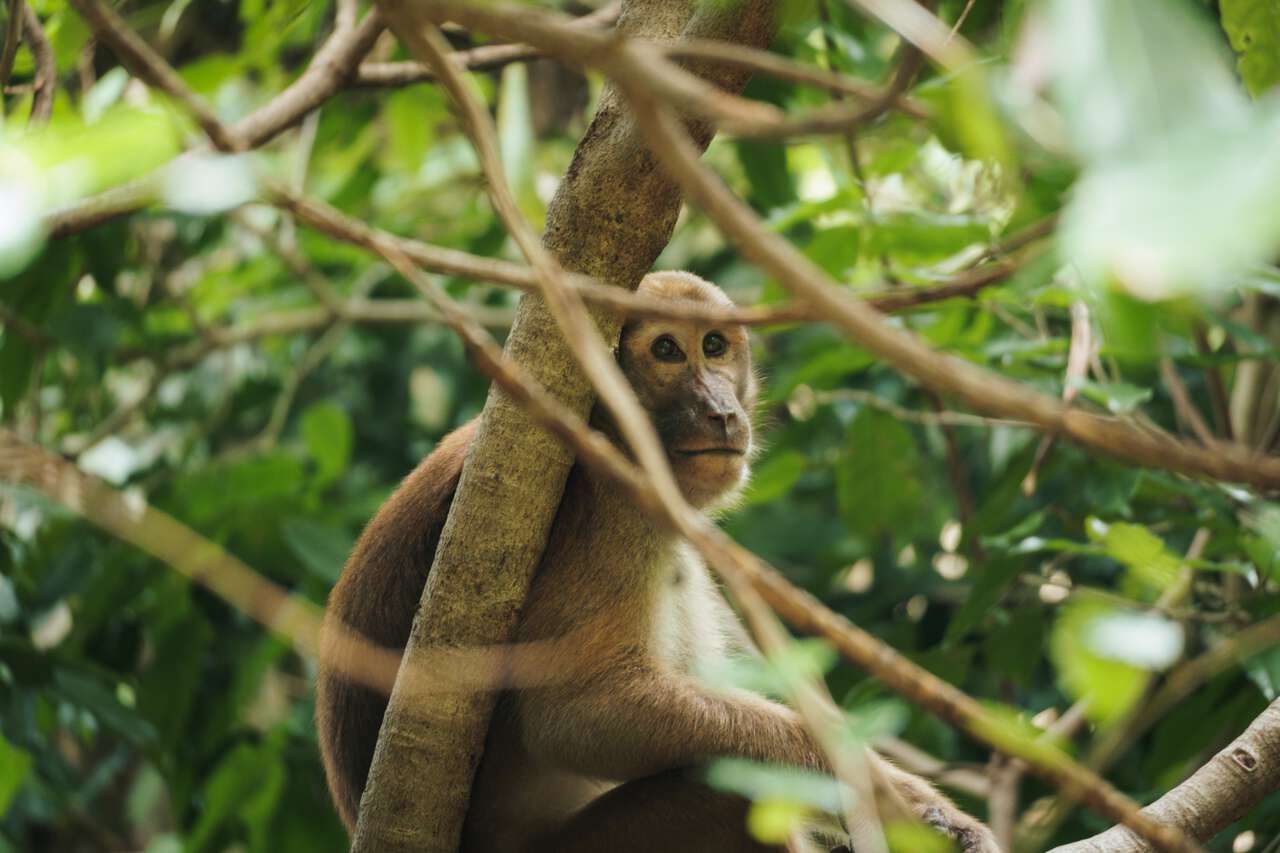
In the early morning, they will take you out for another safari trip to observe the birds and monkeys that often come out. If you are lucky, you might even see a Hornbill or two.
On your way out of the lake, you will be visiting more caves and getting a chance to jump into the water one last time before you return to Khao Sok Village. From the village, you should be able to catch a bus to Surat Thani Airport, where you can fly back to Bangkok.


Getting from Khao Sok Lake to Bangkok
From the Khao Sok Village, you will have to catch a bus to Surat Thani airport and fly back to Bangkok before heading home. Only 1 or 2 vans are leaving from Khao Sok Village in the morning, and you will have to book one via your accommodation. The journey to Surat Thani Airport should take about 2 hours and cost 350 THB per person.
If there is no direct bus available, you can also catch the bus to Surat Thani bus station and from there, you can catch another bus to the airport. The whole trip should take about 3 hours, excluding waiting time, and cost around 400 THB per person.
Once you arrive at the airport, you can then fly back to Bangkok via one of the many daily flights operated by AirAsia, Thai Vietjet Air, and Thai Lion Air. The flight will take about 1 hour and cost around 500 - 1000 THB.
If you have a flight out from Suvarnabhumi Airport on the same day, make sure you find a domestic flight that will take you directly to Suvarnabhumi Airport (VietJet, etc.), not Don Muang Airport. You can book the flight here.
Day 14: Back to Bangkok (1 Night)
After you return to Bangkok, you can enjoy one more night here before flying back home the next day. Use this evening to indulge in the delicious food available, purchase some souvenirs, and immerse yourself in Bangkok's nightlife one last time before heading home. Congratulations! You've completed this epic 2-week itinerary!
When to Visit Thailand?
The best time to visit Thailand is from November to January when the weather is cooler and less humid due to Thailand's northern climate, making it much more enjoyable to explore the beautiful outdoors of Thailand.
That said, Thailand has suffered a lot from air pollution in recent years due to the burning season, and it is extremely prevalent during Thailand's winter period (December - January). So, even though the weather is cooler, your visibility might not be the best. Be sure to buy a face mask if you decide to visit Thailand during this time.
March and April are the hottest and most humid periods of the year, so if you can't handle the heat very well, avoid visiting during this time. The air quality may be slightly better during this period, but it's not guaranteed.
All the other months are considered to be a rainy season, which, even though the weather is a little more manageable than the summer months, you will also be seeing a lot more rain that might prevent you from enjoying the outdoors. Air quality during this time should be better due to the rain.
As you can see, the traditional best time to visit Thailand was during its wintertime. However, with the worsening air quality, travelers now face a choice between good weather with poor air quality or vice versa. If you're looking for the best of both worlds, November to December is probably your best bet.
How to Get to Thailand?
Every trip to Thailand starts in the capital city, Bangkok. Since Bangkok is one of the largest hubs in the region, you should have no trouble finding a flight from your home country to Suvarnabhumi International Airport or Don Muang International Airport (budget airlines only) in Thailand.
From the US, unfortunately, there are no direct flights to Bangkok. So, you will have to rely on transit flights by Emirates, Qatar, or Turkish Airlines from the East Coast, or ANA Airlines or Korean Air from the West Coast.
From Europe, you can fly from the most popular European hubs like London, Paris, or Frankfurt via Thai Airways or local carriers such as British Airways, Air France, or Lufthansa to Bangkok. From there, you can fly domestically to Chiang Mai. You can also choose to travel with Etihad, Qatar, or Emirates if you don't mind transiting.
From within Asia, there are several low-cost airlines offering multiple routes from many hub cities like Singapore, Kuala Lumpur, Tokyo, Jakarta, to Bangkok. AirAsia is a great option as they have the most connections to Bangkok from around Asia.
To find a cheap flight to Bangkok, I would recommend that you use Skyscanner or Expedia to look for the cheapest route and schedule so you can compare and pick the best one.
How To Get From Bangkok's Airports to your Accommodation?
By Bus: If you are staying near Khaosan Road or the Old Town area, I recommend taking the bus as it goes directly to your location without the need for transfers.
If you fly into Suvarnabhumi International Airport, you can take the S1 bus, and it will take you to Khaosan Road for 60 THB. Depending on the traffic, the journey should take around 1.5 hours, and the bus runs between 6 AM and 8 PM every 30 minutes.
If you fly into Don Muang International Airport, you can take the A4 bus, which should take you to Khaosan Road for 50 THB. From Don Muang Airport to Khaosan Road, you can expect an approximately 1-hour journey. The A4 bus runs between 7 AM and 10 PM, with a frequency of every 30 minutes.
By Sky Trains: If you are staying elsewhere in Bangkok, you can take the sky train instead. Just make sure that you know which sky train station to get off at.
If you fly into Suvarnabhumi International Airport, you can take the Airport Rail Link to Phaya Thai Station. From there, you will be able to connect to the main Sukhumvit Line and take the train to the nearest station near your accommodation.
The Airport Link runs every 20 minutes, and the trip from Suvarnabhumi Airport to Phaya Thai will cost you 45 THB and take around one hour. From Phaya Thai, the price varies depending on how far your accommodation is. The sky train price starts at 15 THB. The train operates from 6 AM to 12 AM.
If you fly into Don Muang International Airport, you will first have to take the A1 bus, which will take you to Morchit BTS Station. The A1 bus comes every 5 minutes, and it should cost you 30 THB.
From Morchit BTS Station, you can then take the train to the BTS Station near your accommodation. The sky train price starts at 15 THB and goes up to 70 THB, depending on how far your journey is. The train operates from 6 AM to 12 AM.
By Taxi: Taking a taxi is a comfortable way to get to your accommodation, but it can be pricey due to the airport fee of 50 THB that will be added on top of the metered price. Therefore, if you are coming from Suvarnabhumi Airport, you can expect to pay around 300 THB, and if you are coming from Don Muang Airport, the fare will be around 150+ THB.
One tip for taking taxis in Bangkok: if they don't turn on their meters, get out and get a new one. Do not tolerate this kind of behavior!

How to Get Around Thailand?
By Air: This is the fastest way to get around Thailand, and there are many low-cost airlines, such as AirAsia and Nok Air, that operate numerous routes around Thailand, which are extremely affordable. If you are in a rush, I recommend flying.
To book a flight in Thailand, you can do so with the link here: Book a flight in Thailand.
By Bus: This is one of the cheapest ways to get around Thailand, especially for long distances. The buses are cheap, quite safe, and surprisingly comfortable to travel in. It is recommended if you are not in a rush.
If you are looking to reserve a seat for bus travels, you can book through here: Book a bus ticket in Thailand.
By Train: You can also take the train if you want a more scenic way of getting around Thailand. Keep in mind that they are slow and often run late, but traveling by train in Thailand is quite a fun experience and it is dirt cheap.
If you are looking to reserve a seat for train travel, you can book through here: Book a train ticket in Thailand.
By Motorbike: This is only recommended for exploring the city and the surrounding areas, not for long distances. For long distances, take the bus or train instead. Rent a motorcycle only when you have already arrived in a city and would like to explore it further.
By Car: This is the most comfortable way to get around Thailand, and you can rent one straight from the airports in Bangkok and elsewhere for around 700 - 1500 THB. To rent a car in Thailand, you can book through this link:
How Much Money Do I Need For 2 weeks in Thailand?
From this 2-week rough itinerary, we can calculate approximately how much money you will be spending in Thailand as follows:
Accommodation: For 14 days in Thailand, you can expect to pay a minimum of around 280 USD for accommodation.
Food: Food costs about 60 THB minimum in Thailand on average, so you can expect to pay around 72 USD (2,520 THB) for 14 days.
Transportation: For this itinerary, you can expect to pay approximately 200 USD (7,000 THB) for transportation, including flights to Chiang Mai and Krabi, as well as buses, motorbike rentals, etc.
Activities: Depending on how many day trips and activities you want to do, you can expect to pay around 115 USD (4,000 THB) for most activities you might do in Thailand in 14 days.
Total Budget for 14 days in Thailand: 667 USD
Is it Safe in Thailand?
Although Thailand is generally safe and the people are friendly, it is always a good idea to second-guess people who approach you and try to offer something that seems too good to be true, as it probably is. That is a sure way to avoid any scam attempts from tuk-tuk/taxi drivers or other scammers who might approach you.
And, as always, please exercise precautions like you would when traveling in any foreign country. Do not leave your belongings unattended, and watch out for your belongings at all times.
Also, if you are planning to ride a scooter around in places like Krabi or Chiang Mai, always wear your helmet, and ideally, cover yourself because accidents do happen. And when they do, they are never pretty, especially if you wear tank tops and shorts.
And, since you will be driving on Thai roads, it is my duty as a Thai to warn you that we are not the best drivers in the world. The roads are great throughout, but we sometimes drive like maniacs, so make sure to be extra careful when you are on the road.
Which tourist SIM card is best for Thailand?
Update: If your phone supports eSIM, I highly recommend checking out Airalo, a global eSIM marketplace. It allows you to stay connected affordably while traveling in Thailand without having to switch out your physical SIM card.
Gone are the days when you needed to scramble to find a local SIM card at an airport upon arrival. You can purchase an eSIM before your arrival, and you'll be good to go. If your phone doesn't support eSIM, here is how you can get a local SIM card in Thailand:
There are three major carriers in Thailand: AIS, DTAC, and True. All of them offer a pretty similar range of traveler's packages as well as coverage. Personally, I use AIS as I have been with them since my first phone. They have a lot of support centers around Thailand, and their coverage hasn't failed me yet. So, if you are looking for a reliable carrier, I can recommend AIS.
There are three packages for tourists: 5 GB for 5 days at 160 THB, 15 GB for 8 days at 299 THB, and 30 GB for 15 days. Depending on the length of your trip to Thailand, you can choose one of these three packages that best suits your itinerary.
With these three packages, you can top up more in case you need additional data or calls for your trip. More often than not, 5 GB is more than enough for me to travel around Thailand for a month.
For more information about Thailand's local SIM card: Thailand's Prepaid Data SIM Card.
Tips: To stay connected with people at home, be sure that you have a VPN, such as ProtonVPN, installed before traveling. It's FREE, and you can gain access to services that may be blocked in certain countries.
Disclaimer: This post may contain affiliate links. See our disclosure policy.
First Published:
Last updated: